Sales Teams Configuration
Configure commercial sales teams, assign team leaders, manage members, establish monthly invoicing targets, and configure automated lead assignment rules in CURQ 18.
1. The Role of Sales Teams in CRM
Sales teams allow organizations to structure commercial activities by geography, industry, product vertical, or deal size (such as Domestic Accounts, International Enterprise, or Inbound Qualification).
Organizing staff into dedicated teams enables commercial leadership to:
Route incoming inquiries to qualified salespeople based on domain rules.
Establish and track monthly invoicing targets for each commercial group.
Maintain segmented visibility across pipelines and team member workloads.
Balance lead distribution evenly across team members according to 30-day volume limits.
2. Enabling Rule-Based Assignment in Settings
Before configuring team-specific assignment domains or executing on-demand allocation, an administrator must activate lead assignment in the global system settings:
Open the CRM application.
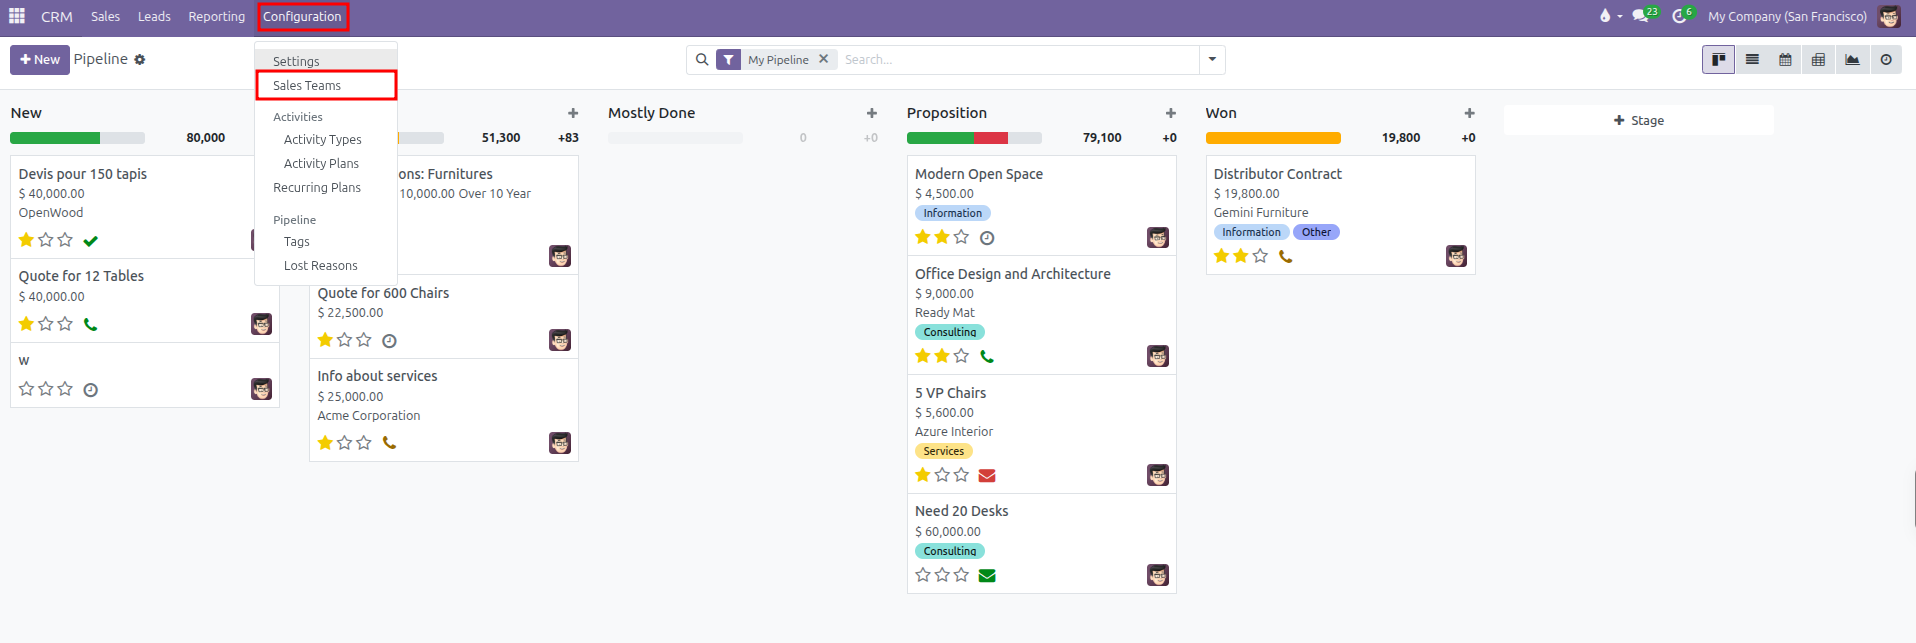
In the top navigation bar, click Configuration.
Select Settings.
In the CRM section, locate the Rule-Based Assignment option.
Check the box for Rule-Based Assignment.
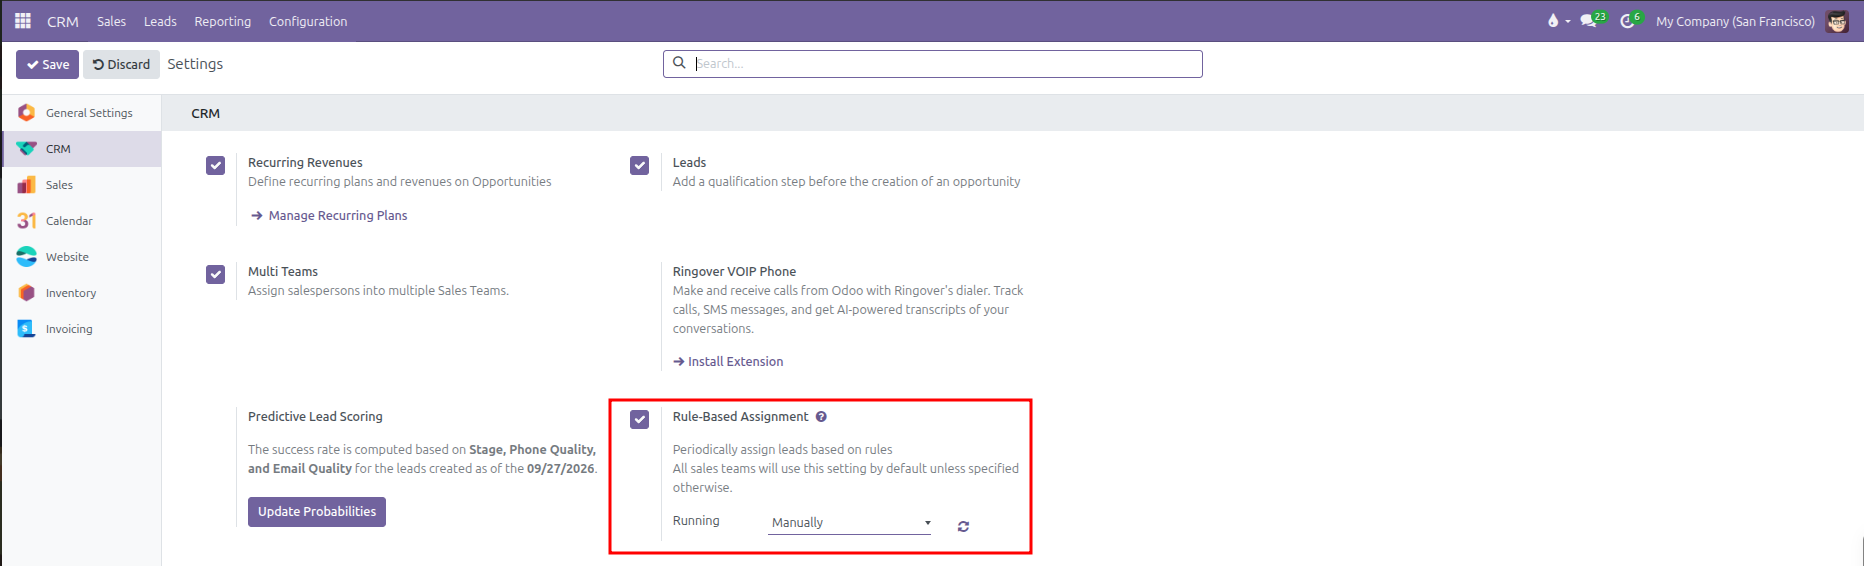
Rule-Based Assignment Settings:
Function Description: Periodically assign leads based on rules. All sales teams will use this setting by default unless specified otherwise.
Running: Governs the execution schedule for lead distribution:
Manually: Automatic background distribution is paused. Lead allocation happens strictly on demand when an authorized manager clicks Assign Leads on individual sales team forms.
Repeatedly: Activates the background scheduled cron job to automate lead distribution across all teams. Selecting this option displays additional configuration fields:
Repeat every: The execution frequency number and interval unit (Minutes, Hours, Days, or Weeks).
Next Run: Displays and schedules the exact timestamp for the next automated allocation execution.
Sync Button: The refresh icon situated next to the Running selection triggers immediate lead assignment across all active sales teams directly from the settings page.
Activating this setting exposes the Assignment Rules section and the Assign Leads action button on all sales team records.
3. Navigating to Sales Teams Configuration
To access and configure sales teams:
Open the CRM application.
In the top navigation bar, click Configuration.
Select Sales Teams.
The Sales Teams list displays all configured teams, their email aliases, assigned team leaders, and legal company affiliations.
You can adjust team display sequence by clicking and dragging the handle at the left edge of any row.

4. Creating and Configuring a Sales Team
Click New to establish a team, or click an existing team row (such as EU) to adjust its settings:
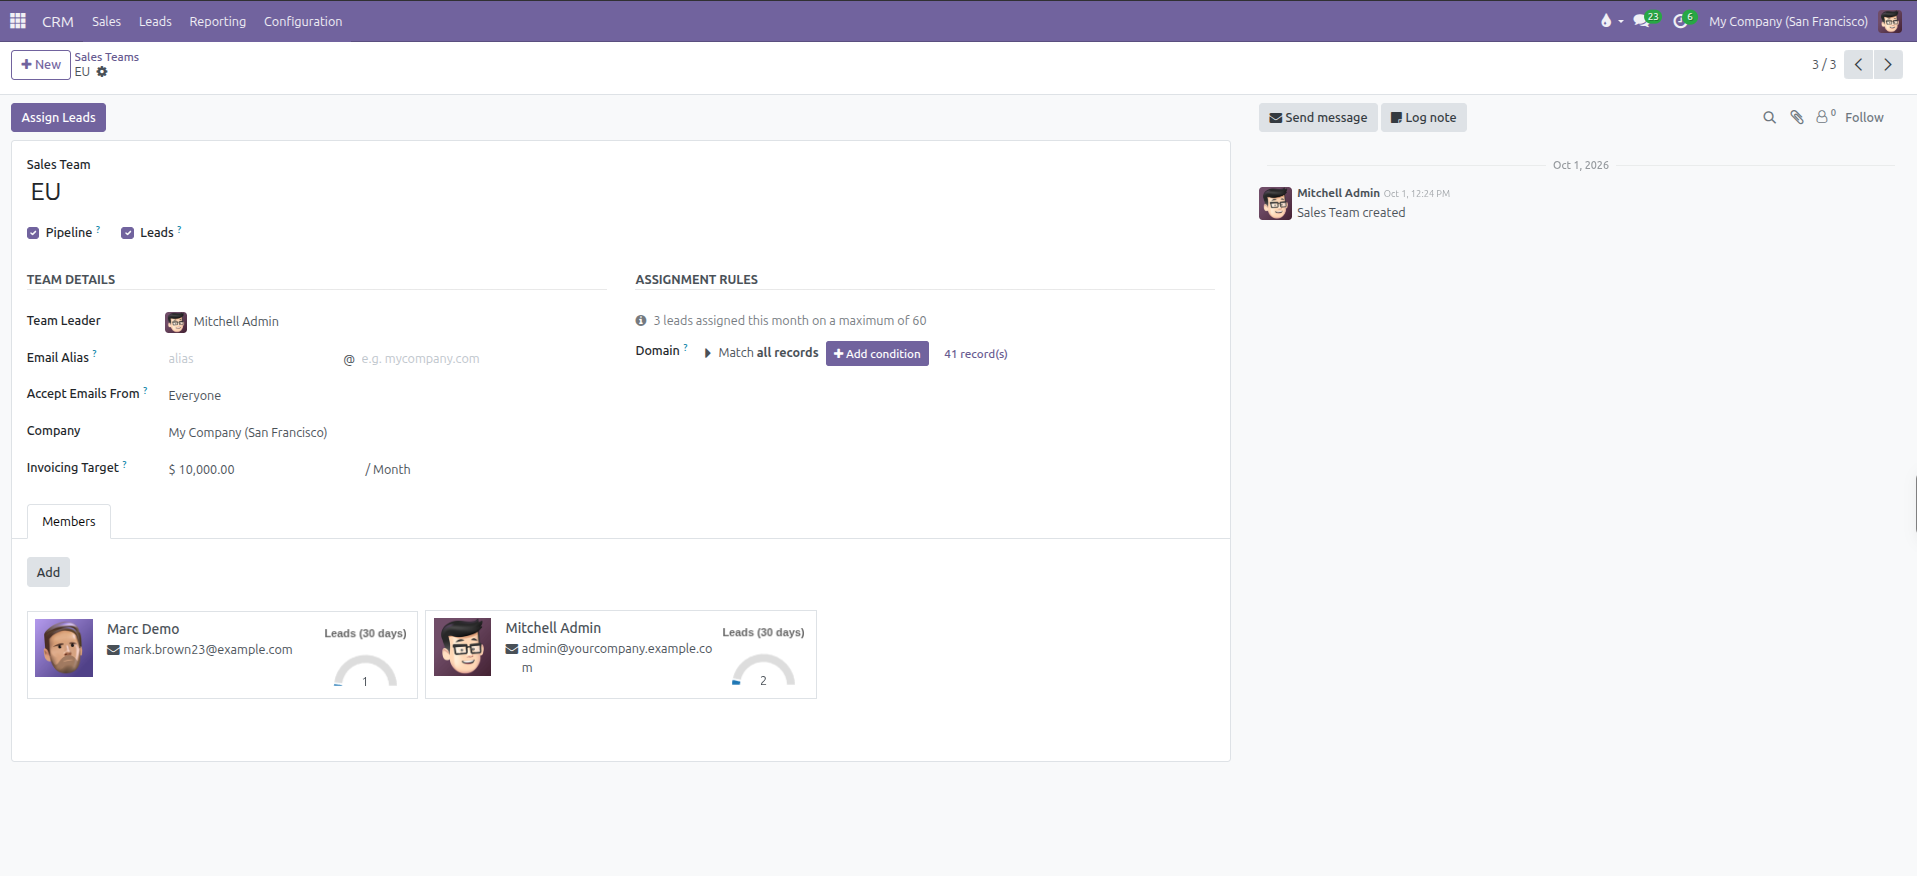
Team Details:
Team Leader: The manager or lead salesperson guiding operations for this team.
Email Alias: The incoming email prefix assigned to the team (such as alias followed by @yourcompany.example.com). Inbound messages delivered to this address automatically generate new leads or opportunities assigned to the team. This field remains hidden when both Pipeline and Leads are disabled.
Accept Emails From: Security filter governing who can generate records via the team email alias:
Everyone: Any inbound sender can generate a record.
Authenticated Partners: Only contacts already saved in the database can generate records via email.
Followers only: Restricts submission to existing followers of the team.
Company: The legal entity associated with the team in multi-company environments.
Invoicing Target: The monthly revenue benchmark for the team (such as $ 10,000.00 / Month). This figure powers progress meters on commercial dashboards against posted and paid customer invoices.
Assignment Rules:
When automated lead assignment is enabled in system settings, this section manages inbound distribution criteria:
Assignment Tracker: Displays real-time allocation metrics for the active month (such as 3 leads assigned this month on a maximum of 60). The maximum reflects the combined 30-day capacity of all active team members.
Domain: Filtering conditions that incoming leads must satisfy to match this team.
When rules are active, the form displays the condition summary, the number of matching records (such as 0 record(s)), and the Edit Domain button.
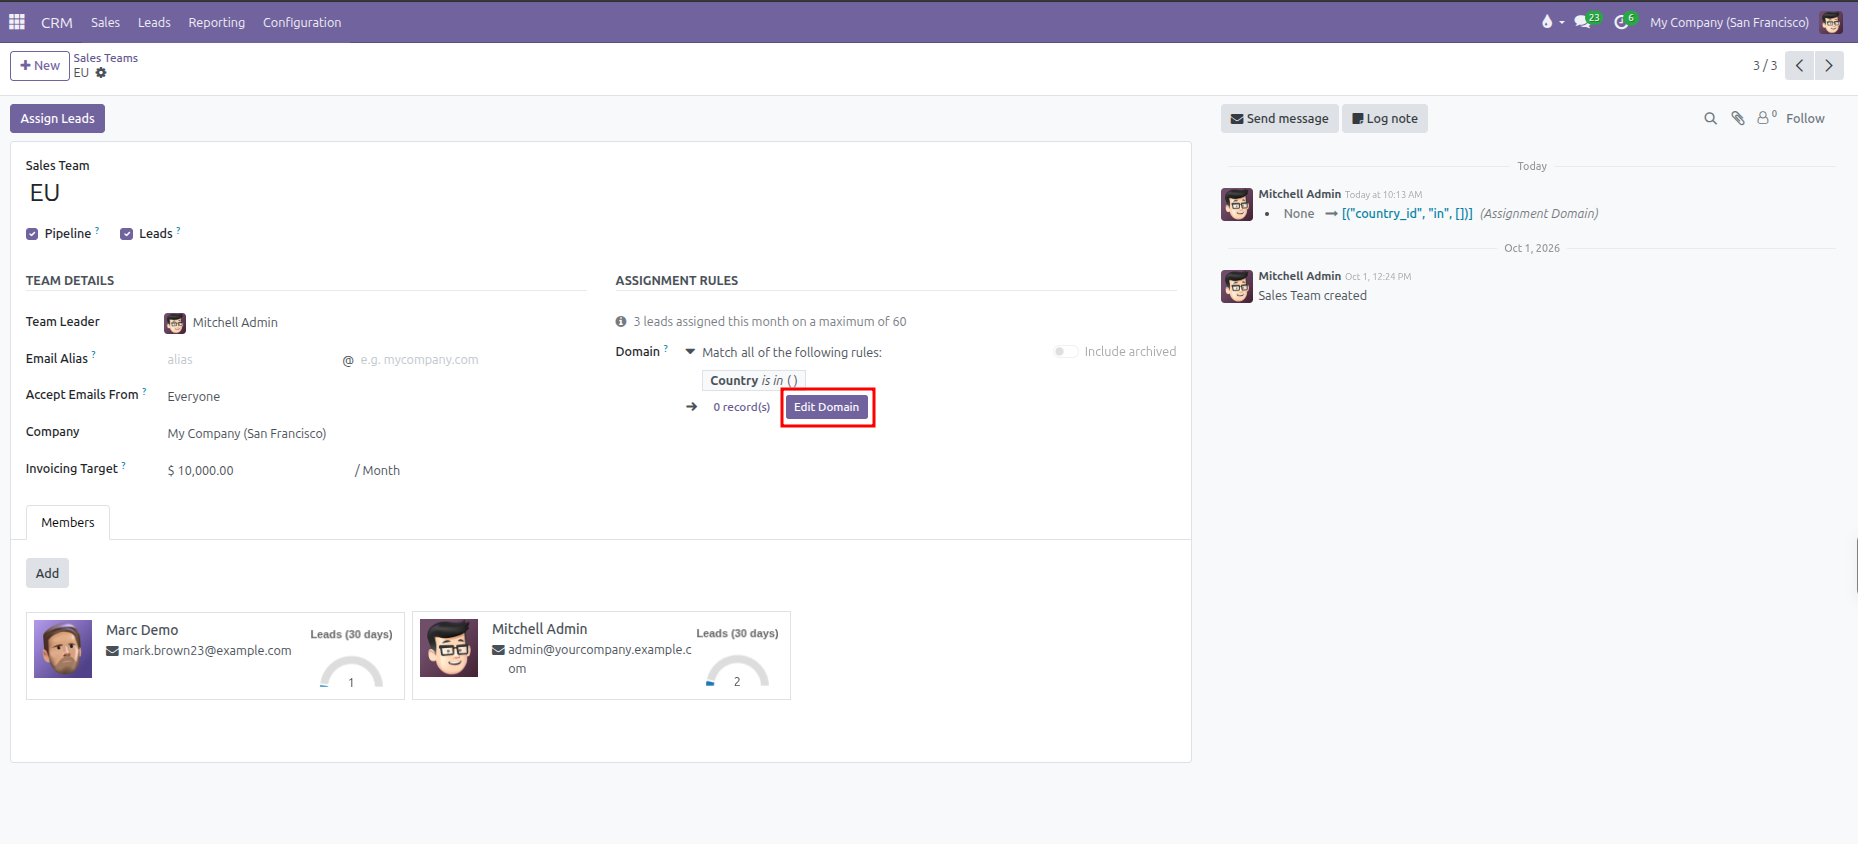
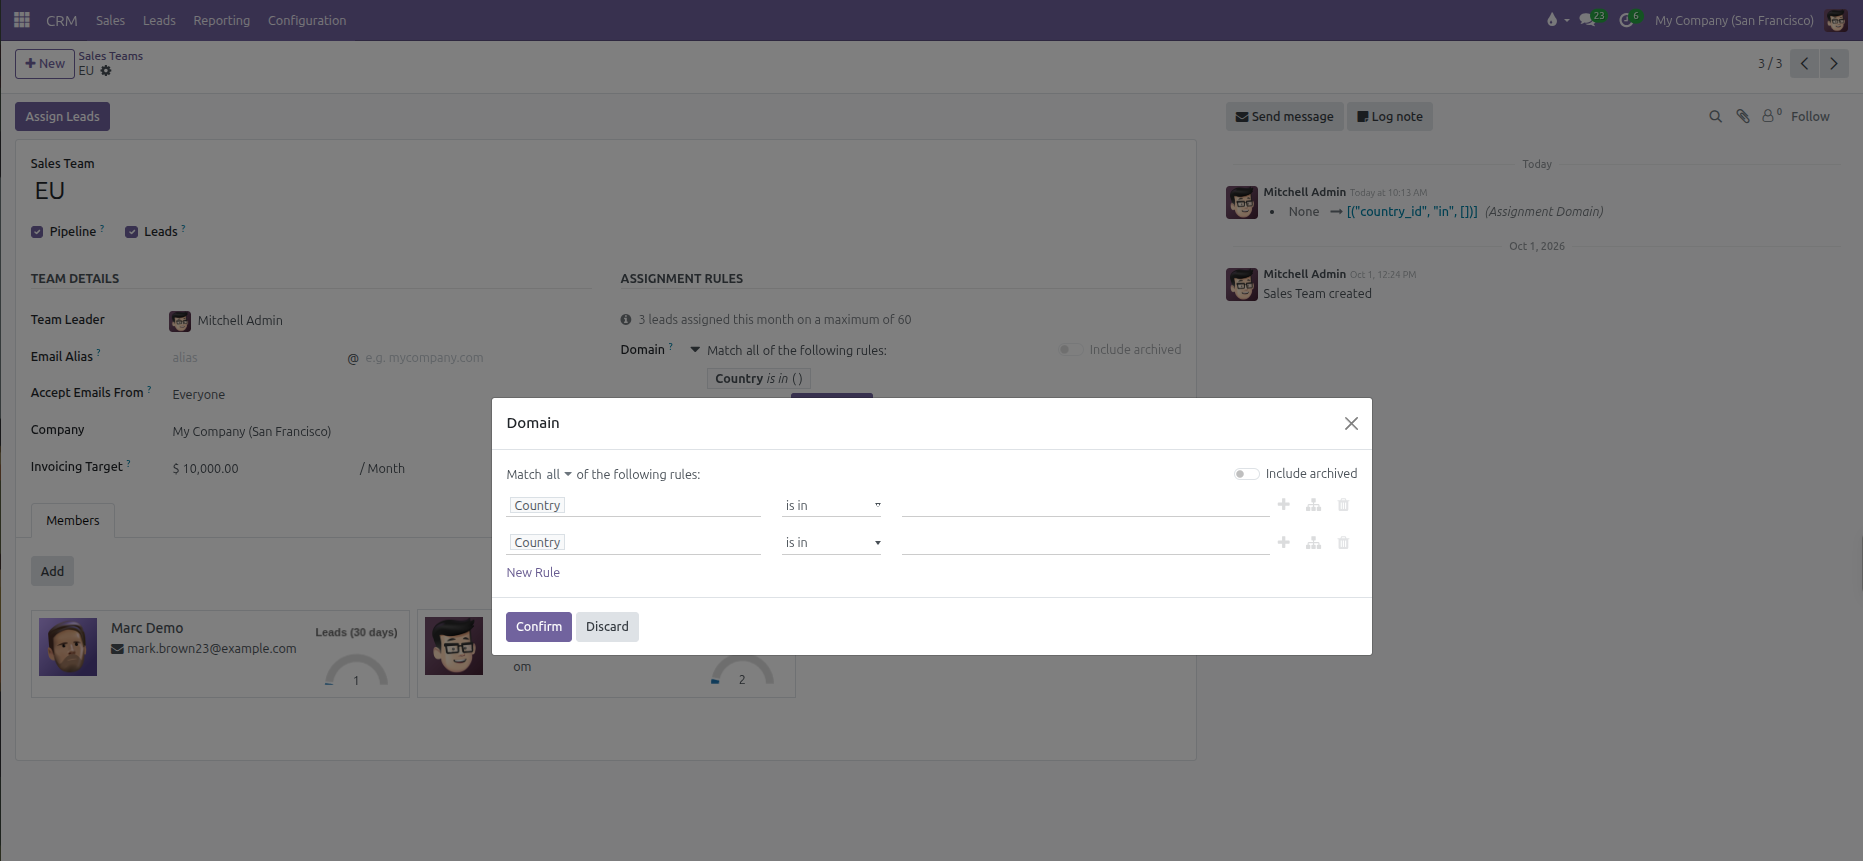
Match Logic: Select Match all of the following rules or Match any of the following rules.
Rule Rows: Select the lead field (such as Country), comparison operator (such as is in), and filter values. Use the plus icon to append conditions, the branch icon to create nested criteria, or the trash icon to remove a line.
New Rule: Appends an additional condition row.
Include archived: Toggle switch to evaluate or ignore archived records in domain queries.
Click Confirm to apply the domain or Discard to cancel changes.
Members Tab:
The Members tab manages internal salespeople assigned to this commercial group:
Click Add to open the member configuration modal.
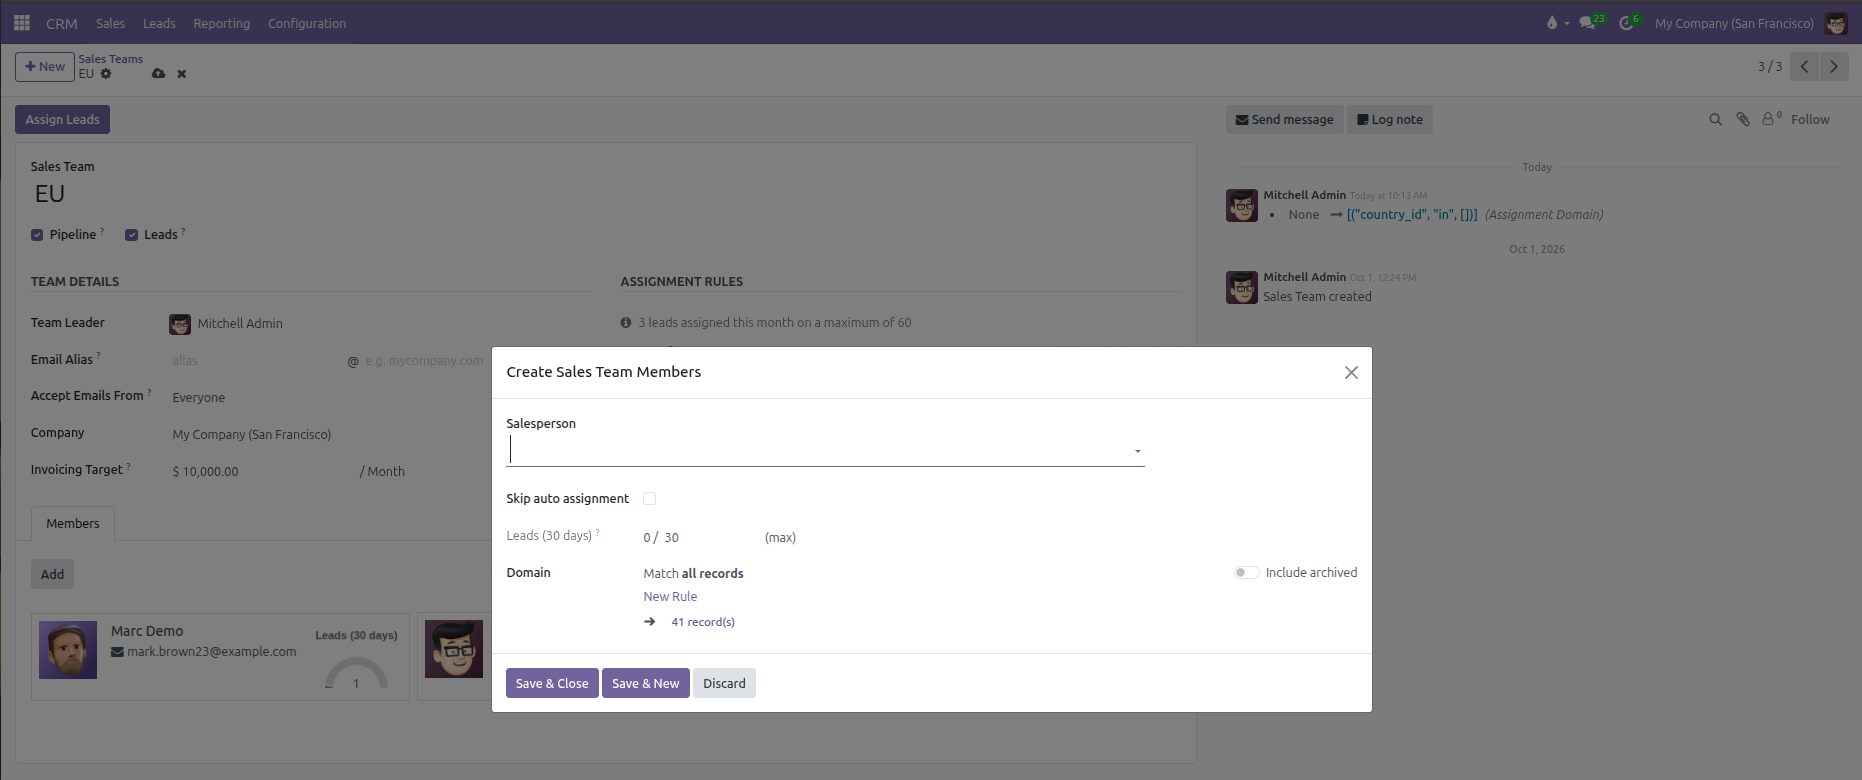
Configure individual member settings:
Salesperson: Select the internal user account.
Skip auto assignment: Check this box if this salesperson should not receive automated lead assignments.
Leads (30 days): Displays current assigned lead count alongside the monthly maximum capacity (such as 0 / 30 (max)). This ceiling sets the 30-day workload limit for this specific user.
Domain: Specific filtering rules applied only to this salesperson, narrowing which team leads get allocated to them.
Click Save & Close to add the member, or Save & New to add multiple colleagues in sequence.
Each member appears as an individual card displaying their name, email address, and visual Leads (30 days) gauge meter tracking volume against their capacity limit.
5. Executing Lead Assignment Manually and Automatically
CURQ manages lead distribution across sales teams using two complementary methods:
Manual Assignment Trigger:
Open the target team form in CRM > Configuration > Sales Teams.
Click the Assign Leads button in the top action bar.
A confirmation dialog appears asking: This will assign leads to all members. Do you want to proceed?
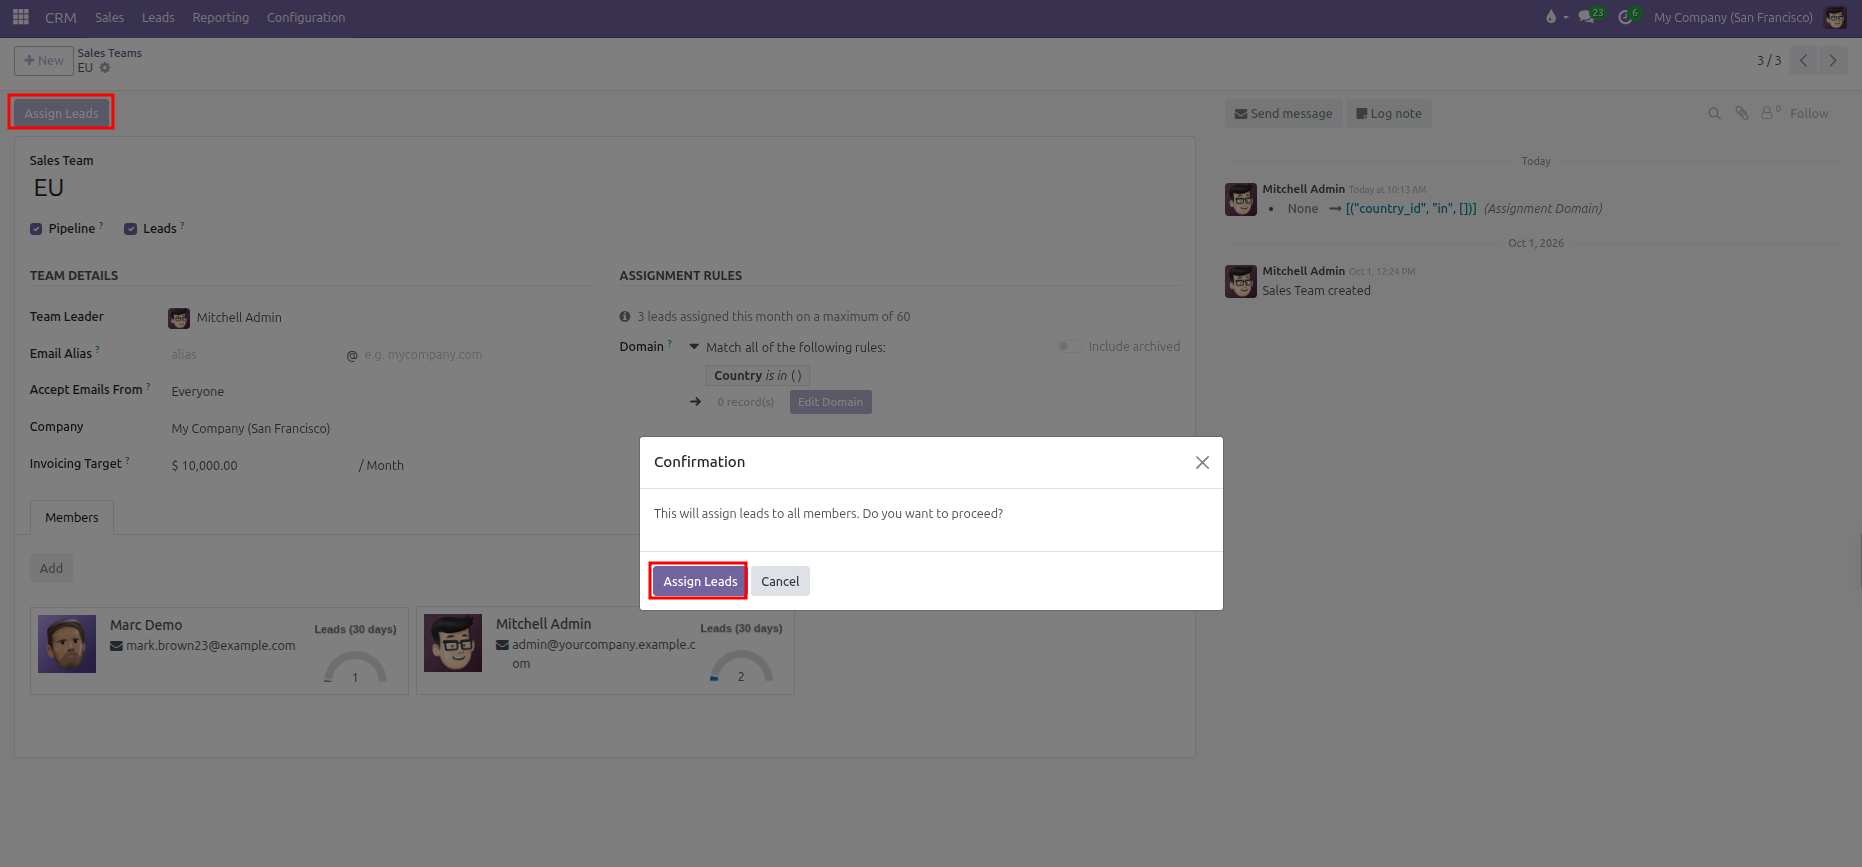
Click Assign Leads in the confirmation modal.
CURQ immediately processes all available unassigned leads matching the team domain, resolves duplicate inquiries, and allocates deals to eligible team members who have available monthly capacity.
Automated Scheduled Allocation:
When Rule-Based Assignment has Running set to Repeatedly in system settings, the background cron task runs periodically at the configured frequency (Repeat every), matching newly created inquiries against team assignment domains and balancing assignments across salespeople while respecting individual 30-day capacity ceilings.