Qualifying and Converting Leads
Capture unqualified inquiries, evaluate prospect suitability, identify duplicate records, and convert qualified leads into pipeline opportunities in CURQ 18.
1. Distinction Between Leads and Opportunities
CURQ 18 supports a two-tier intake process for commercial prospects:
Leads: Unscrubbed, unverified inquiries such as incoming contact form submissions, business cards gathered at exhibitions, raw email messages, or cold prospect directories. A lead does not have pipeline stages, win probability calculations, or quotation links.
Opportunities: Qualified commercial prospects with an assigned contact, estimated monetary value, closing date, and active pipeline stage (such as New, Qualified, Proposition, or Won).
Using leads prevents raw, low-intent inquiries from cluttering active sales pipeline Kanban views. Once an inquiry is validated as a legitimate sales prospect, you convert it into an opportunity.
2. Enabling Leads in System Configuration
The Leads intake stage is optional. When disabled, CURQ directs all incoming inquiries immediately into the pipeline as opportunities.
To activate the Leads workflow:
Open the CRM app.
In the top navigation bar, click Configuration > Settings.
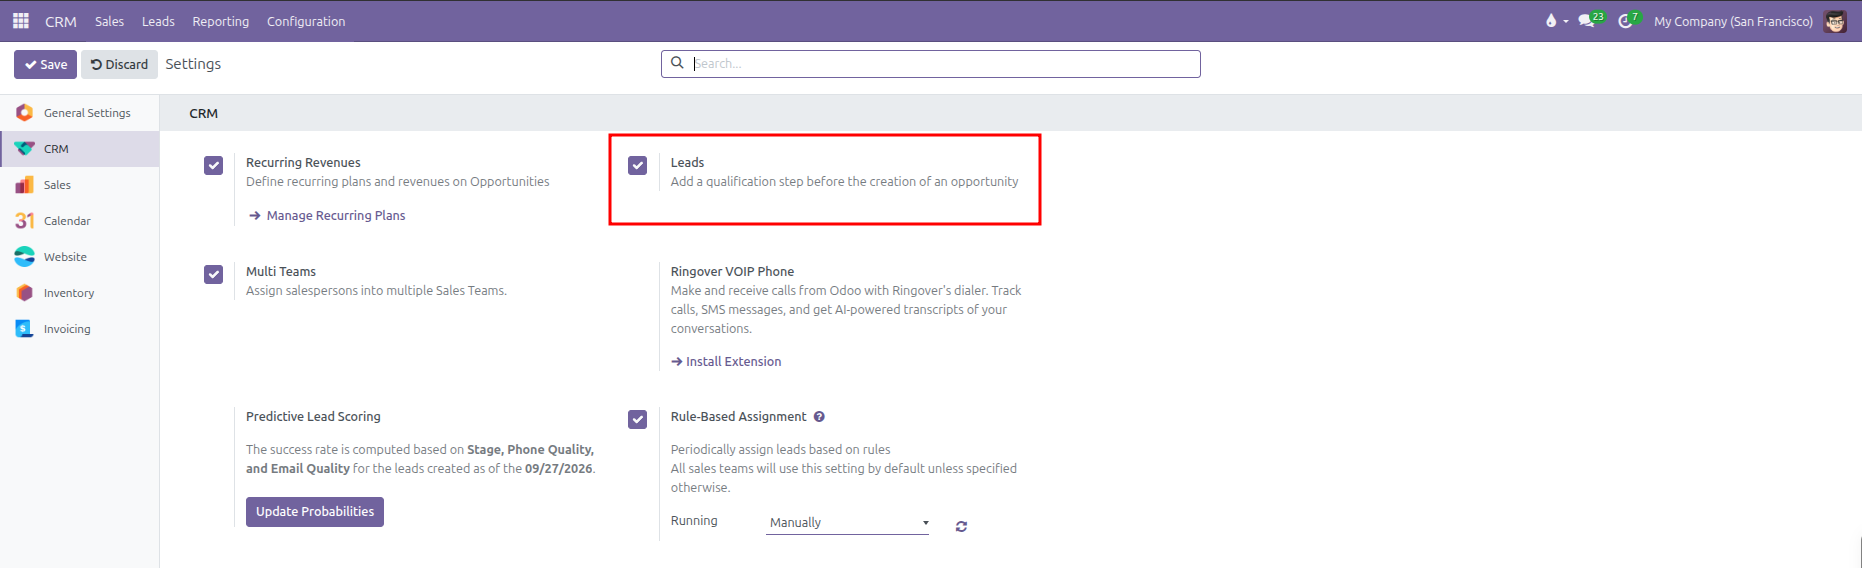
Under the CRM section, locate Leads.
Check the box labeled Add a qualification step before the creation of an opportunity.
Click Save in the top control panel.
Once saved, a dedicated Leads menu item appears in the top navigation bar next to Sales.
3. Creating and Managing Inbound Leads
To log a new inquiry manually:
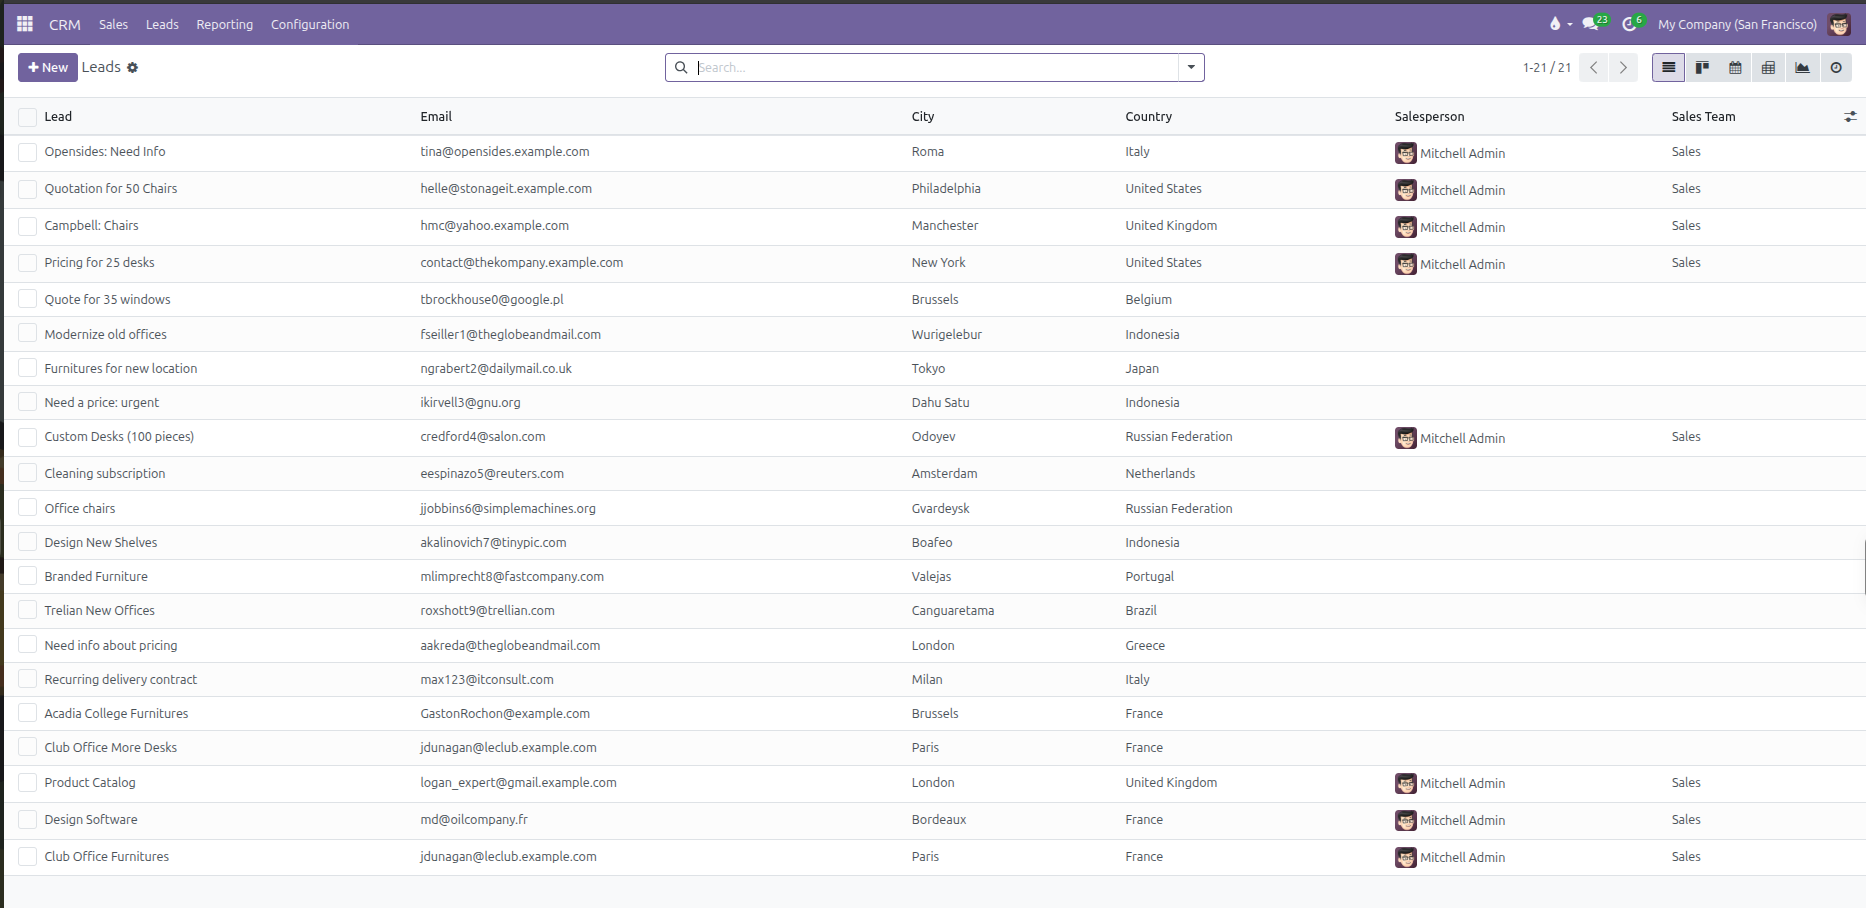
Navigate to CRM > Leads.
Click + New in the top left control bar.
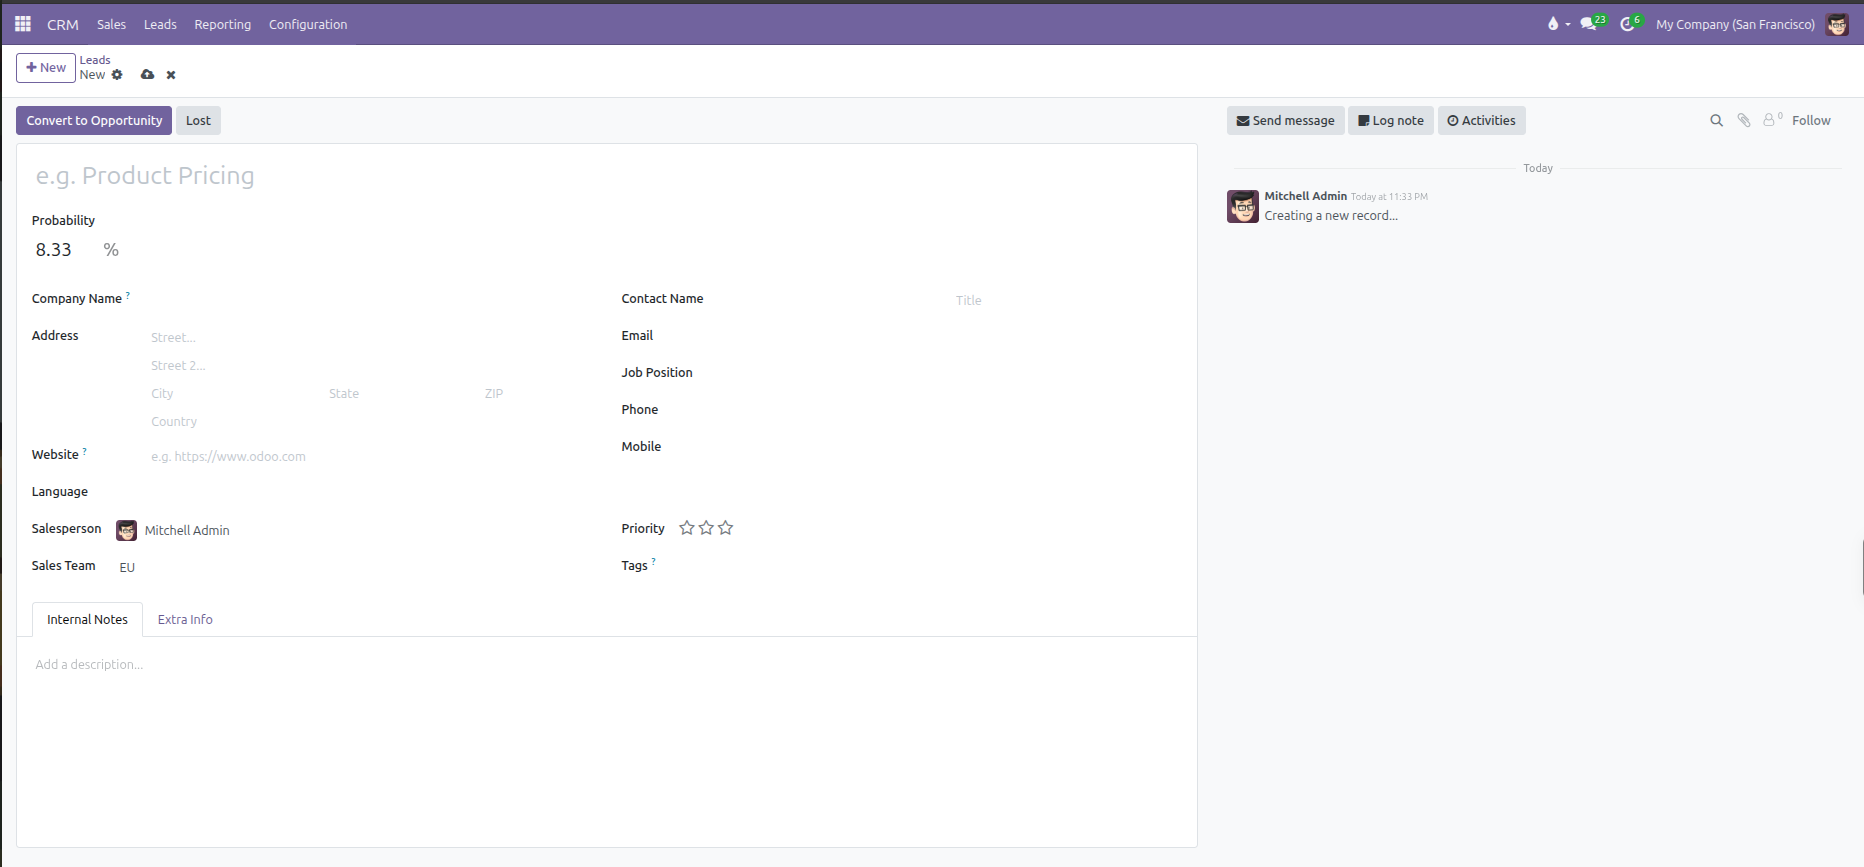
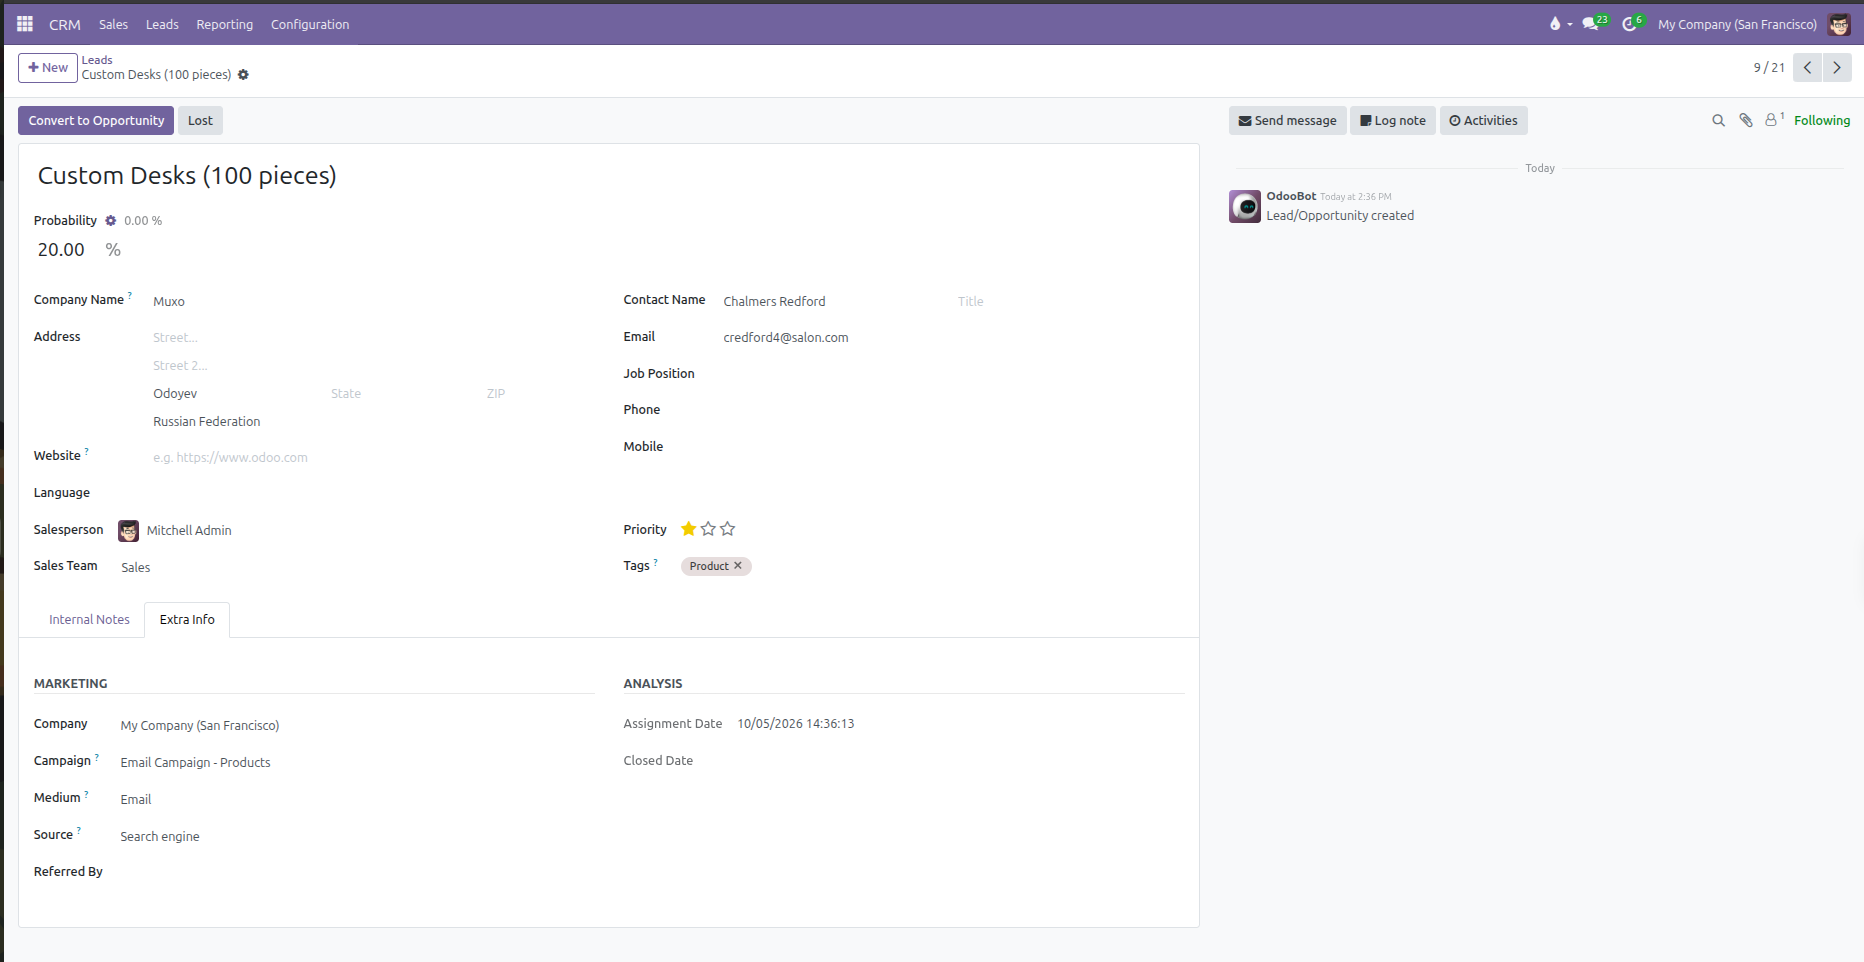
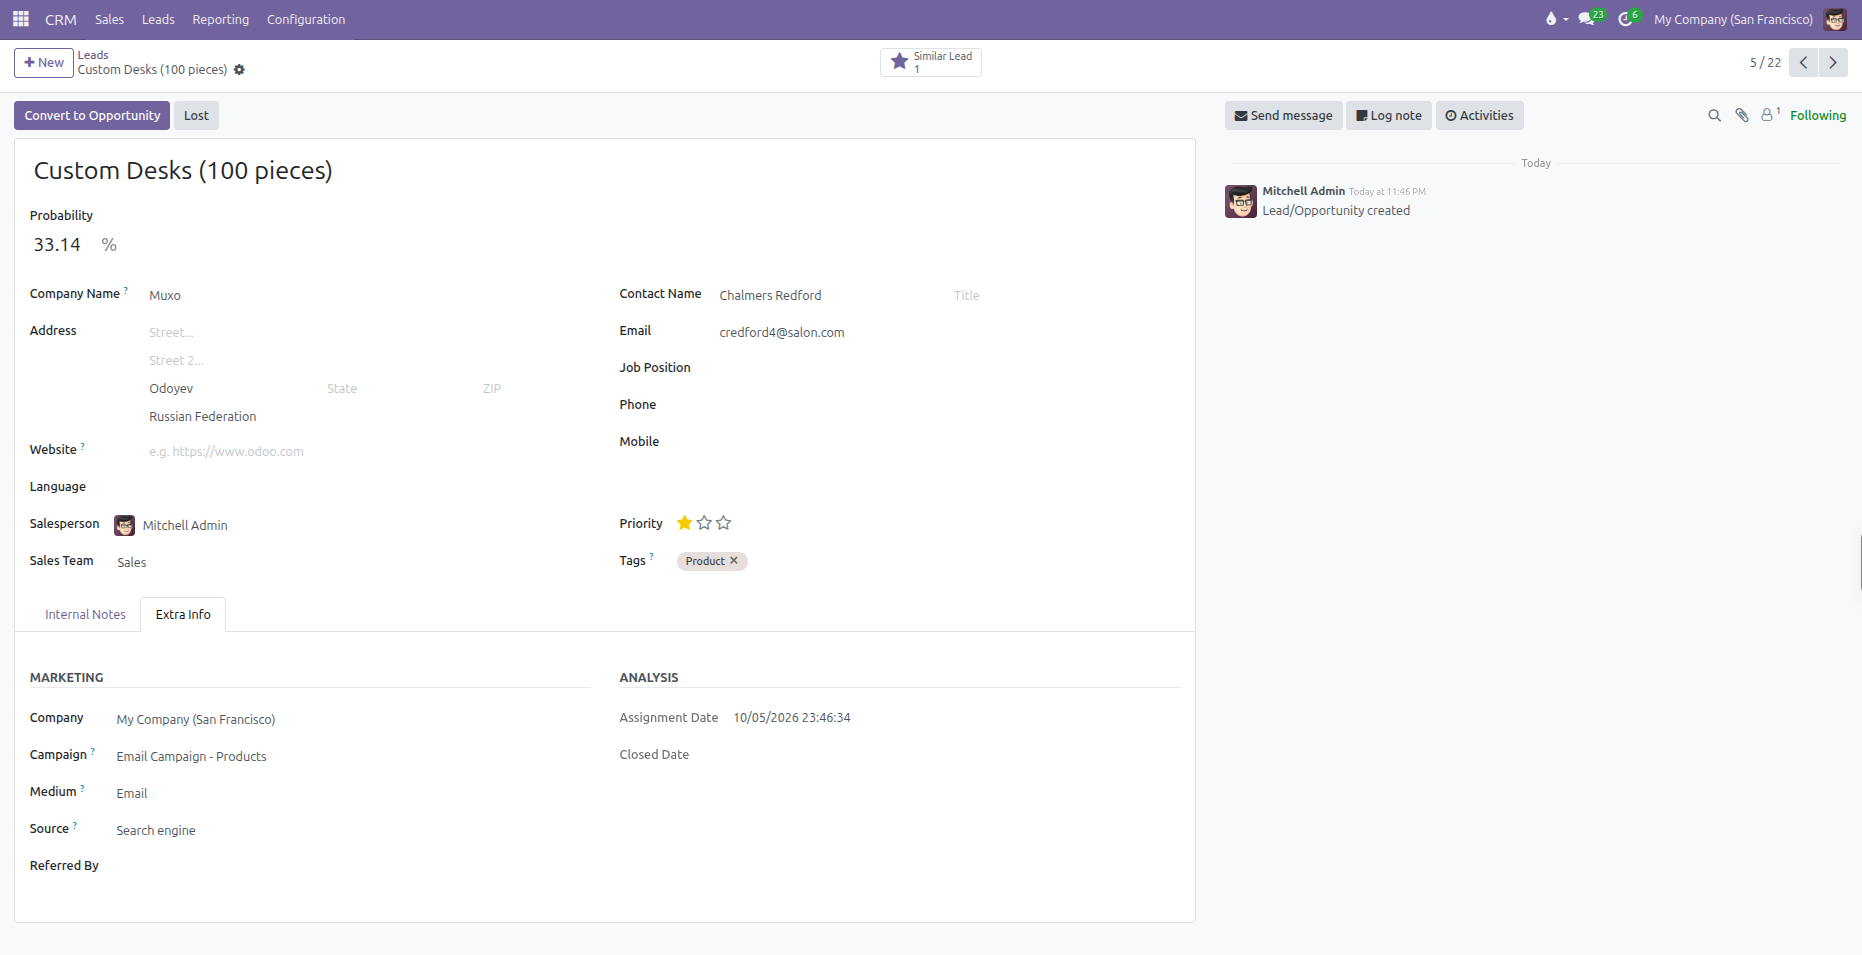
CURQ opens the lead creation form with the following fields:
Primary Header and Subject:
Lead Title: Enter a descriptive summary of the inquiry (such as Custom Desks (100 pieces) or Web contact form submission).
Probability: The calculated win probability percentage. Clicking the gear icon resets custom entries back to the automated calculation.
Left Column (Company and Sales Assignment):
Company Name: Legal or operating name of the customer business.
Address: Complete street address, city, state, postal code, and country.
Website: Client website URL.
Language: Preferred language for outgoing messages and documentation.
Salesperson: The internal user assigned to qualify the inquiry.
Sales Team: The designated commercial team handling the division. Configure teams in Sales Teams Setup.
Tab Sections:
Internal Notes: Discovery notes, technical specifications, or qualification discussion details.
Extra Info: Contains marketing origin data and assignment tracking metrics.
Marketing
Field |
Description |
|---|
Company |
Internal operating company managing the inquiry. |
Campaign |
Promotional campaign that generated the lead (such as Email Campaign: Products). |
Medium |
Delivery channel used to reach the prospect (such as Email, Banner, or Direct). |
Source |
Origin platform or touchpoint (such as Search engine, Referral, or Trade Show). |
Referred By |
Individual, partner, or colleague who introduced the prospect. |
Analysis
Field |
Description |
|---|
Assignment Date |
Timestamp recording when a salesperson was assigned to the lead. |
Closed Date |
Timestamp recording when the lead reached closure. |
4. Detecting Duplicate Records and Similar Leads
Before reaching out to a prospect, verify whether the individual or organization already exists in your records:
The Similar Leads smart button appears at the top right of the lead sheet whenever CURQ detects matching contact details (such as identical email addresses, phone numbers, or company names).
Clicking the smart button displays a list of potential duplicate leads or opportunities.
Reviewing matches prevents multiple sales team members from contacting the same prospect independently.
5. Converting a Lead to an Opportunity
Once an inquiry is qualified and confirmed as a genuine commercial prospect, convert the record into an opportunity:
Open the lead form.
In the top action bar, click Convert to Opportunity.
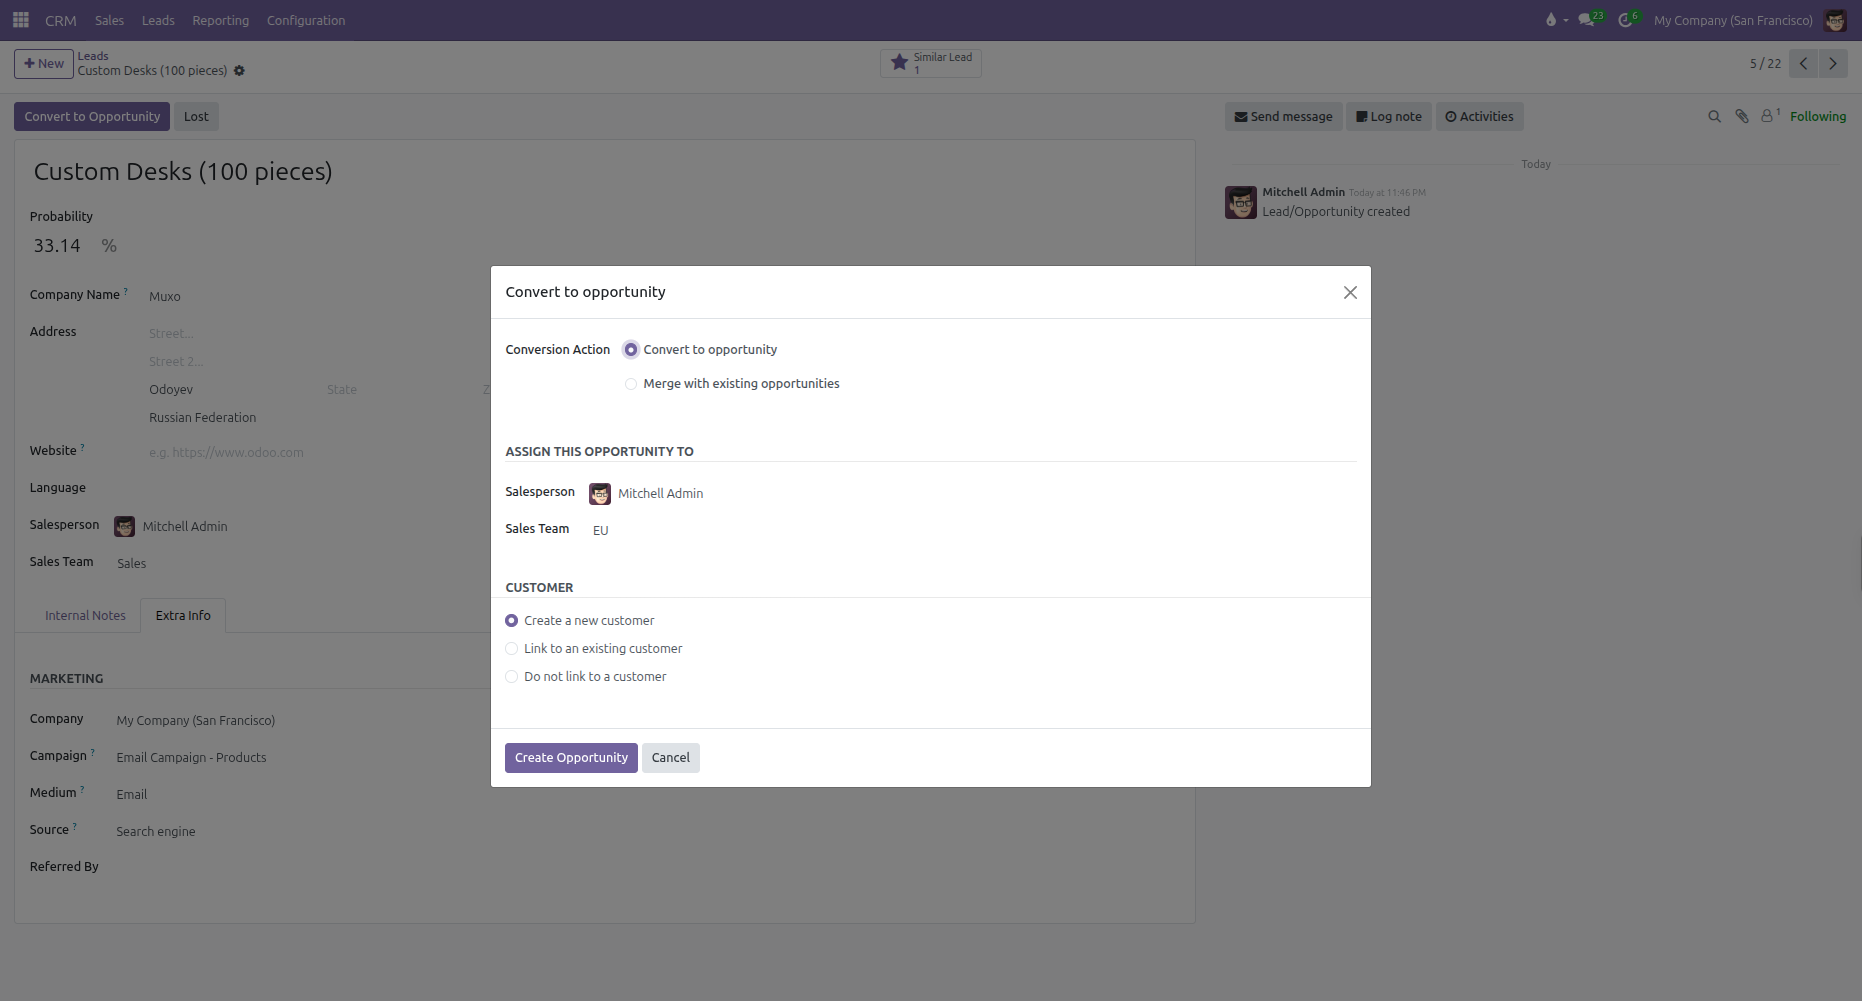
A modal dialog opens with conversion configuration choices:
Conversion Action:
Convert to opportunity: Creates a new opportunity card inside the pipeline. This option displays customer linking choices (Link to an existing customer, Create a new customer, or Do not link to a customer).
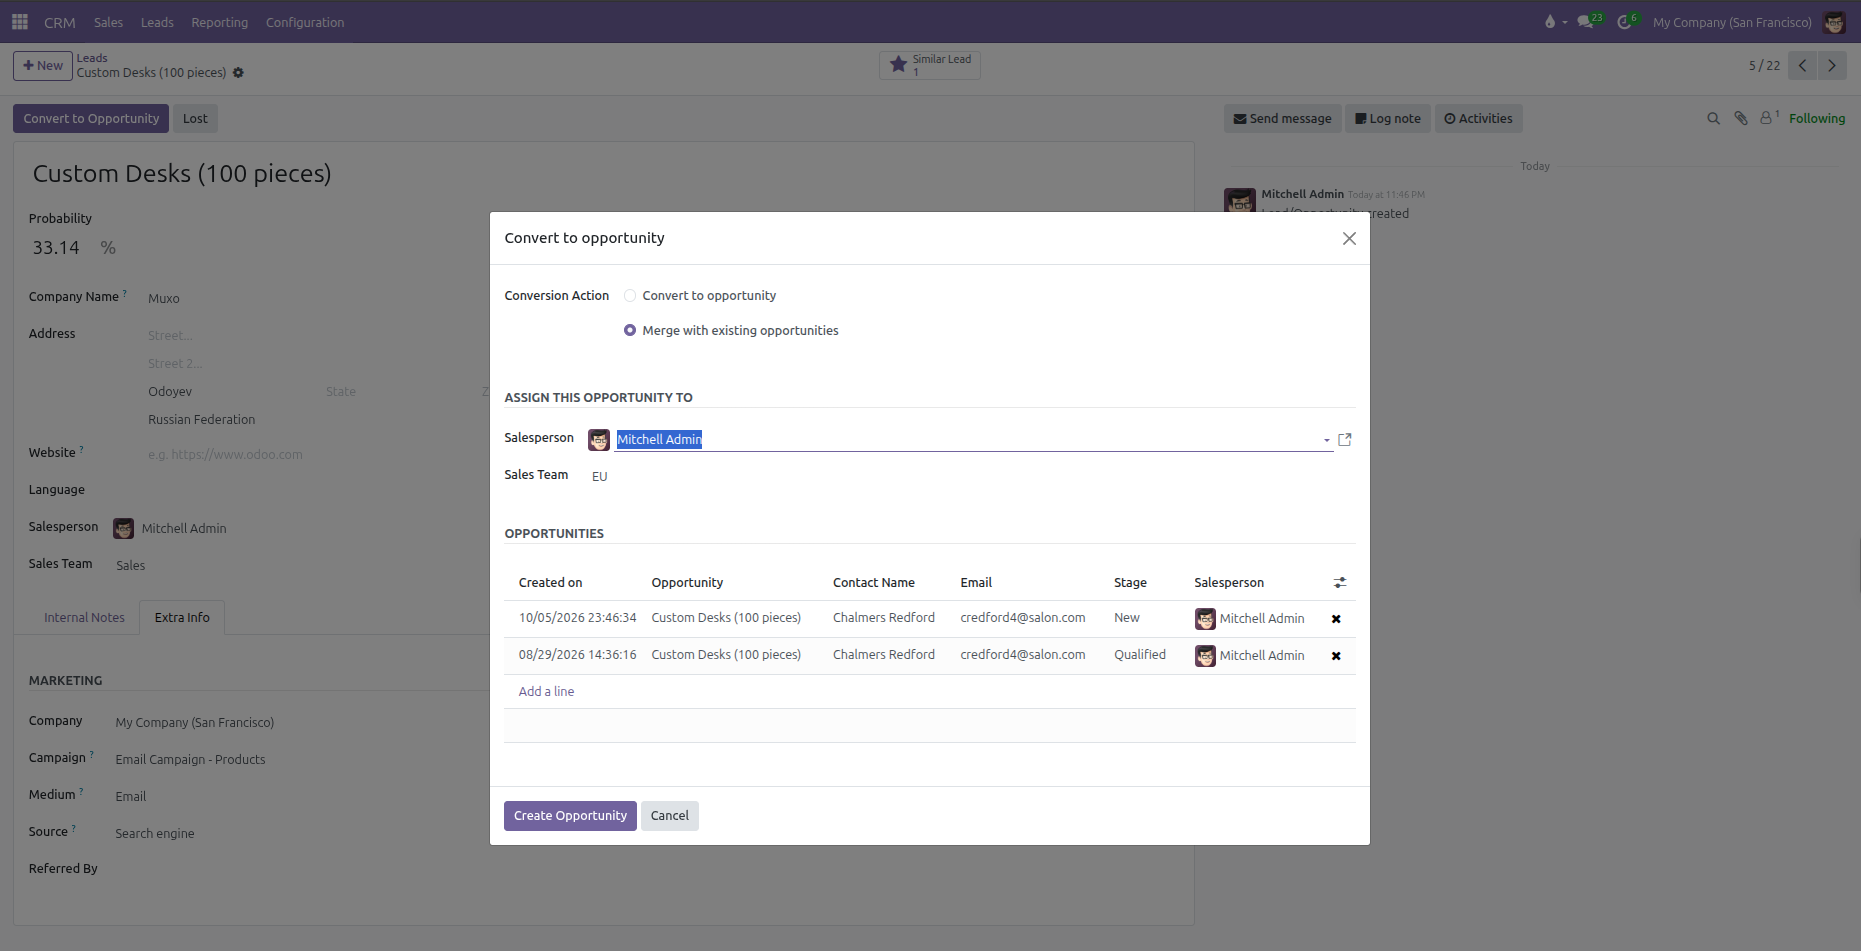
Merge with existing opportunities: Combines the inquiry with matching active deals into a single record, displaying a list of matching opportunities to consolidate.
Assign This Opportunity To:
Customer Handling (when Converting):
Create a new customer: Automatically generates a brand new contact card in your database using the address and contact details from the lead form.
Link to an existing customer: Select this option when the prospect belongs to an established customer in your system. Use the search field to connect to the existing record in Contacts.
Do not link to a customer: Converts the inquiry into an opportunity without generating or linking an address book contact.
When duplicate deals are detected, selecting Merge with existing opportunities displays the matching records to consolidate:
Click Create Opportunity to execute the transition.
Following conversion:
The record moves out of the Leads view into CRM > Sales > My Pipeline.
The pipeline stage statusbar appears at the top of the form, placed by default into the first stage (New).
Commercial revenue estimation, automated win probability, calendar meeting scheduling, and quotation drafting become accessible. See Creating and Managing Opportunities and Pipeline Stages and Won/Lost Workflow.
6. Marking Unqualified Inquiries as Lost
Not every inbound inquiry reflects a viable commercial engagement. If a lead contains spam, requests unsupported services, or lacks genuine commercial intent:
Open the lead form.
In the top action bar, click Lost.
In the Mark Lost popup dialog, pick a standardized Lost Reason (such as Not qualified, Spam, or Services not offered). Configure lost reasons in Lost Reasons and Tags Setup.
Enter optional closing remarks in the Closing Note field.
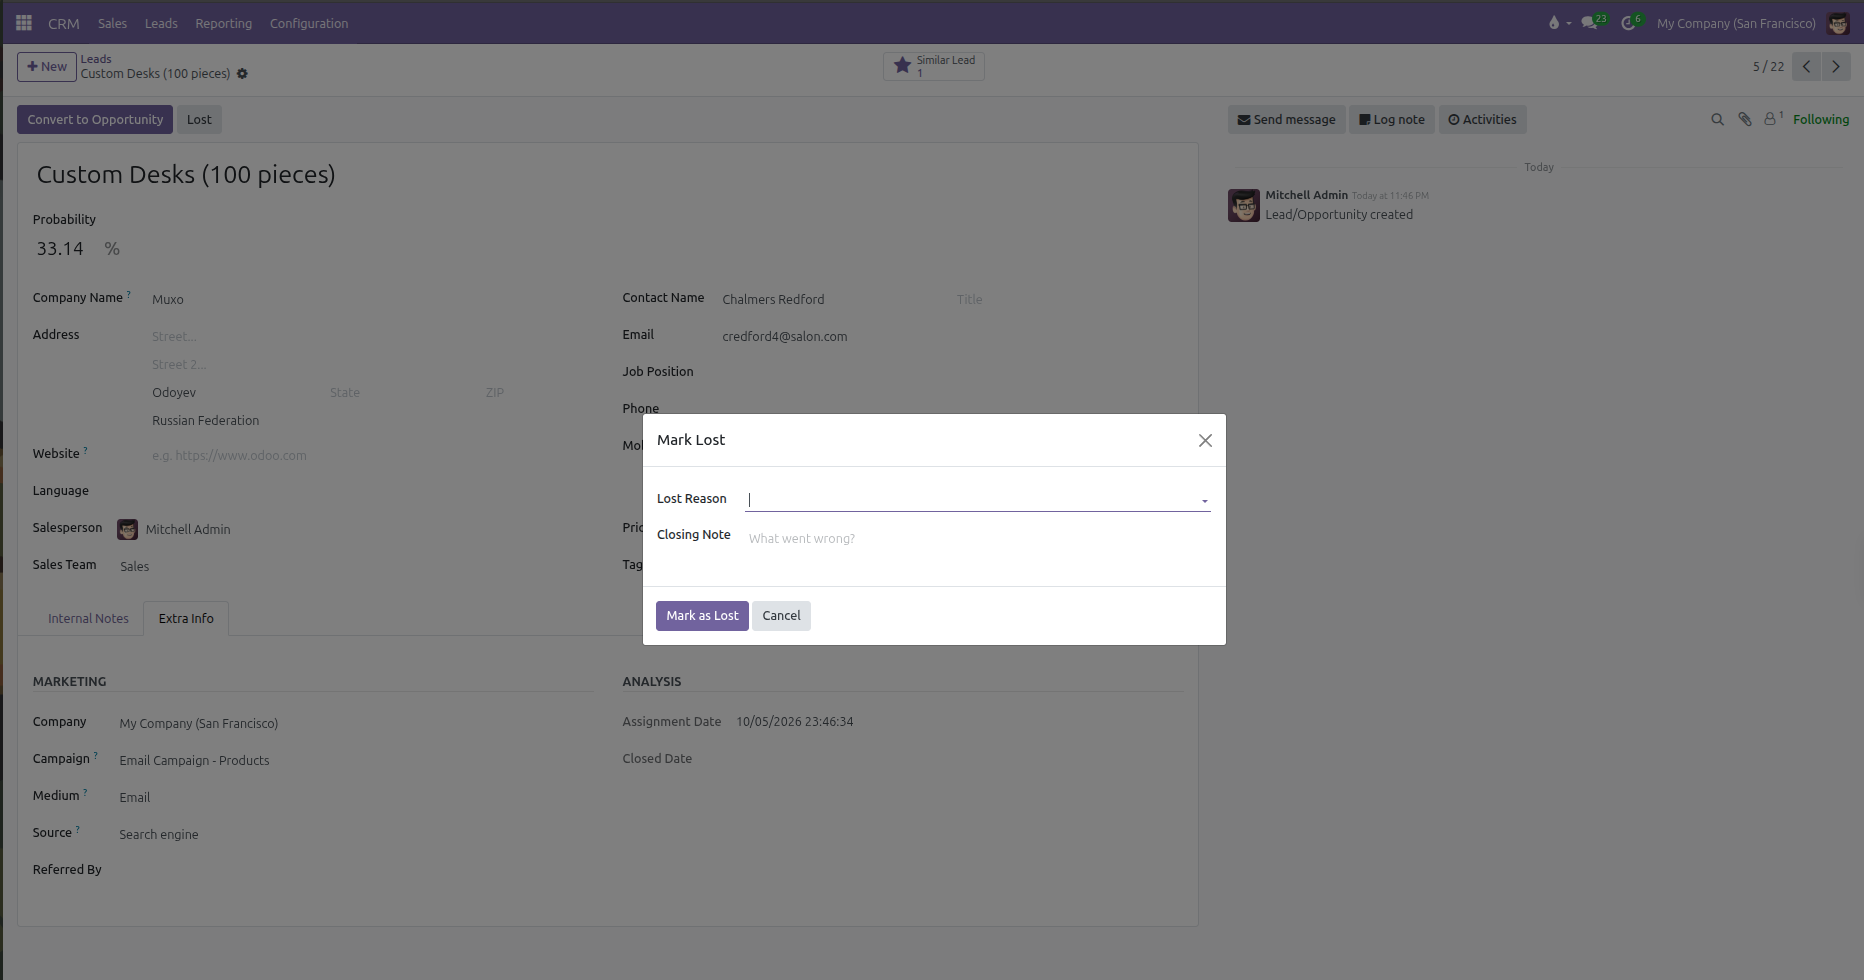
Click Mark as Lost.
The record receives a red Lost ribbon and archives automatically from the default Leads list view while preserving the inquiry for historical analysis.