Search, Filter, and Group Contacts
Follow these steps to find, filter, and organize contacts in CURQ 18:
1. Search for Contacts
To find a specific contact quickly:
Open the Contacts app from the main dashboard.
Click into the search bar at the top center of the screen.
Type your search term. CURQ allows searching by:
Name: The personal name or business name.
Company: The parent organization.
Email: Contact email address.
Phone / Mobile: Direct phone or mobile numbers.
Tag: Labels assigned to contacts (such as B2B or VIP).
Salesperson: The internal team member managing the relationship.
2. Apply Preset and Custom Filters
Narrow down your contact directory using standard built-in filters:
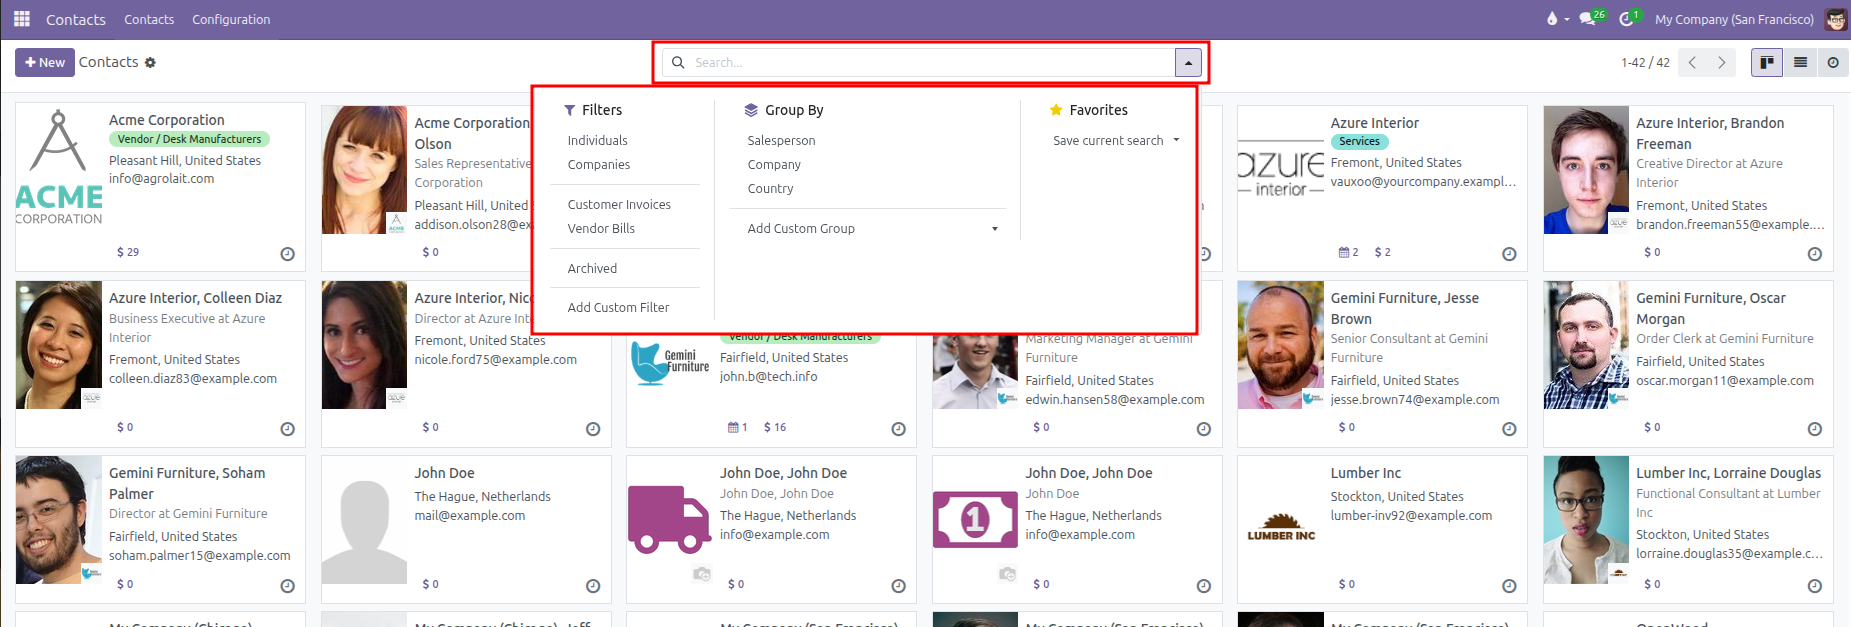
Click the search bar to reveal the filter dropdown menu.
Under the Filters section, select one or more options:
Individuals: Displays only individual people and employees.
Companies: Displays only business entities and organizations.
Customer Invoices: Displays contacts with customer sales and billing history.
Vendor Bills: Displays suppliers and vendors with purchase bills.
Archived: Displays deactivated contacts that are hidden from everyday views.
Click Add Custom Filter to filter by specific fields, such as City, State, or Country.
3. Group Contacts by Organization or Country
Organize large contact lists into structured groups:
Click the search bar to open the dropdown menu.
Under the Group By section, select a grouping rule:
Salesperson: Groups contacts under the internal team member assigned to manage them.
Company: Groups employees and sub-contacts under their parent organization.
Country: Groups partners geographically by their country.
Click Add Custom Group to cluster records by any other field, such as Contact Tags or Cities.
Under Favorites, click Save current search to save your active filters and grouping rules for one-click access later.
4. Switch Between Directory Views
CURQ provides three visual layouts to browse and interact with contacts:
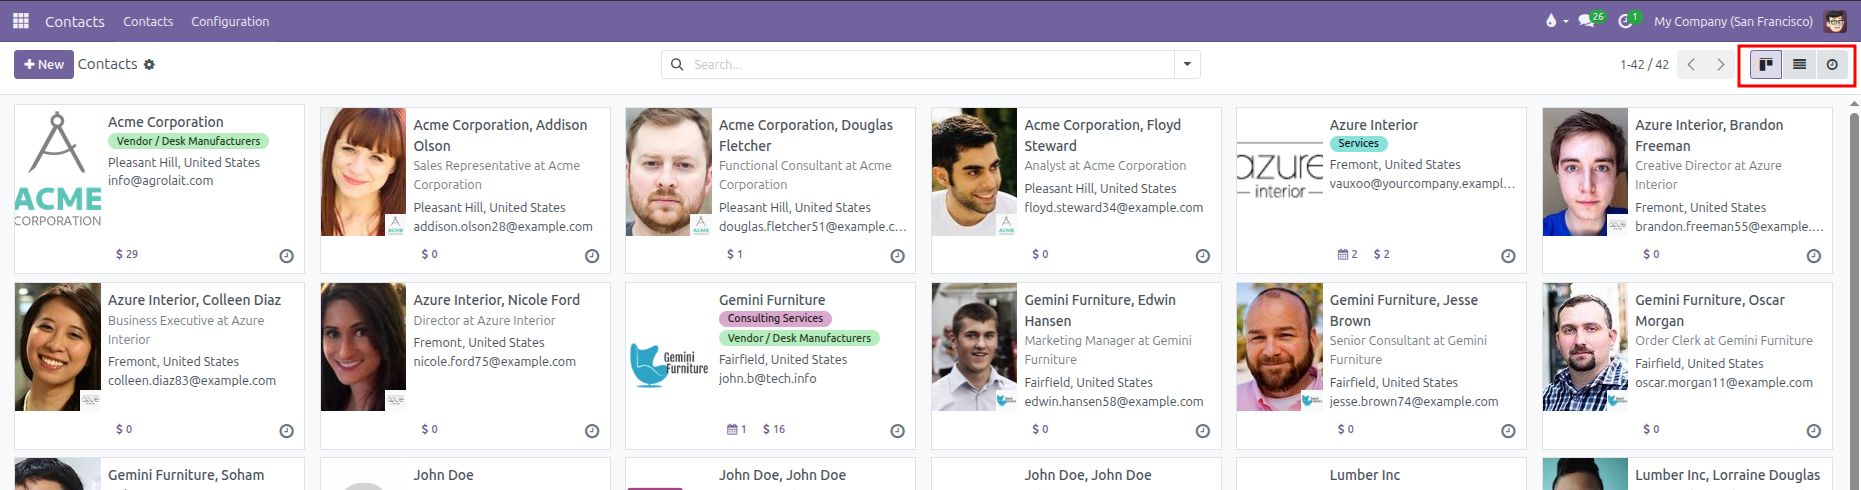
Kanban Card View: Displays visual cards with contact photos, company names, emails, phone numbers, and quick counters for meetings and sales orders.
List View: Displays contacts in a spreadsheet table. This layout makes it easy to compare phone numbers, cities, and countries, or select multiple contacts at once for bulk actions.
Activity View: Displays a schedule board showing upcoming tasks, phone calls, meetings, and to-do deadlines across all contacts.
To switch views, click the Kanban, List, or Activity icons at the top right of the screen.
5. Perform Bulk Actions in List View
When working in the List view:
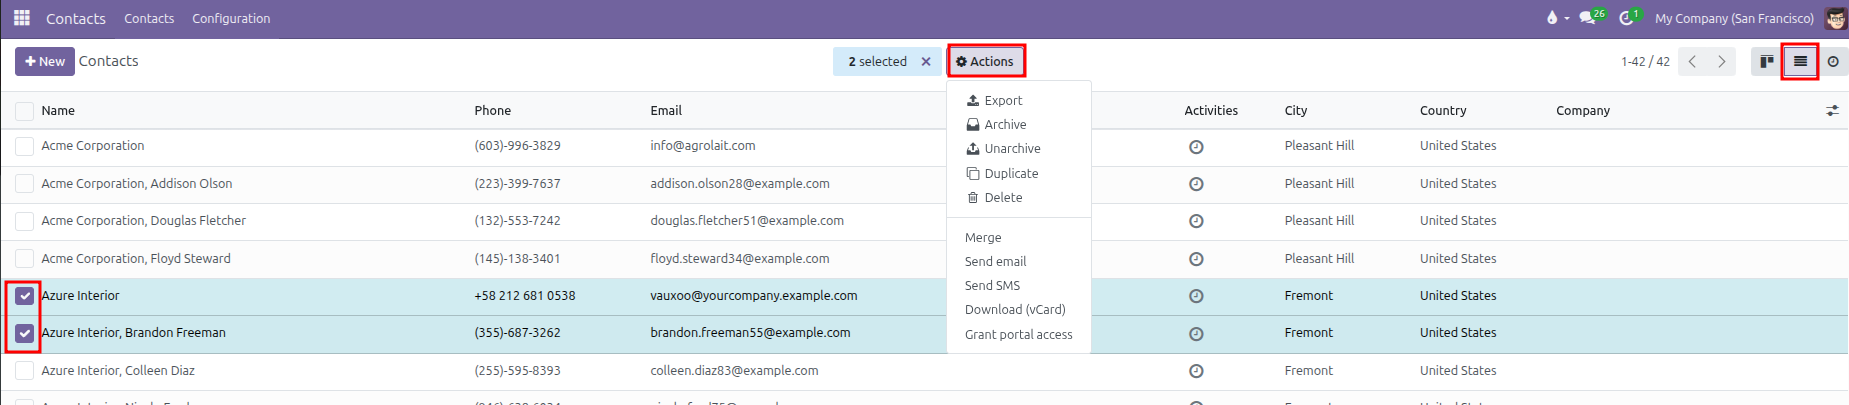
Select the checkbox on one or more contact rows (or check the box in the table header to select all).
Click the Actions dropdown menu (gear icon) at the top of the list to perform bulk operations:
Export: Download selected contacts into a spreadsheet file (XLSX or CSV).
Archive: Deactivate records without deleting their transaction history.
Unarchive: Restore previously archived contacts to active status.
Duplicate: Make an identical copy of a contact record.
Delete: Remove contacts (blocked if records are tied to posted transactions).
Merge: Combine duplicate records into a single consolidated master contact.
Send email: Send an email message to all selected contacts.
Send SMS: Send text messages to contact mobile numbers.
Download (vCard): Export contact cards formatted for phones or address books.
Grant portal access: Invite customers to access their orders and bills online.
6. Merge Duplicate Contacts
When duplicate contact records are created by mistake, merge them into a single clean profile:
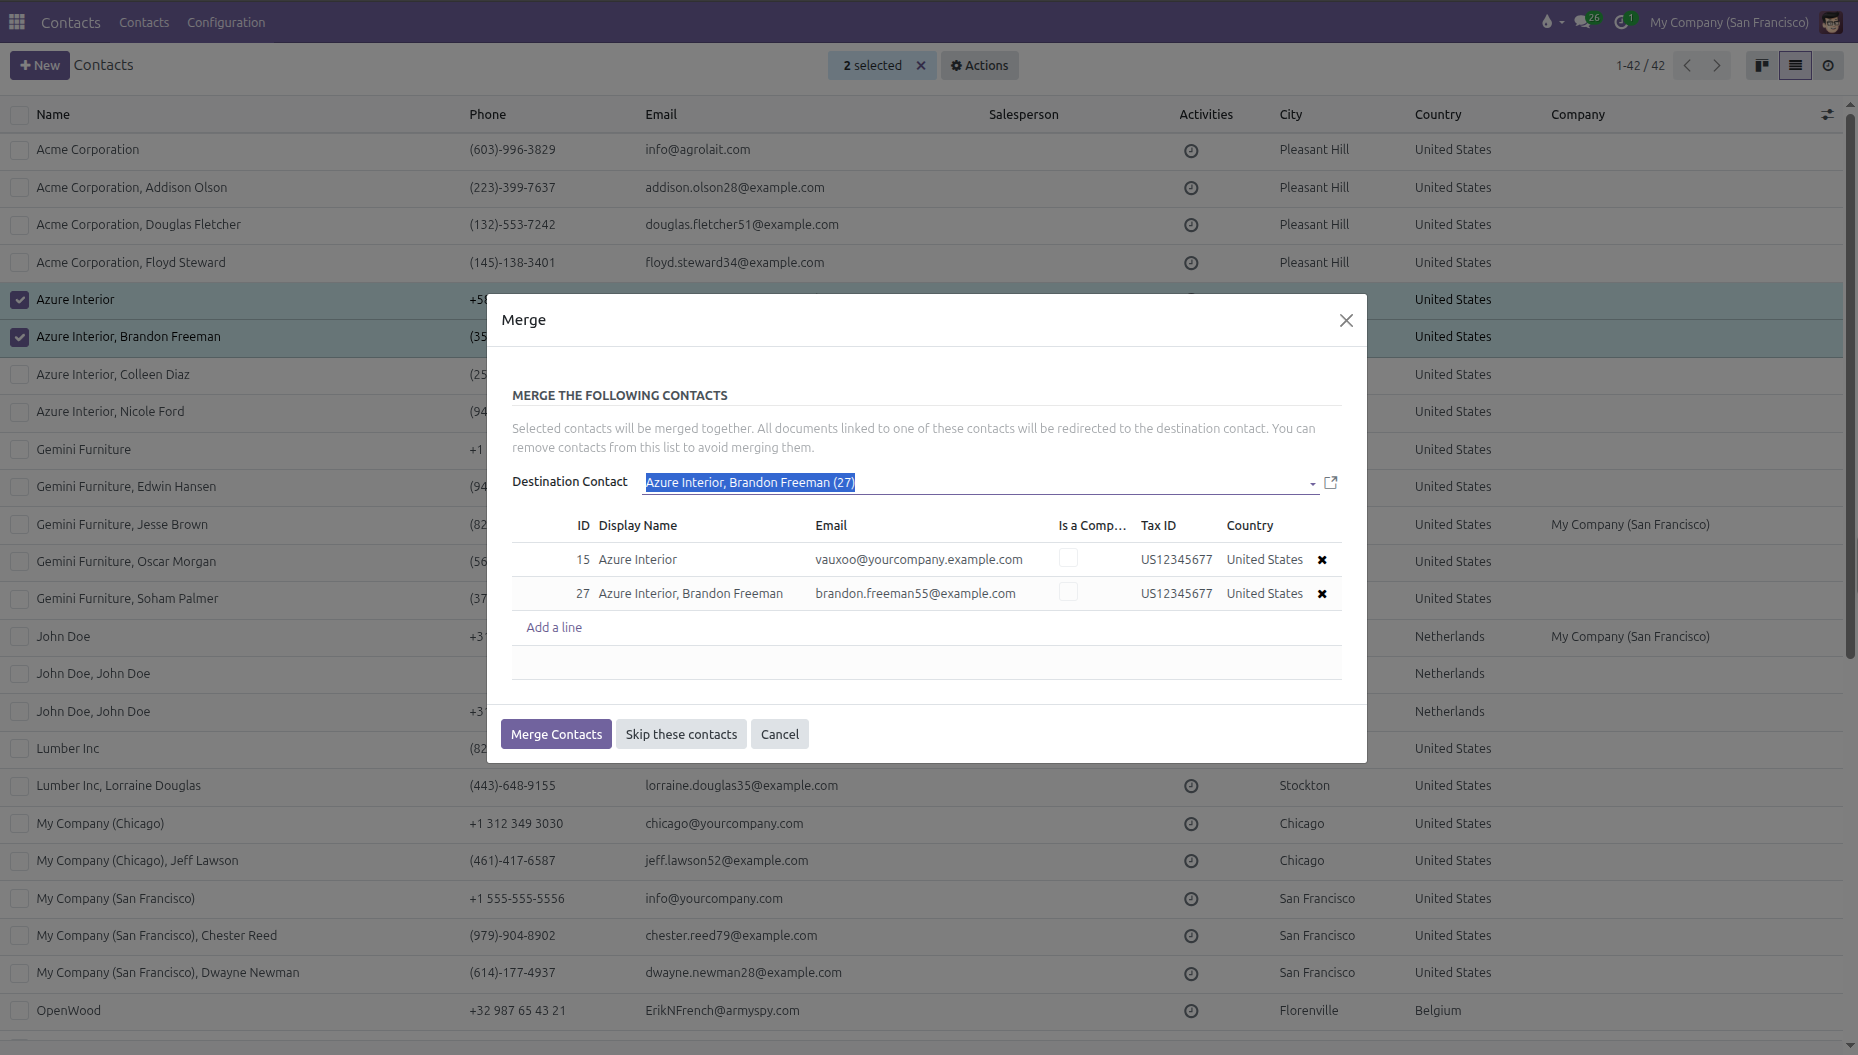
Select two or more duplicate contacts in the List view.
Click the Actions menu and select Merge.
In the Merge popup window:
Destination Contact: Choose which contact profile remains as the final master record. All sales orders, invoices, deliveries, and past notes redirect to this destination profile.
Contacts Table: Review the list of contacts being combined. Click the remove icon (x) on any row to exclude it, or click Add a line to include another contact.
Click Merge Contacts to finish the consolidation.