Bank Accounts Setup
Configure bank institutions and manage customer and vendor bank accounts with payment validation in CURQ 18.
1. Overview of Banks and Bank Accounts
CURQ manages financial institution details through two connected directories under the Bank Accounts configuration menu:
Banks: A directory of financial institutions, storing bank names, BIC/SWIFT codes, bank addresses, phone numbers, and email addresses.
Bank Accounts: Specific customer, vendor, or internal accounts linked to a partner, tracking account numbers, IBANs, routing numbers, and outgoing payment authorization.
2. Register a Bank in the Directory
Before assigning bank accounts, you can register financial institutions:
Open the Contacts app from the main dashboard.
In the top navigation bar, click Configuration.
Under the Bank Accounts sub-section, select Banks.
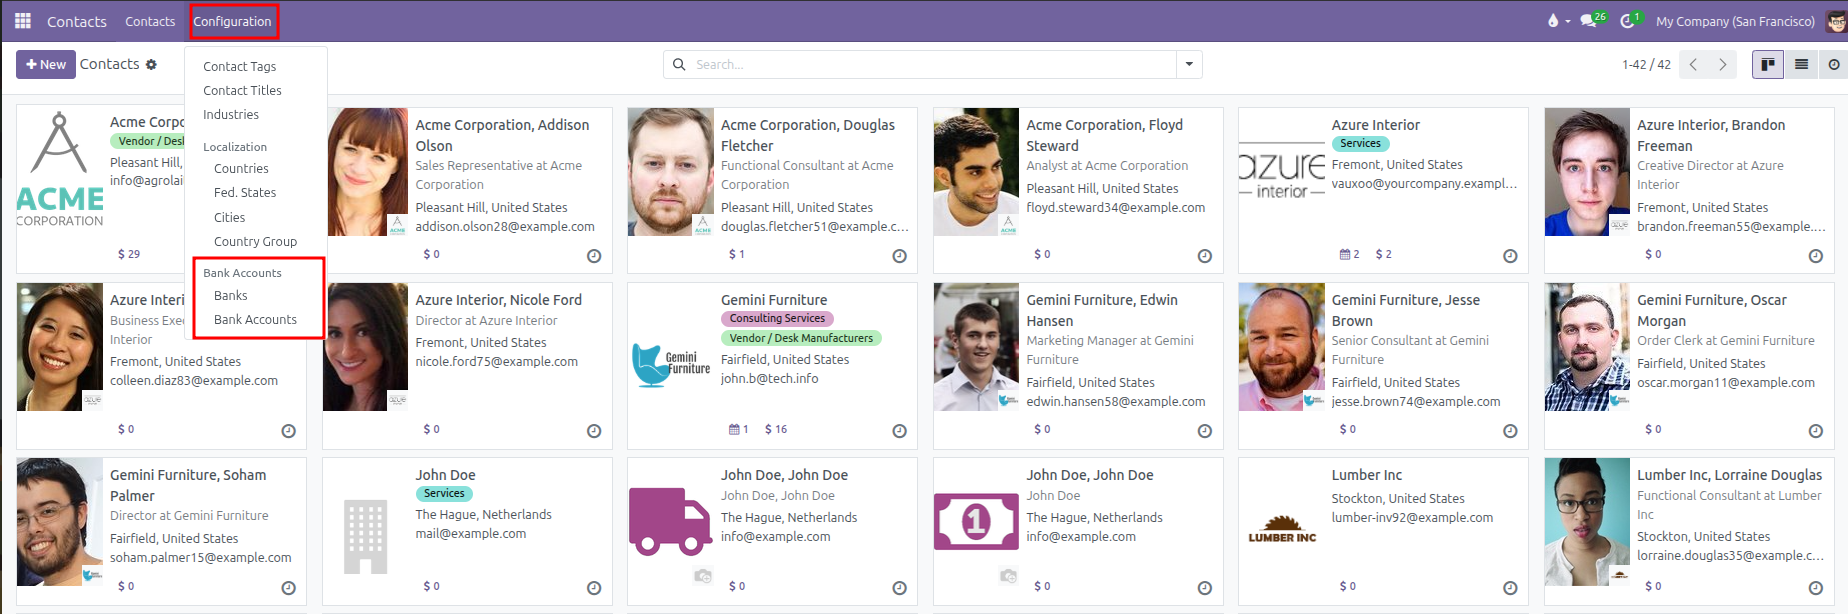
CURQ displays the table of existing banks showing Name, Bank Identifier Code, and Country:

Click New at the top left to open the bank form.
Fill in the bank institution fields:
Field |
Description |
Practical Effect |
|---|---|---|
Name |
Official name of the financial institution (such as |
Displays when selecting banks on partner account lines. |
Bank Identifier Code |
BIC or SWIFT code (such as |
Required for international wire transfers and SEPA payments. |
Bank Address |
Street, City, State, ZIP, and Country of the branch. |
Validates cross-border banking locations. |
Phone & Email |
Direct branch phone number and email address. |
Kept for internal administrative reference. |
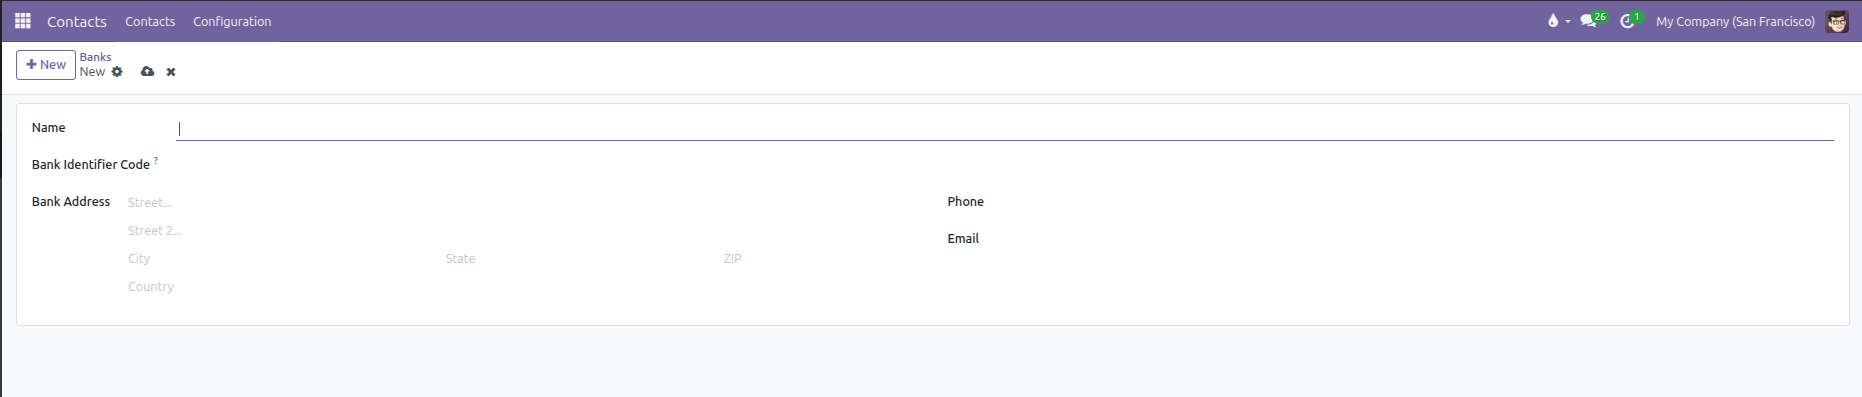
Click Save (cloud icon) to store the bank record.
3. Create and Link a Partner Bank Account
To add a bank account for a vendor, customer, or company branch:
Open the Contacts app.
In the top navigation bar, click Configuration.
Under the Bank Accounts section, select Bank Accounts.
CURQ displays all existing partner bank accounts with their validation status:

Click New at the top left.
Configure the account properties:
Field |
Description |
Practical Effect |
|---|---|---|
Account Number |
Full bank account number or IBAN. |
Formats outgoing payment files and customer billing templates. |
Bank |
Financial institution selected from the Banks registry. |
Automatically pulls the bank name and BIC code into payment runs. |
ABA/Routing |
Routing transit number for domestic payments. |
Validates domestic bank clearing. |
Account Holder |
The person or company contact who owns the account. |
Links the bank account directly to the partner contact card. |
Account Holder Name |
Name printed on the bank records if different from the contact. |
Used for exact payee reconciliation. |
Company |
Internal company entity that manages this bank relationship. |
Controls access in multi-company environments. |
Send Money |
Toggle switch showing Untrusted or Trusted status badge. |
Protects against wire fraud by requiring verification before paying out. |
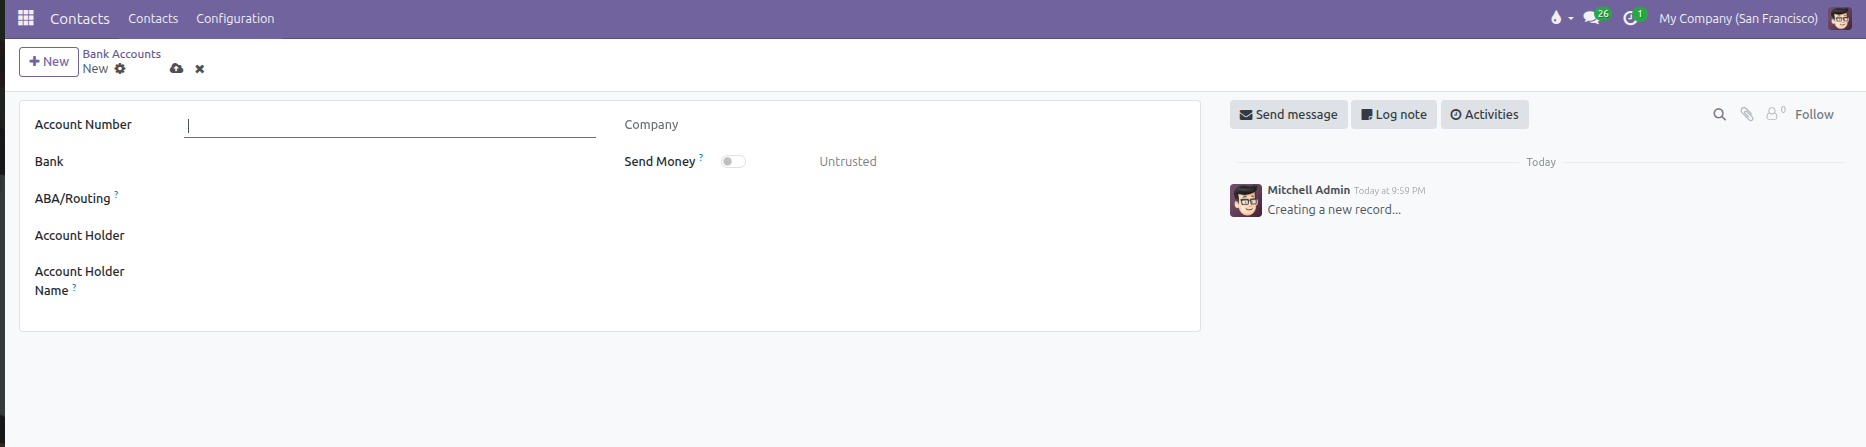
Click Save (cloud icon) to store the account.
4. Understand Trusted Accounts and Fraud Protection
CURQ includes security controls to protect your business against payment errors and wire fraud:
Trusted vs Untrusted: When a new bank account is added, it is set to Untrusted by default. An authorized accounting user must turn on the Send Money toggle to mark it as Trusted before automatic batch payments can be processed.
High Risk Warning: If an account number belongs to a money transfer service rather than an established bank, CURQ displays a high risk alert advising you to verify the vendor by phone.
Medium Risk (Country Mismatch): If an account IBAN country code differs from the vendor’s primary country, CURQ displays a warning to ensure funds are not misrouted internationally.
5. Add Bank Details Directly from the Contact Form
Users can also add bank accounts directly while reviewing a contact:
Open a contact in the Contacts app.
Click the Invoicing tab.
Under the Bank Accounts table, click Add a line.
Type the Account Number and select the Bank.
Click Save (cloud icon) to apply the banking details.