Creating and Managing “My Dashboard”
Follow these quick steps to pin views from across CURQ 18 and organize your personal dashboard:
1. Pin a View to My Dashboard
You can pin any List, Kanban, Graph, or Pivot view to your personal dashboard:
Open the app and view you want to pin (such as Sales > Orders or CRM > My Pipeline).
Apply your desired filters and grouping.
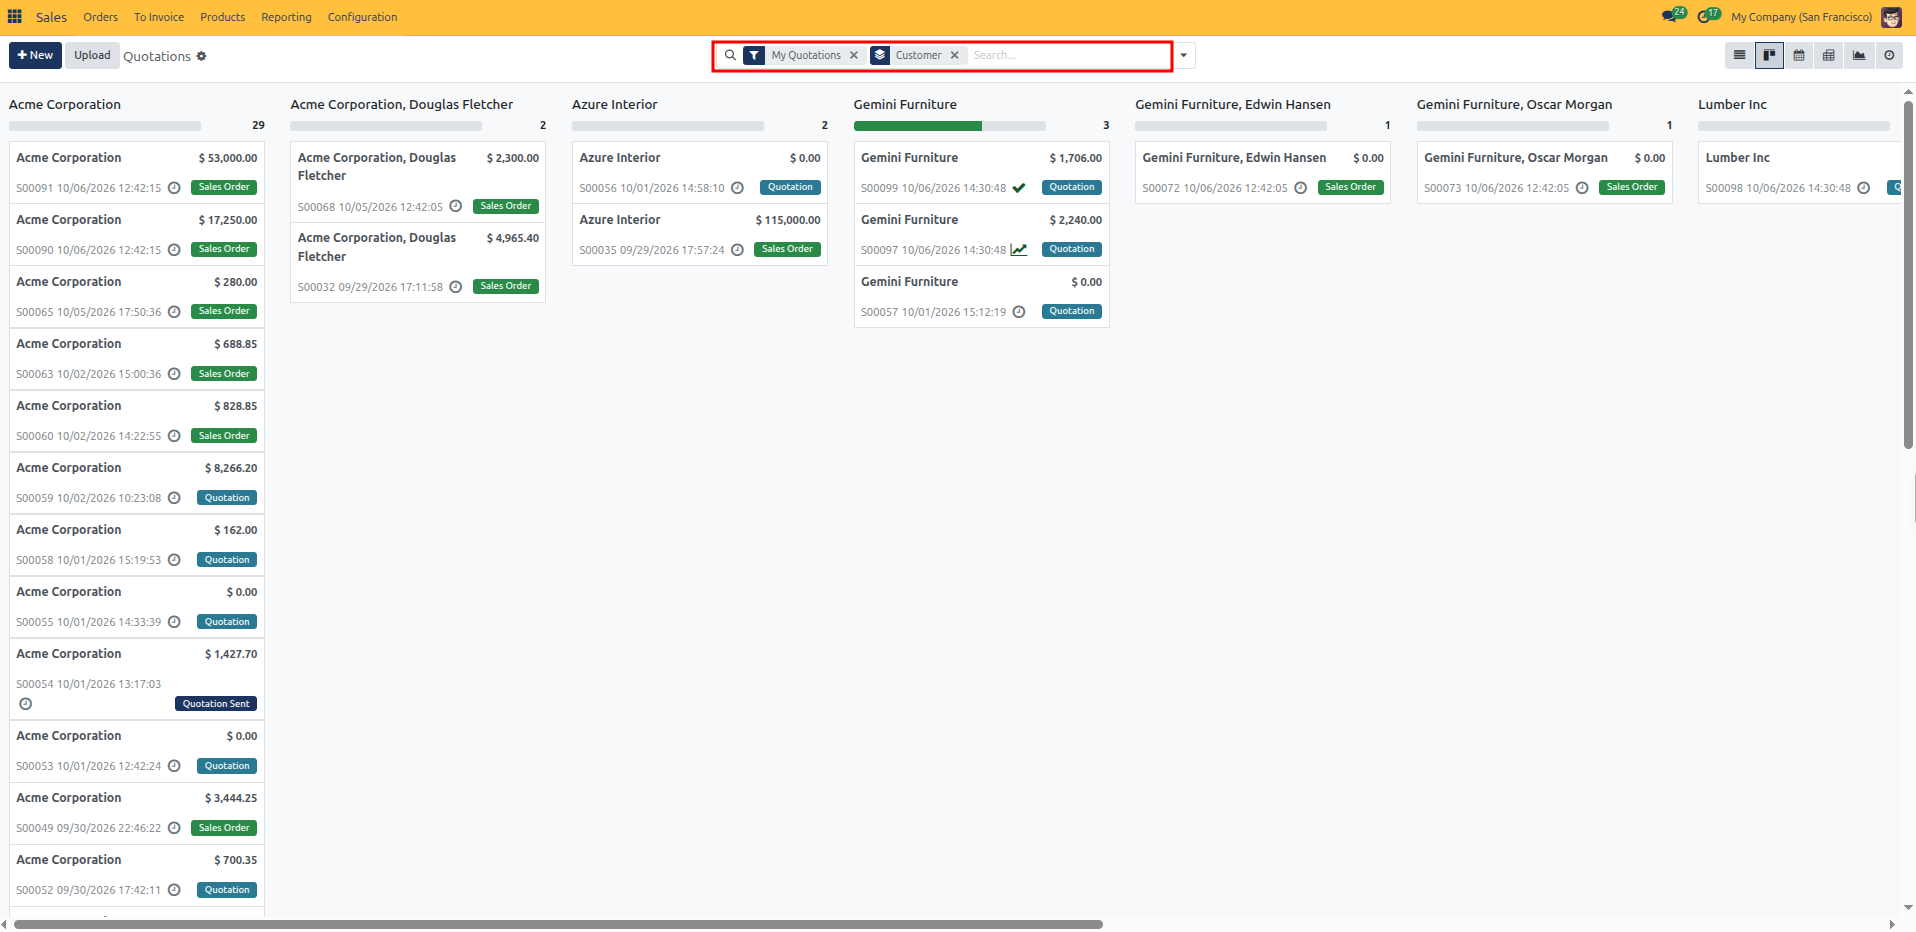
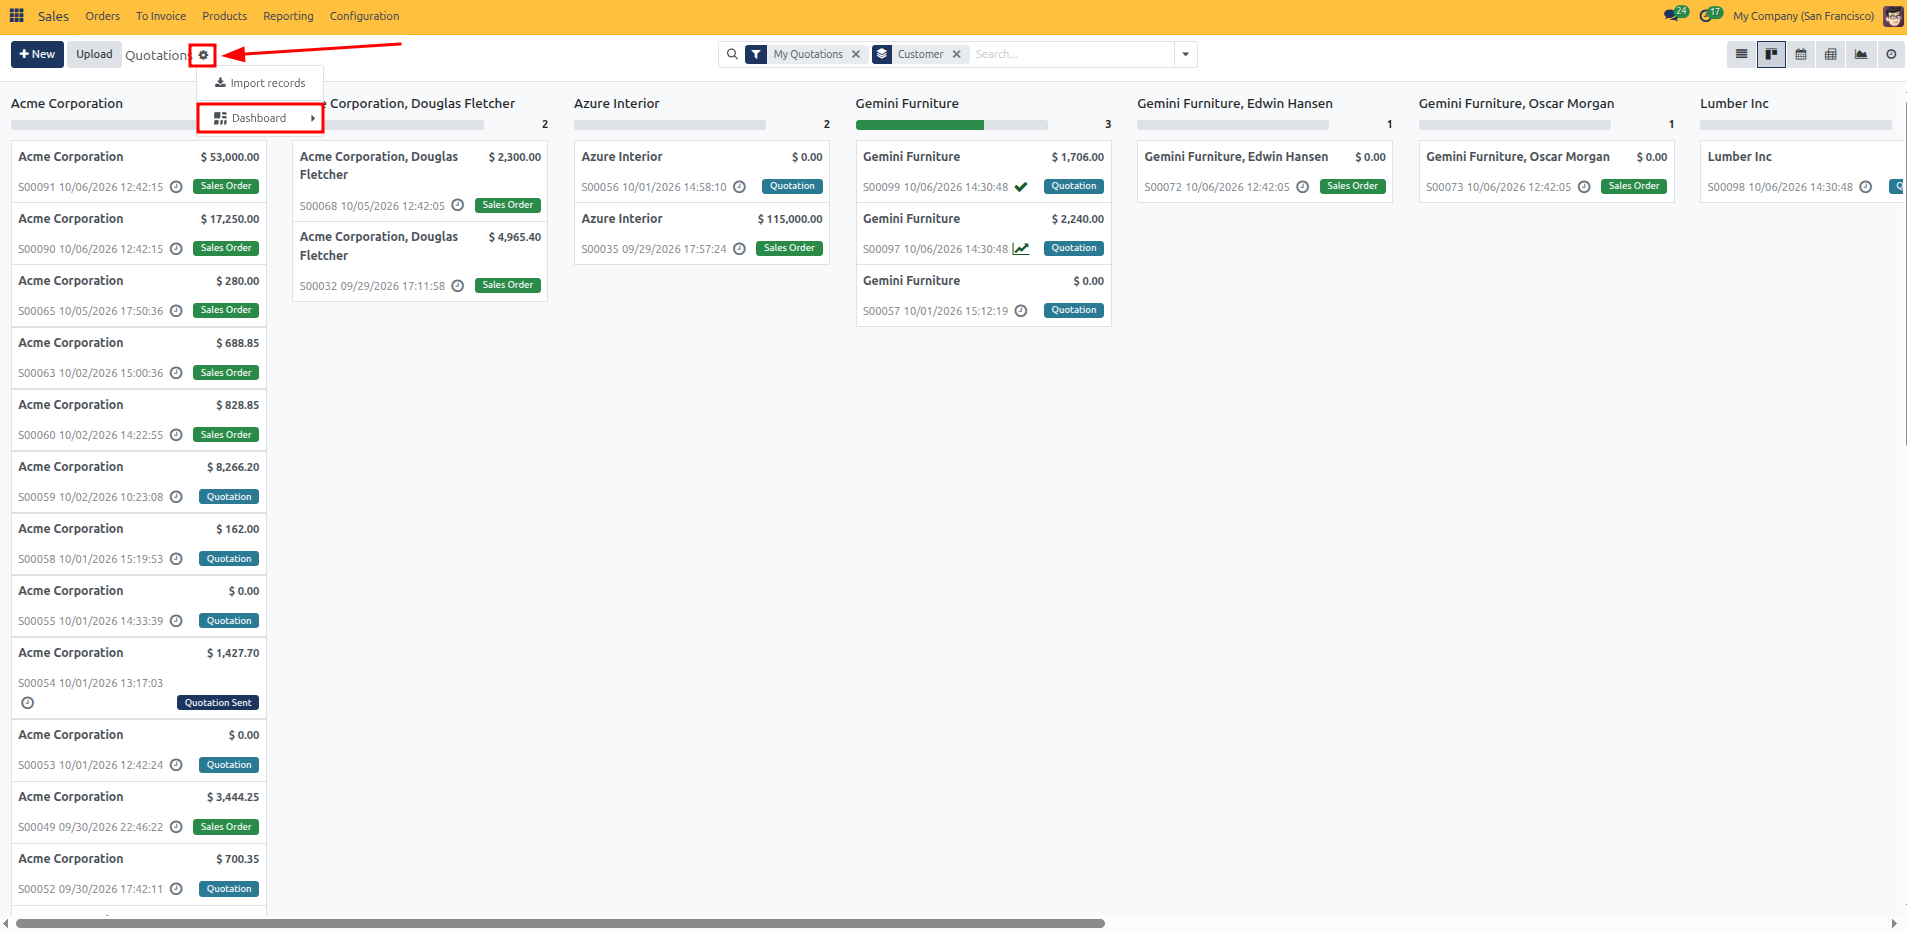
Click the Actions / Settings gear icon (
⚙) next to the view title (e.g., Quotations ⚙).Select Dashboard from the dropdown menu.
In the Add to my dashboard prompt, enter a title for the widget and click Add.

2. View and Arrange Widgets
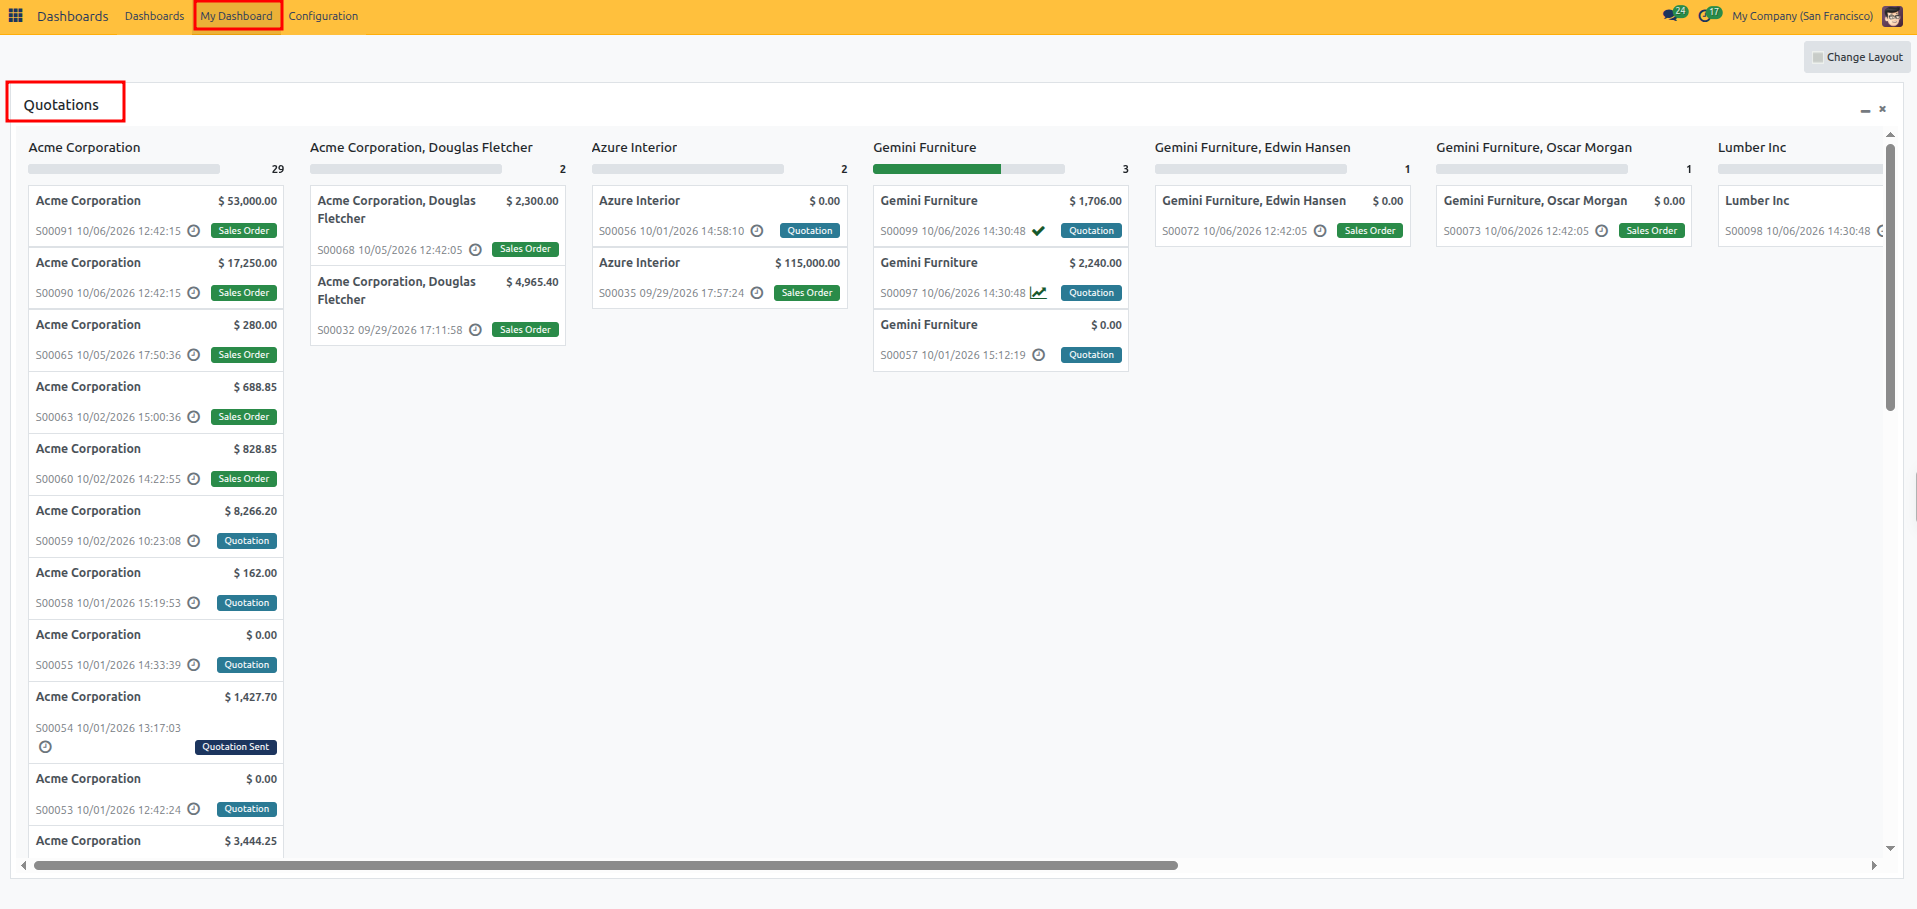
Open the Dashboards app from the main menu and click My Dashboard.
Your pinned widgets appear in your personal dashboard workspace.
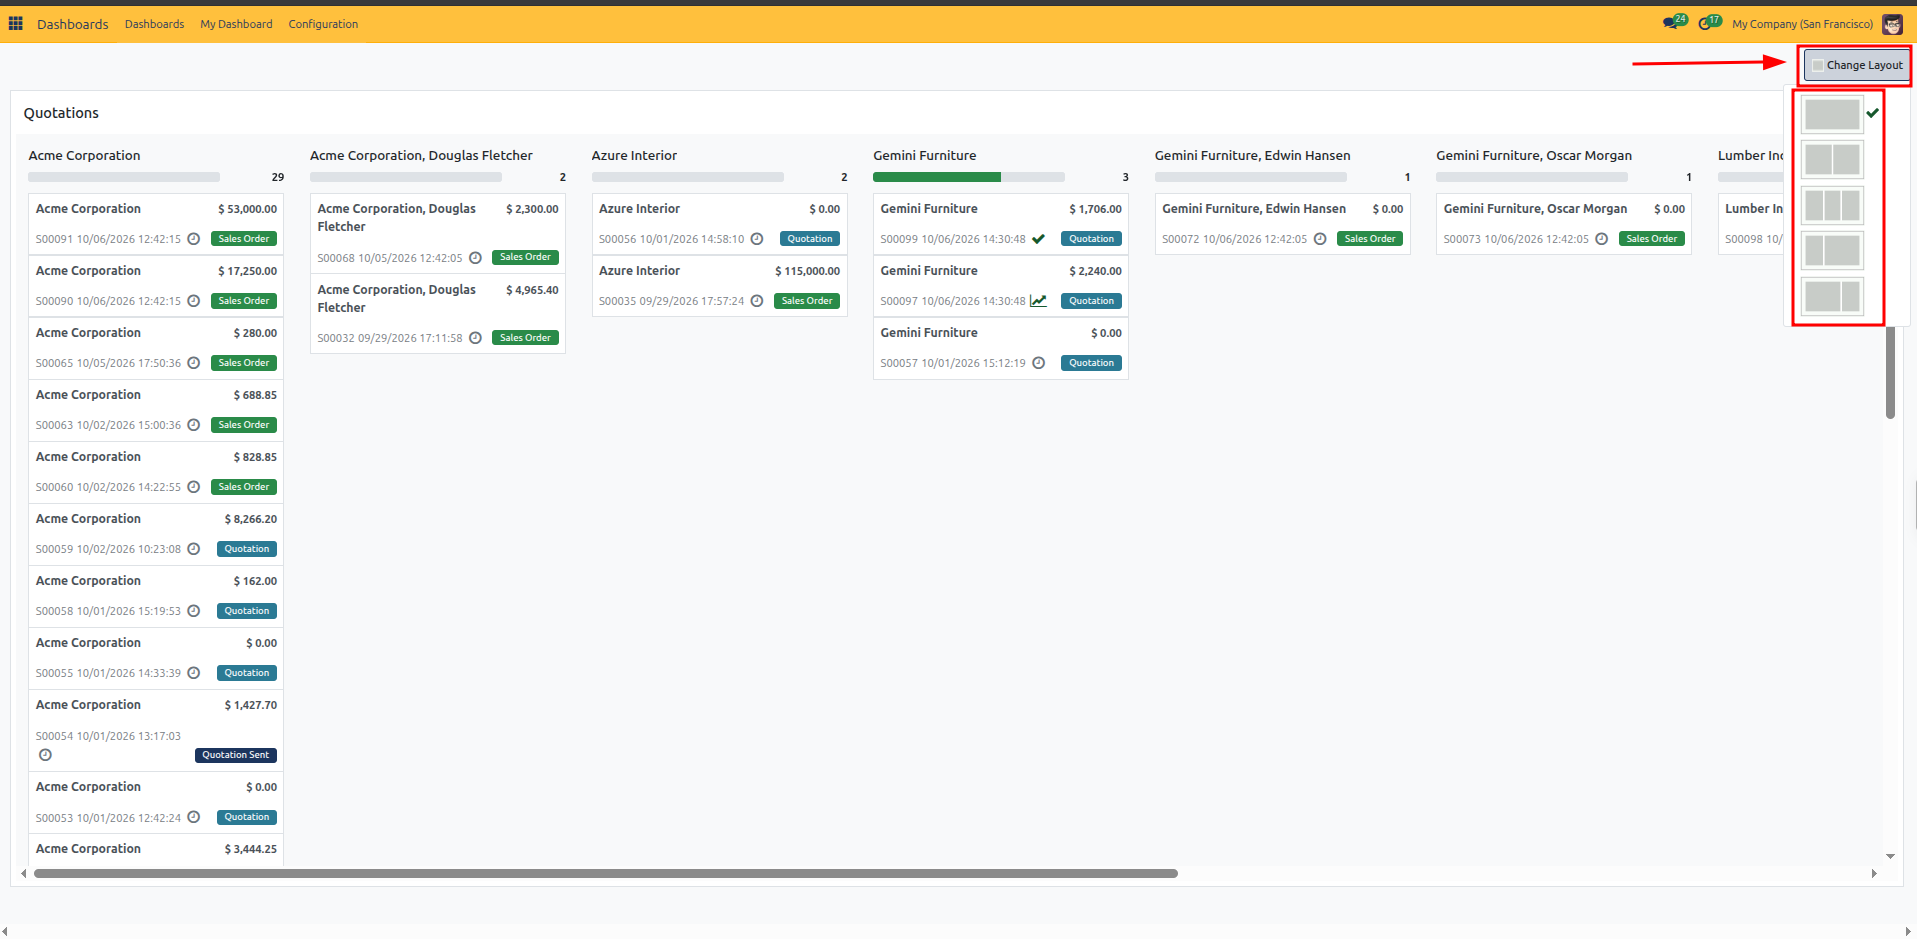
Change layout: Click the Change Layout button at the top right to choose your preferred column structure (such as 1, 2, or 3 columns).
Move widgets: Click and drag a widget header to move it to another position or column.
Collapse widgets: Click the minus (
-) icon in the top right of the widget header to minimize a card and save screen space. Click the maximize icon to expand it again.
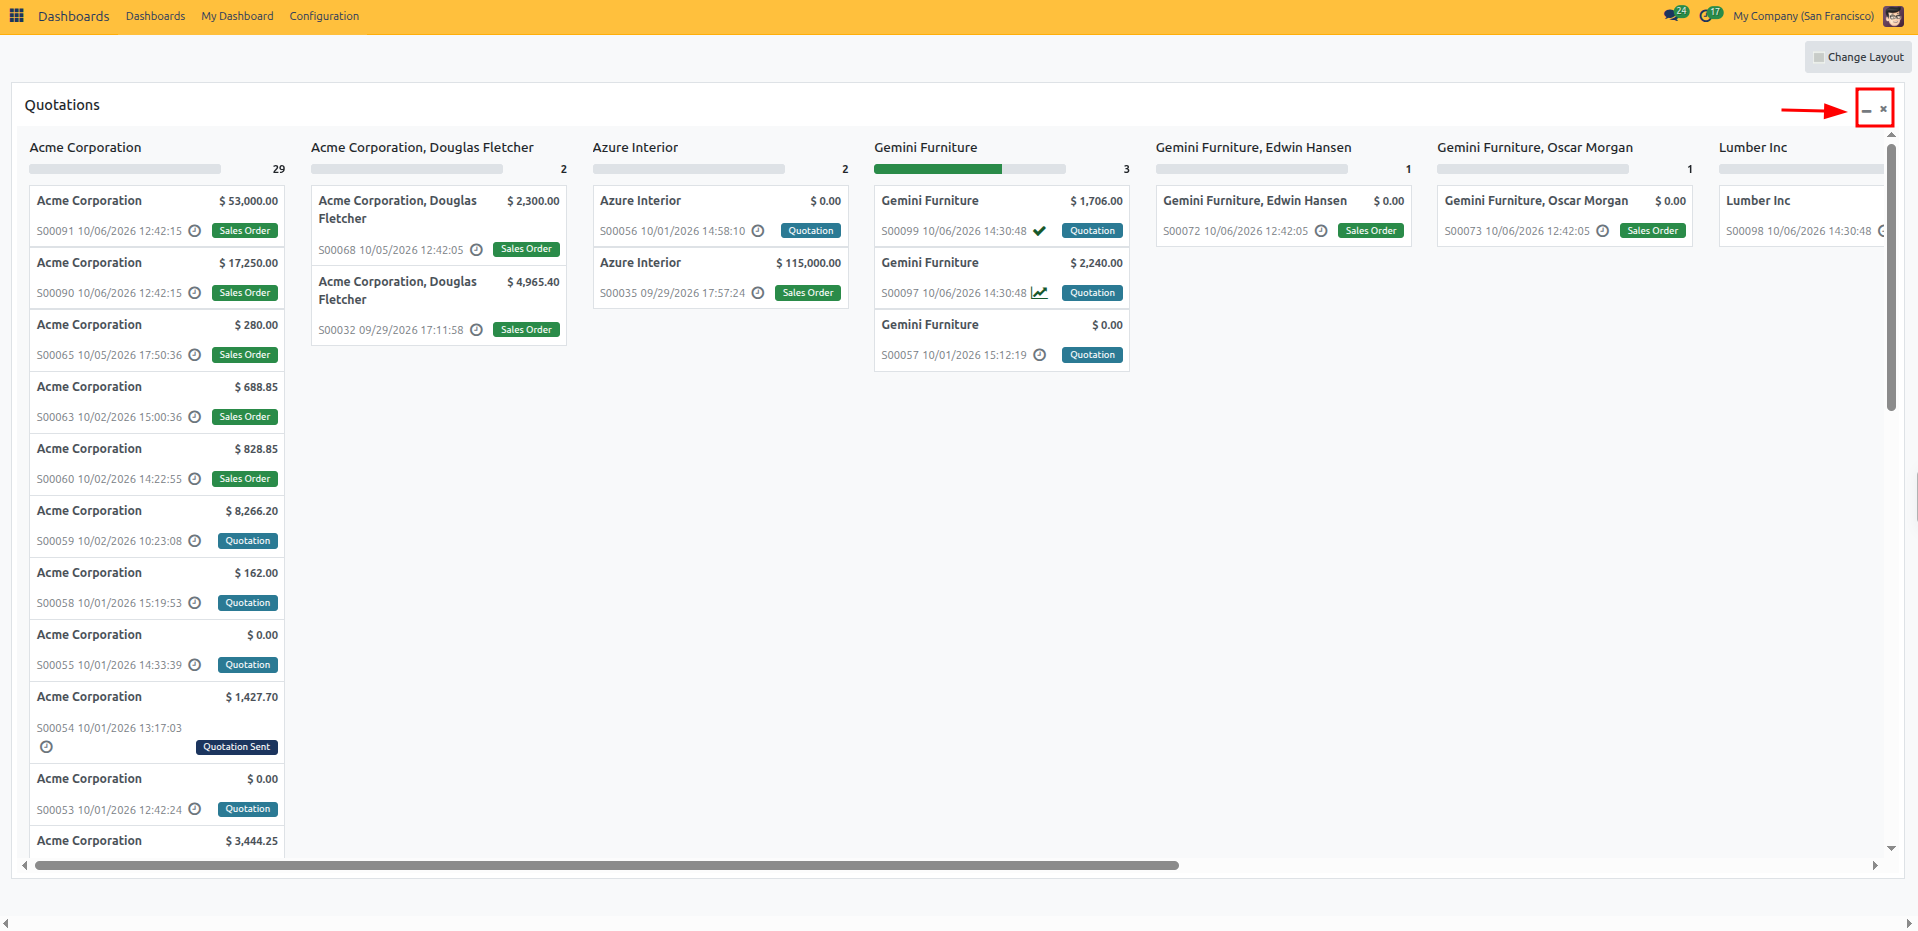

Open records: Click any item inside a widget to open its full record.
3. Remove a Widget
Open My Dashboard.
Click the close (
x) icon at the top right of the widget header.Confirm the prompt to remove the card from your dashboard.