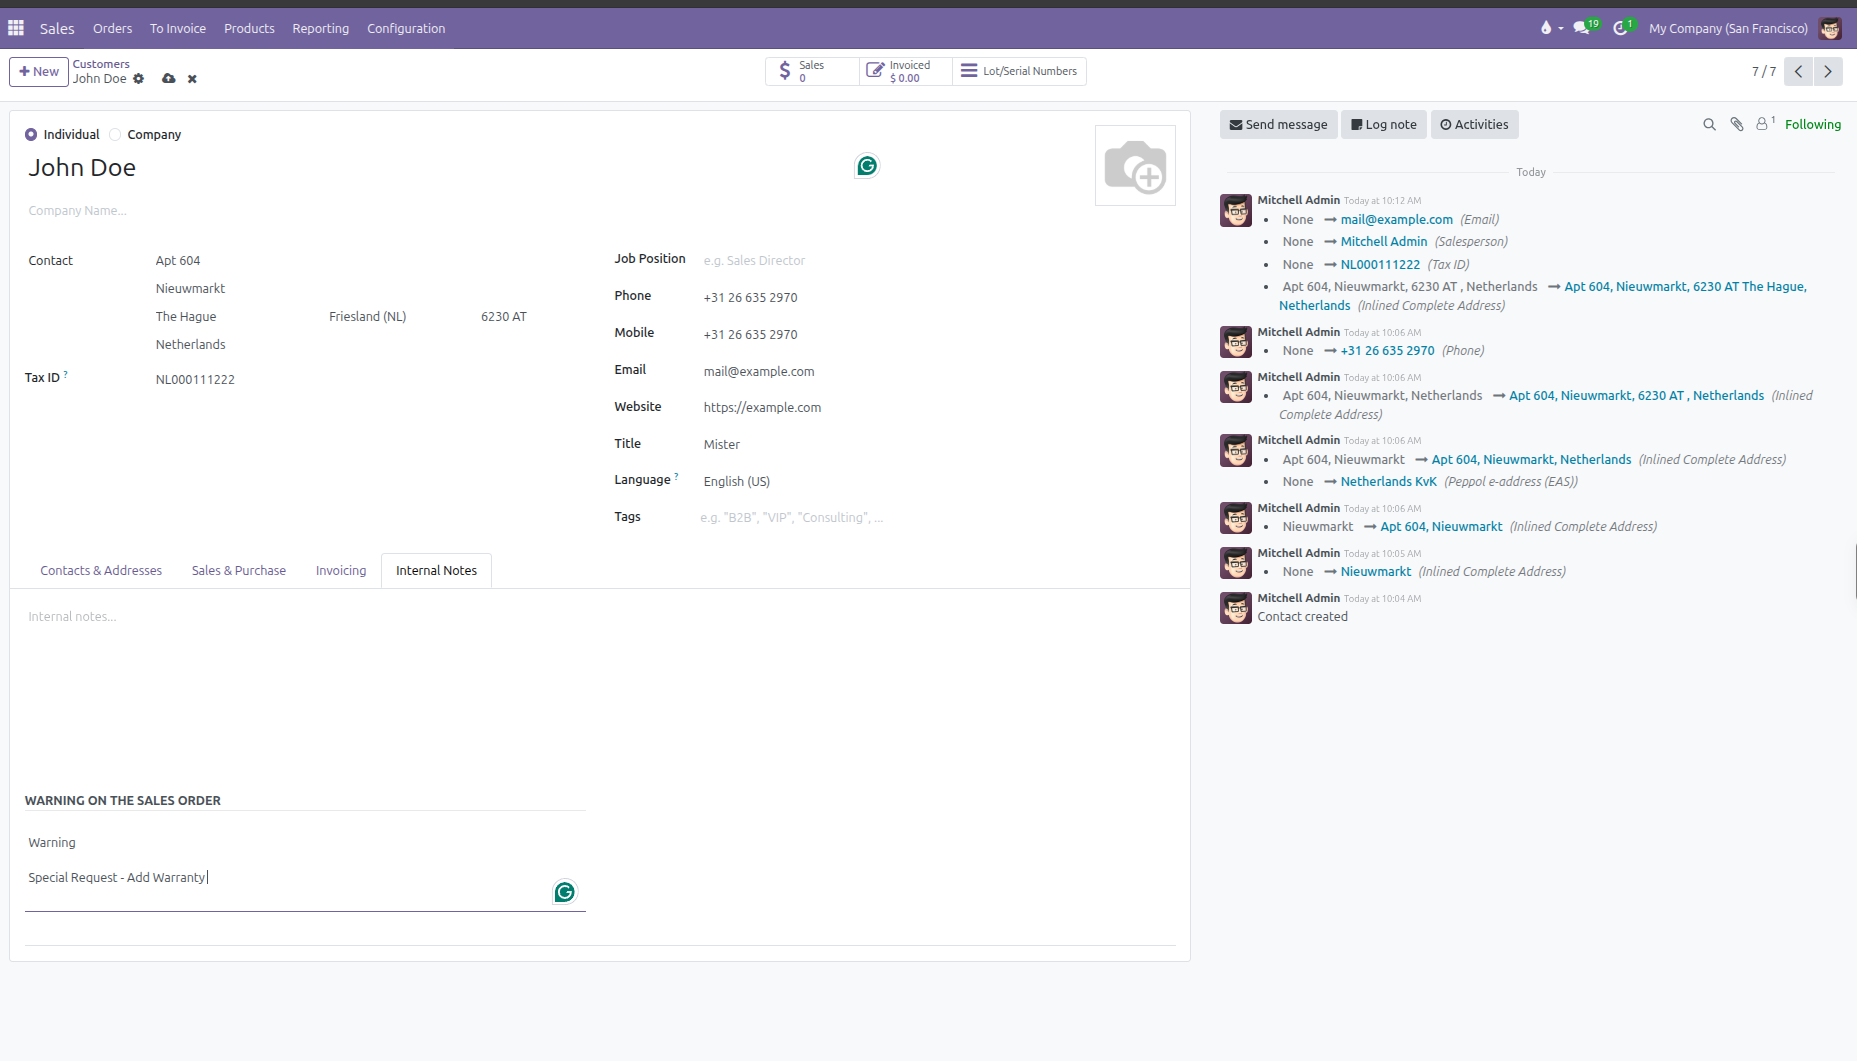
Managing Customers and Multiple Addresses
Create customer records, configure multiple delivery and invoice addresses, and assign default commercial terms in CURQ 18.
1. Creating a Customer Record
Every sales quotation and invoice in CURQ requires a customer record. To create a new customer:
Navigate to Orders > Customers.
Click New at the top left of the screen.
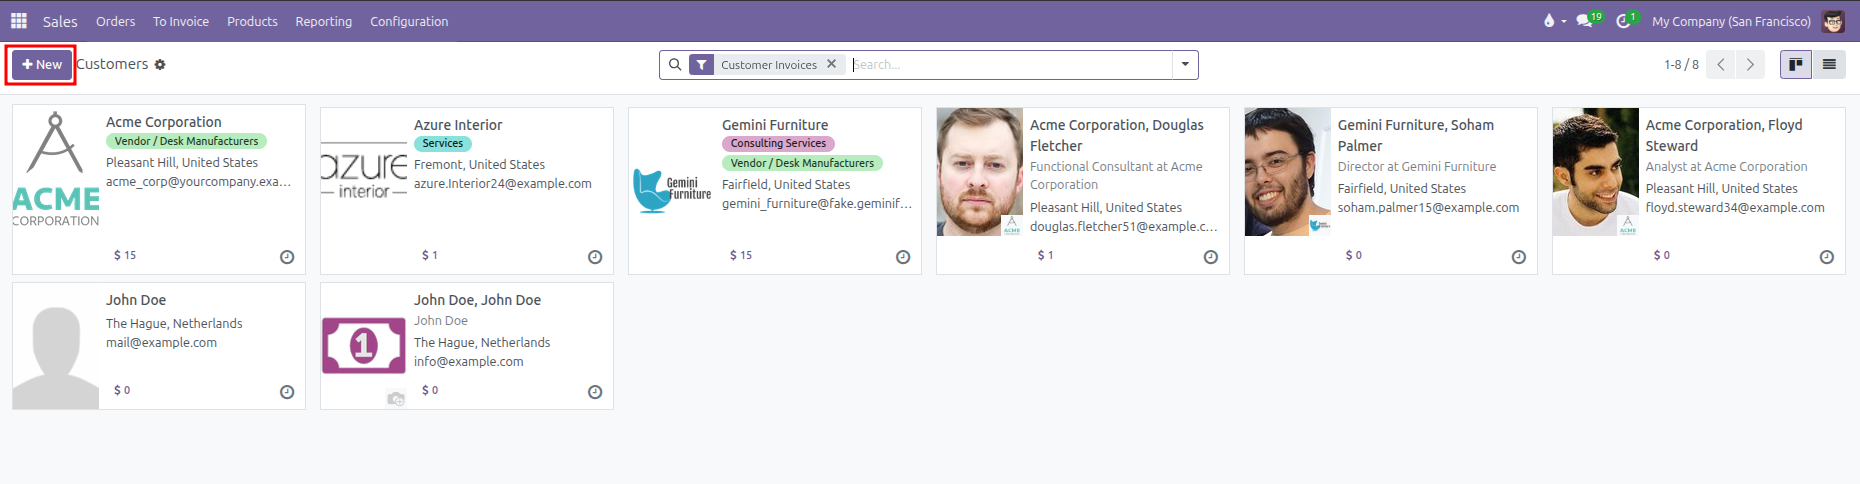
Select whether the contact is an Individual or a Company.
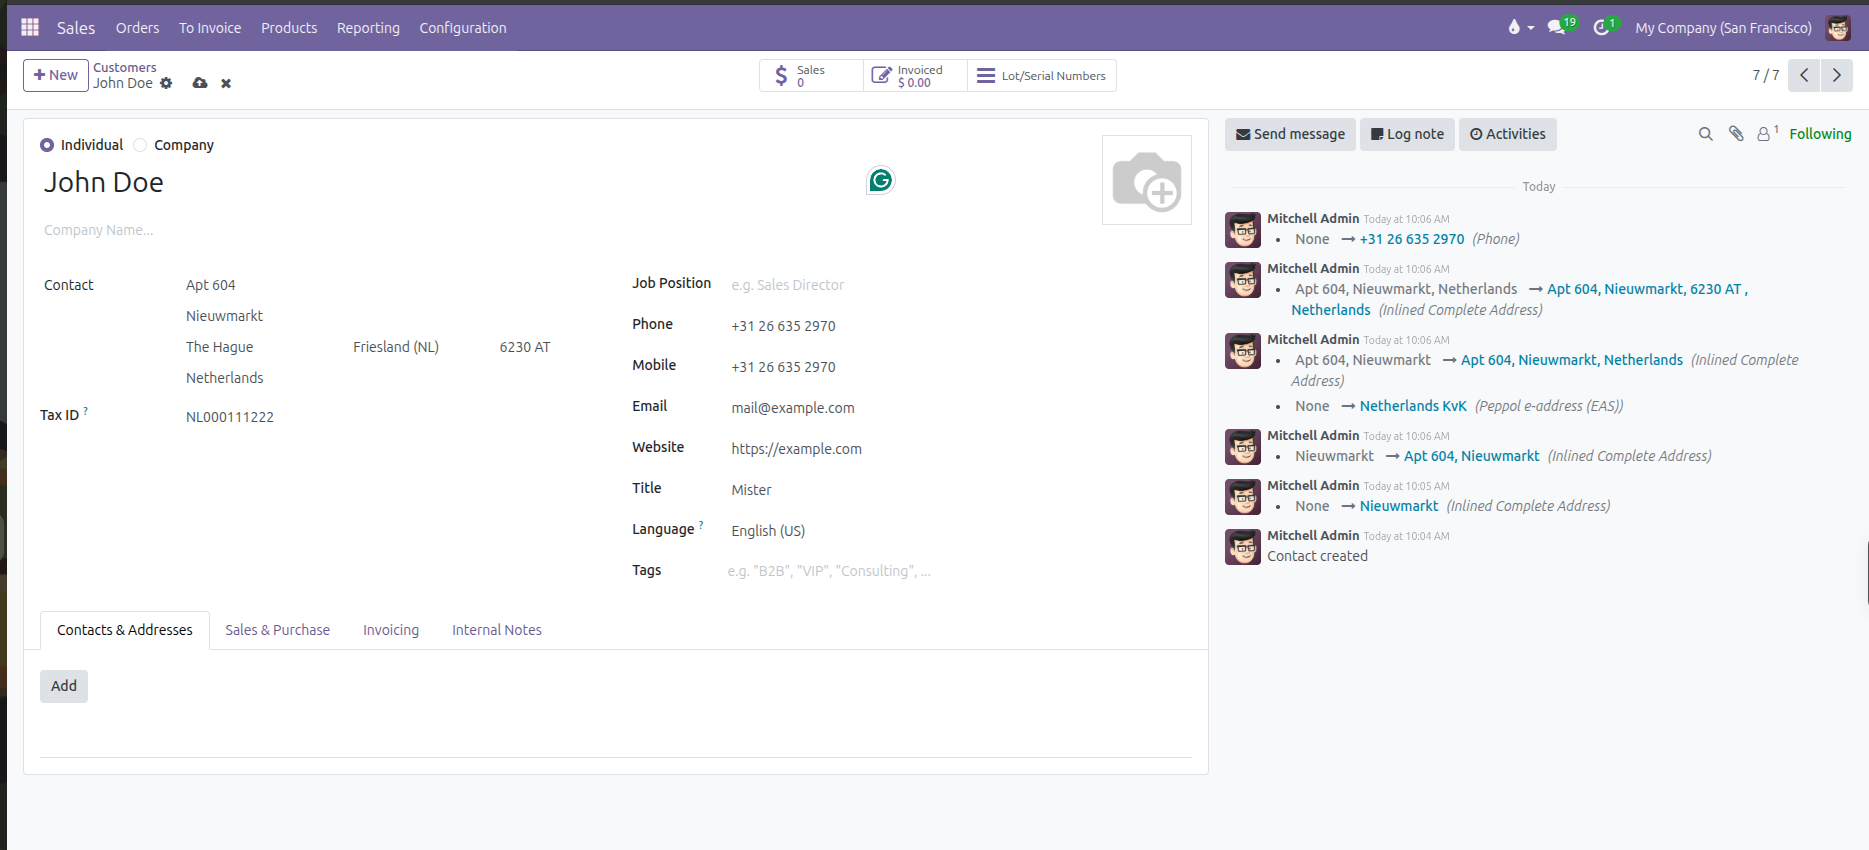
CURQ changes the visible fields on the form based on this selection:
Form Behavior |
When You Select Company |
When You Select Individual |
|---|---|---|
Name Field |
Prompts for the organization legal business name. |
Prompts for the person full name. |
Company Name |
Hidden. A company cannot be parented to another company here. |
Visible. Allows linking this individual to an existing employer or parent company. |
Job Position |
Hidden. Companies do not hold job titles. |
Visible. Enter the person professional role (such as Purchasing Manager or Director). |
Title |
Hidden. |
Visible. Select an honorific or salutation (such as Mr., Ms., or Dr.). |
Address & Tax ID |
Enter the organization official registered address and Tax ID directly. |
If linked to a parent company, inherits the company address and Tax ID automatically. If independent, enter personal address and tax details. |
2. Managing Multiple Addresses
Companies often receive invoices at their central accounting office while requesting product deliveries at a warehouse, branch, or job site. You can attach multiple dedicated addresses to a single customer record.
To add an address:
Open the customer form from Orders > Customers.
Under the Contacts & Addresses tab, click Add.
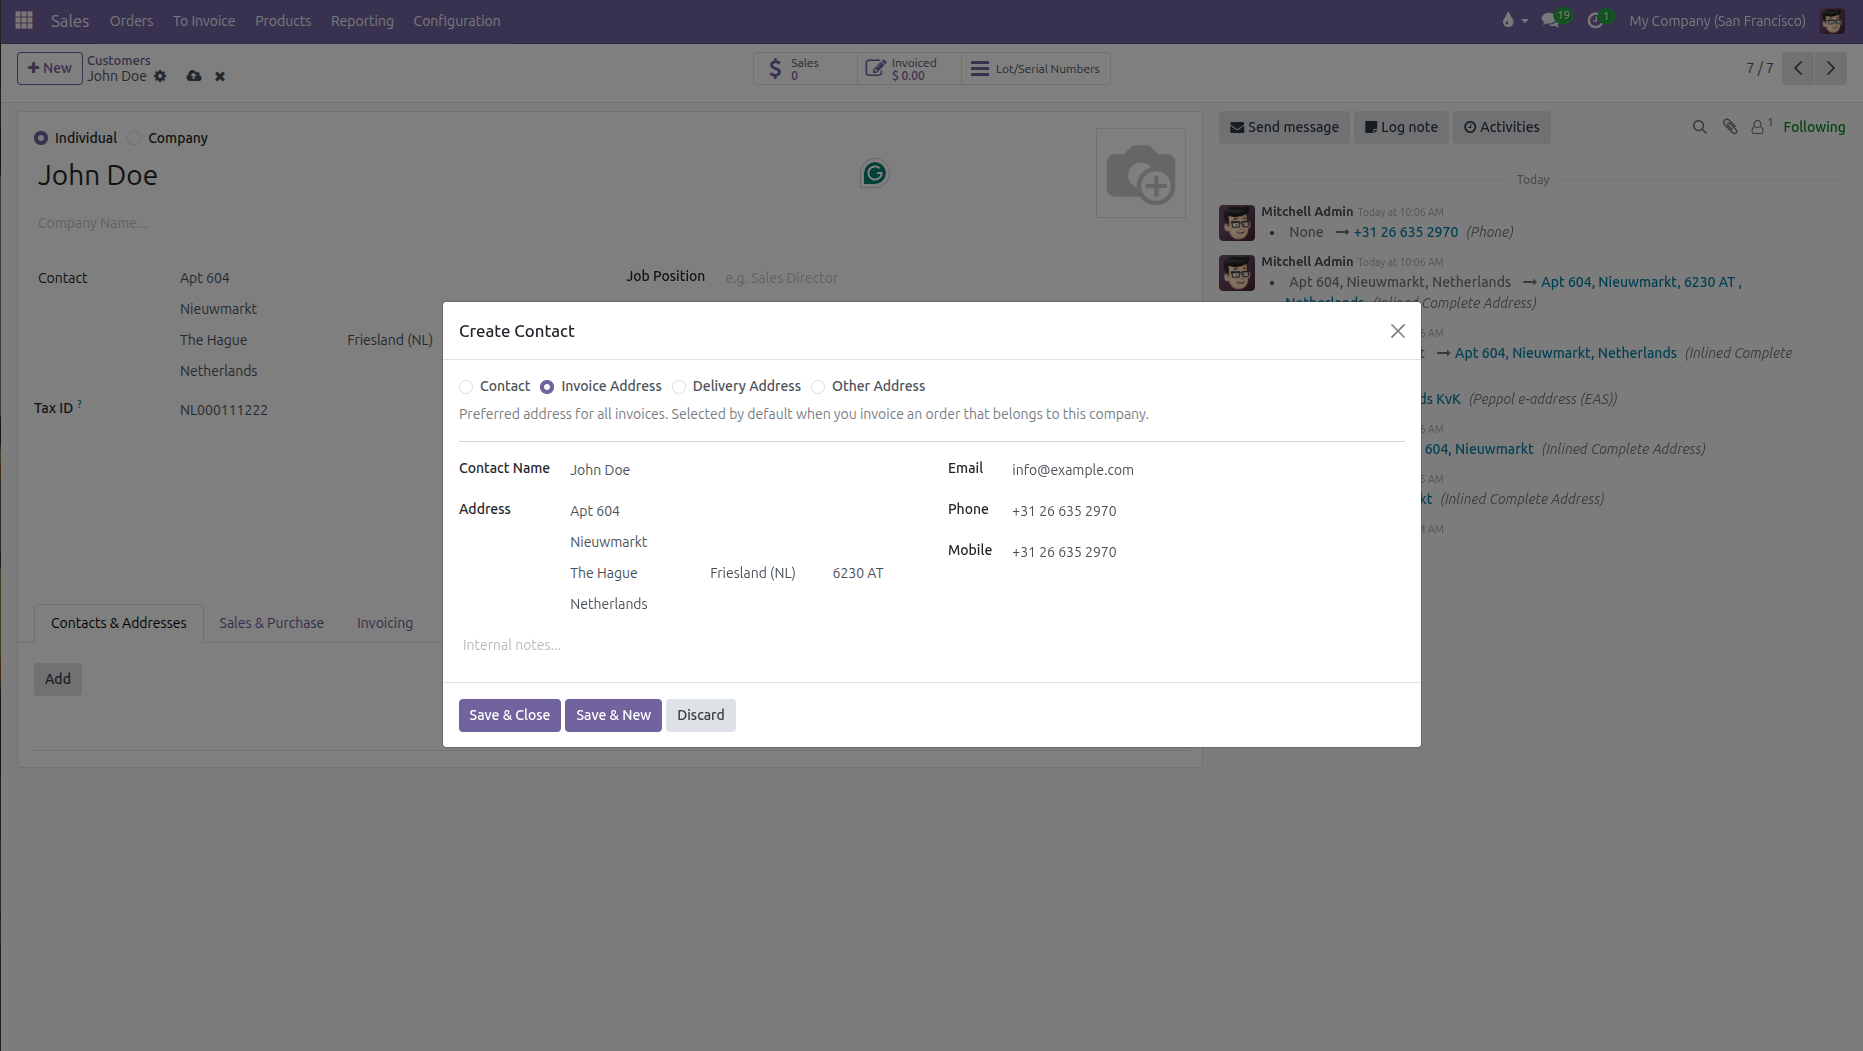
Select the address type:
Address Type |
Purpose in Sales |
How CURQ Uses It |
|---|---|---|
Invoice Address |
Specific accounting office or billing department. |
Automatically populates as the Invoice Address on quotations and customer invoices. |
Delivery Address |
Specific destination warehouse, distribution center, or site. |
Automatically populates as the Delivery Address on quotations and warehouse delivery slips. |
Contact |
An employee, buyer, or representative at the company. |
Available as a contact person when composing quotation emails and portal invitations. |
Other Address |
Secondary office, showroom, or regional branch. |
Stored for internal records and communication. |
Enter the contact name, street address, and contact details for that location.
Click Save & Close to add the address, or Save & New to add another.
When you create a quotation for this customer, CURQ automatically fills the default invoice and delivery addresses, while letting you pick alternatives directly on the quotation form.
3. Commercial Terms and Sales Settings
You can preconfigure commercial agreements, payment schedules, tax rules, and delivery preferences on each contact record.
Open the customer form and click the Sales & Purchase tab:
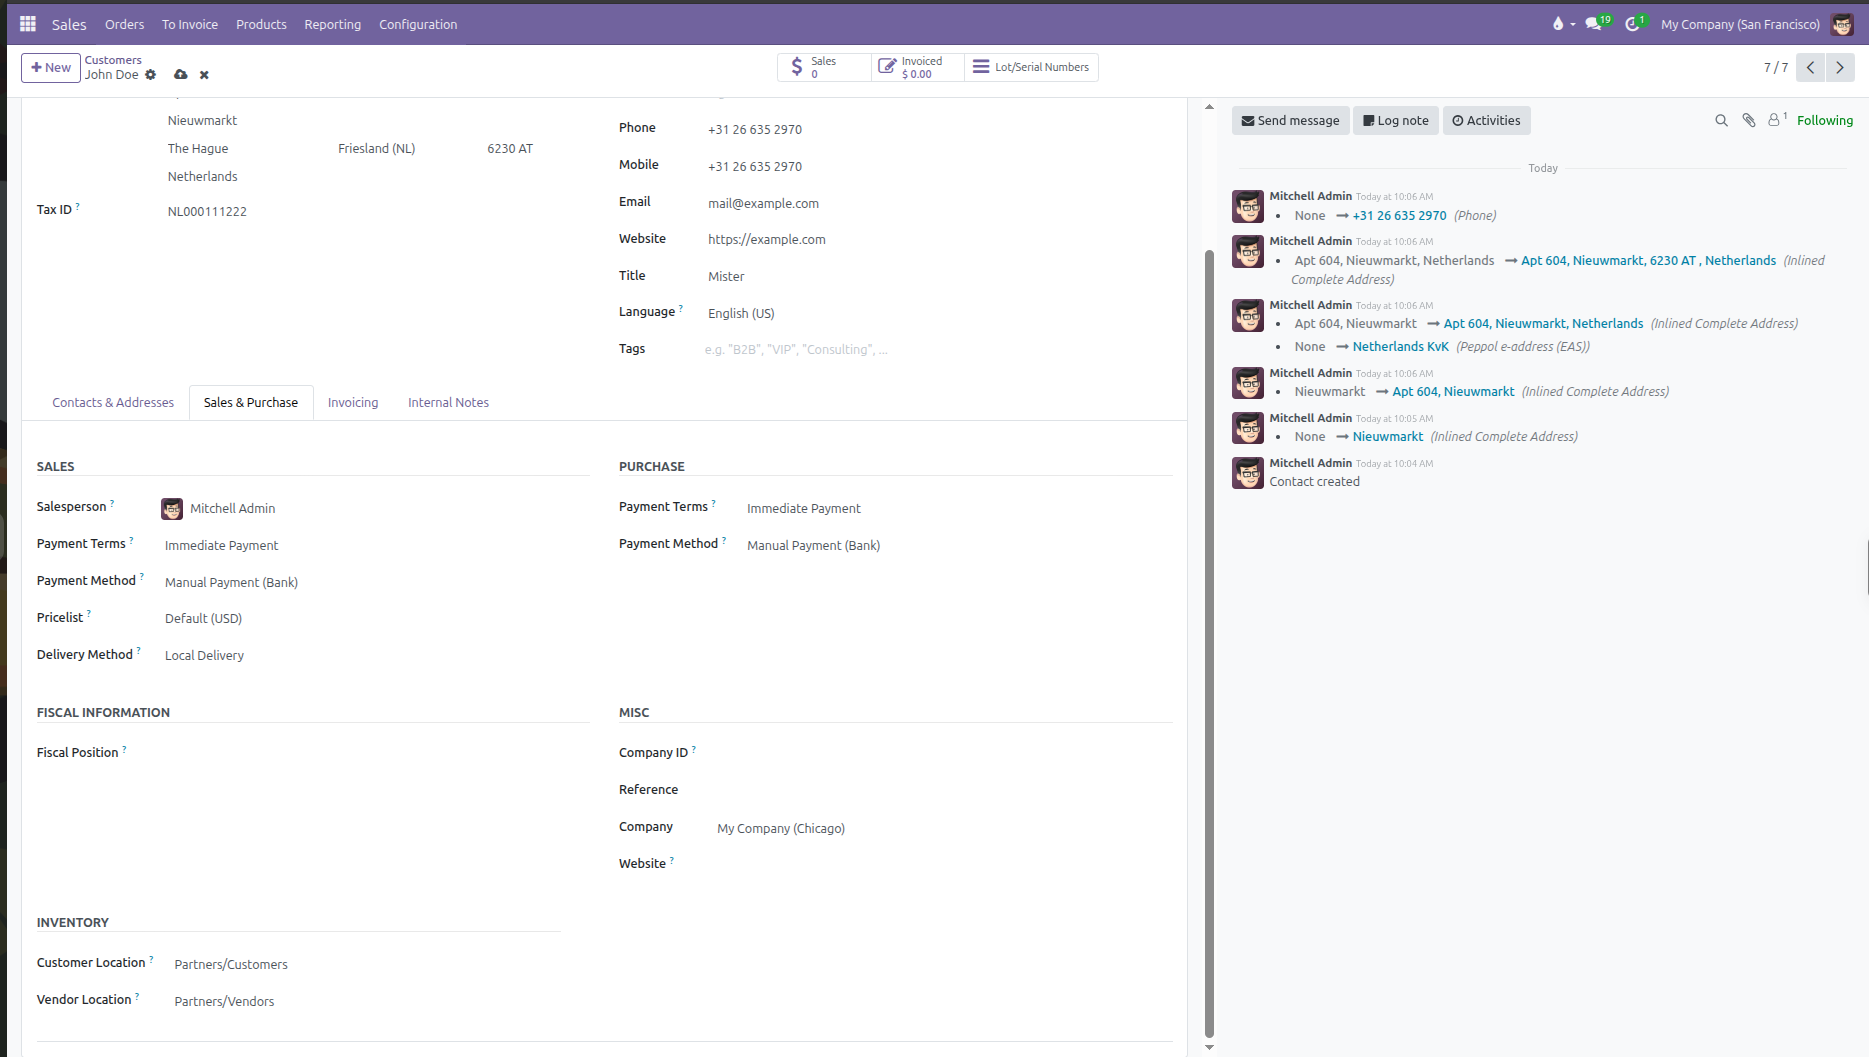
Sales Settings
Field |
Purpose |
Practical Effect |
|---|---|---|
Salesperson |
Assigns a dedicated internal account representative. |
Automatically prefills as the salesperson on new quotations and routes customer chatter notifications to them. |
Payment Terms |
Sets the default customer payment schedule (such as 30 Days or Immediate Payment). |
Automatically applies to quotations and customer invoices, calculating due dates without manual entry. |
Payment Method |
Preferred collection method for customer payments. |
Recommends the default payment workflow when registering payments. |
Pricelist |
Assigns custom pricing tiers, wholesale rates, or currencies. |
Quotation prices calculate automatically based on rules in this selected pricelist. |
Delivery Method |
Assigns a preferred shipping carrier or service (such as Local Delivery). |
Prefills shipping calculation rules when adding delivery charges to an order. |
Purchase Settings
(Used when this contact also acts as a vendor or supplier)
Field |
Purpose |
Practical Effect |
|---|---|---|
Payment Terms |
Agreed payment schedule for vendor bills. |
Automatically populates payment deadlines when entering bills received from this partner. |
Payment Method |
How your company pays this vendor (such as bank transfer or check). |
Sets the default payment mechanism for outbound vendor payments. |
Fiscal Information
Field |
Purpose |
Practical Effect |
|---|---|---|
Fiscal Position |
Maps taxes and accounting accounts based on the customer regional status. |
Automatically adapts taxes for international, domestic, or tax-exempt transactions on quotations and invoices. |
Miscellaneous Details
Field |
Purpose |
Practical Effect |
|---|---|---|
Company ID |
Official government registration or business entity number. |
Appears on formal invoices and legal business reports. |
Reference |
Custom internal identification code or legacy account number. |
Allows sales teams to search and locate the customer quickly using internal codes. |
Company |
Restricts visibility to a single legal branch. |
Leaves the customer available to all branches if blank, or restricts access to the selected company in multi-company setups. |
Website |
Corporate web address. |
Stores customer URL for reference and online research. |
Industry |
Business sector classification. |
Helps segment and filter customers for sales reporting and commercial campaigns. |
Inventory Locations
Field |
Purpose |
Default Value |
|---|---|---|
Customer Location |
Destination stock location for outgoing goods delivered to this customer. |
|
Vendor Location |
Source stock location for incoming goods or returns received from this partner. |
|
4. Invoicing and Banking Details
Under the Invoicing tab, you configure banking coordinates and electronic invoice delivery preferences for this customer.
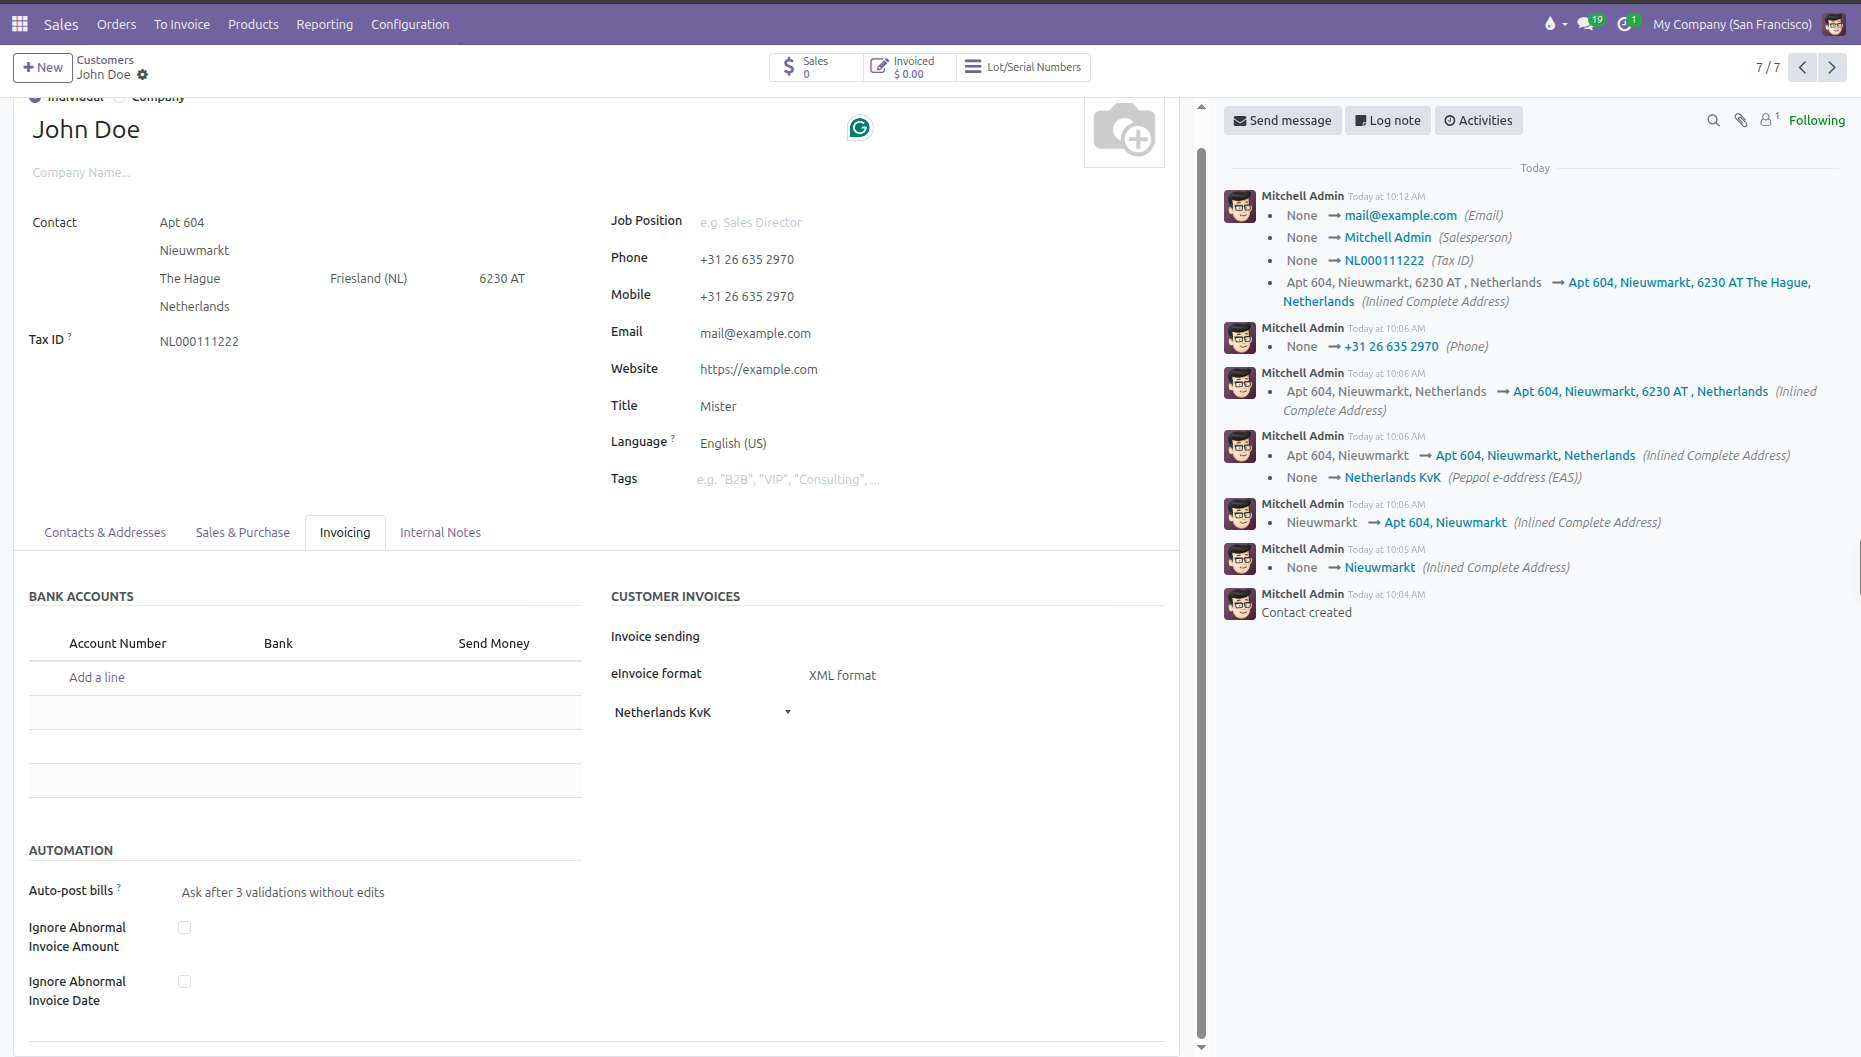
Bank Accounts
Click Add a line under Bank Accounts to register customer or vendor bank accounts:
Account Number: Enter the bank account number or international
IBAN.Bank: Select or create the financial institution name and routing identifier.
Send Money: Check this option if you intend to send outbound supplier payments or customer refunds to this account.
Customer Invoices Settings
Field |
Purpose |
Available Choices |
|---|---|---|
Invoice sending |
Preferred invoice delivery route. |
Choose by Email to send invoices electronically or Download for physical printing. |
eInvoice format |
Standard electronic XML format embedded into invoices. |
Select national standards such as France Factur-X, EU Standard Peppol BIS 3.0, Germany XRechnung or ZUGFeRD, Netherlands NLCIUS, Australia BIS 3.0, or Singapore BIS 3.0. |
Peppol ID |
Customer electronic address on the Peppol exchange network. |
Select the national registry scheme (such as VAT, KvK, SIRET, or DUNS) and enter the company Peppol participant identifier. |
Automation
Setting |
Purpose |
Practical Effect |
|---|---|---|
Auto-post bills |
Automated posting rule for vendor bills received from this partner. |
Choose Ask after 3 validations without edits (default) to prompt for confirmation until trustworthiness is established, Always to validate matching bills automatically, or Never to require manual review for every bill. |
Ignore Abnormal Invoice Amount |
Bypasses unusual total warnings. |
Prevents verification warning alerts if this partner frequently bills variable or high value invoices. |
Ignore Abnormal Invoice Date |
Bypasses date discrepancy warnings. |
Prevents warning alerts when bills or invoices carry backdated or distant future dates. |
5. Setting Customer Order Warnings
(You need to enable Sale Warnings from Sales > Configuration > Settings)
If a customer has a credit hold, special delivery requirements, or outstanding billing questions, you can configure automatic warning messages that appear when staff select that customer on a quotation:
Open the customer form from Orders > Customers.
Select the Internal Notes tab.
In the Warning on the Sales Order section, select an alert level:
No Message: Default state with no alert.
Warning: Displays an informative pop up alert on screen, but allows the salesperson to proceed with the quotation.
Blocking Message: Displays a pop up alert and completely prevents the user from saving or confirming a quotation for this customer.
When selecting Warning or Blocking Message, type the alert message text in the box that appears below the selection.