Contact Tags Setup
Configure and organize color-coded tags to categorize and segment contacts in CURQ 18.
2. Access the Contact Tags Menu
To view and manage contact tags:
Open the Contacts app from the main dashboard.
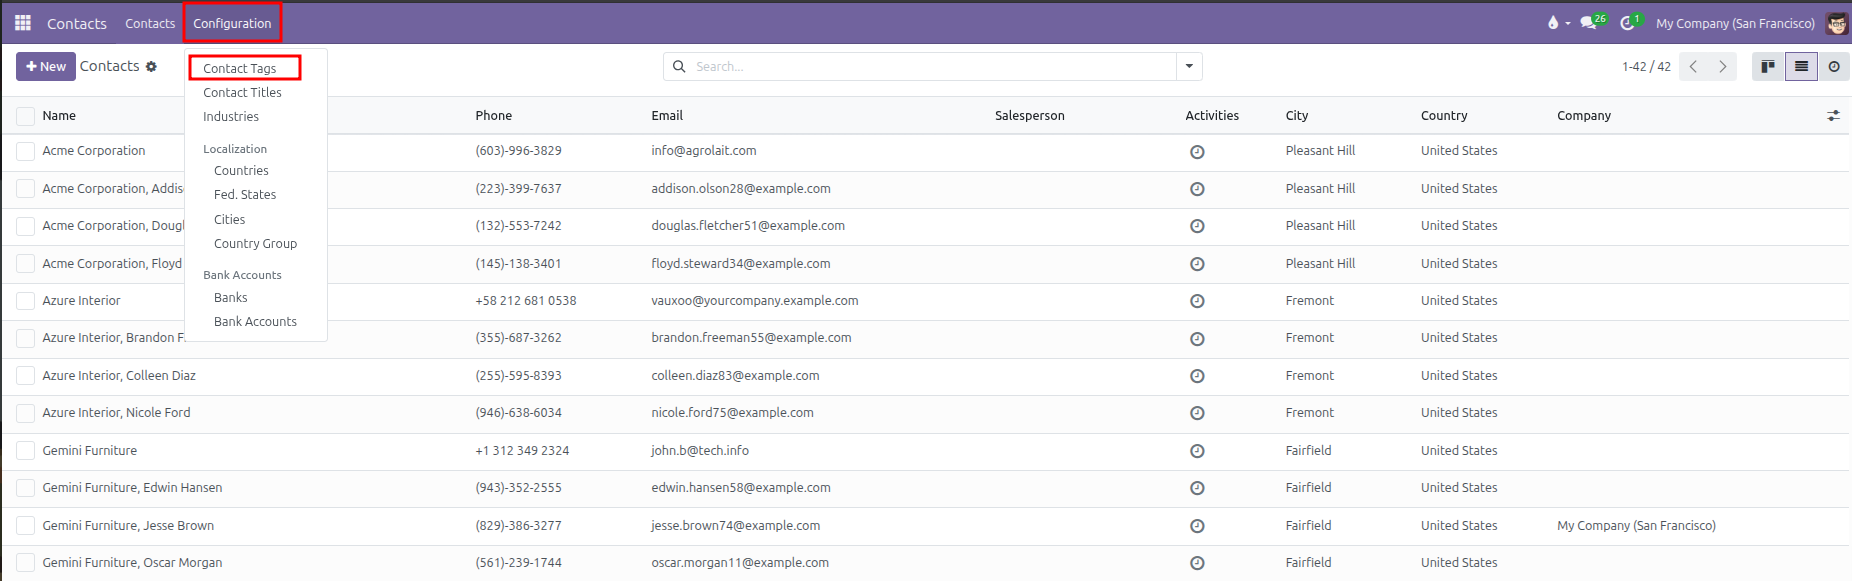
In the top navigation bar, click Configuration.
Select Contact Tags.
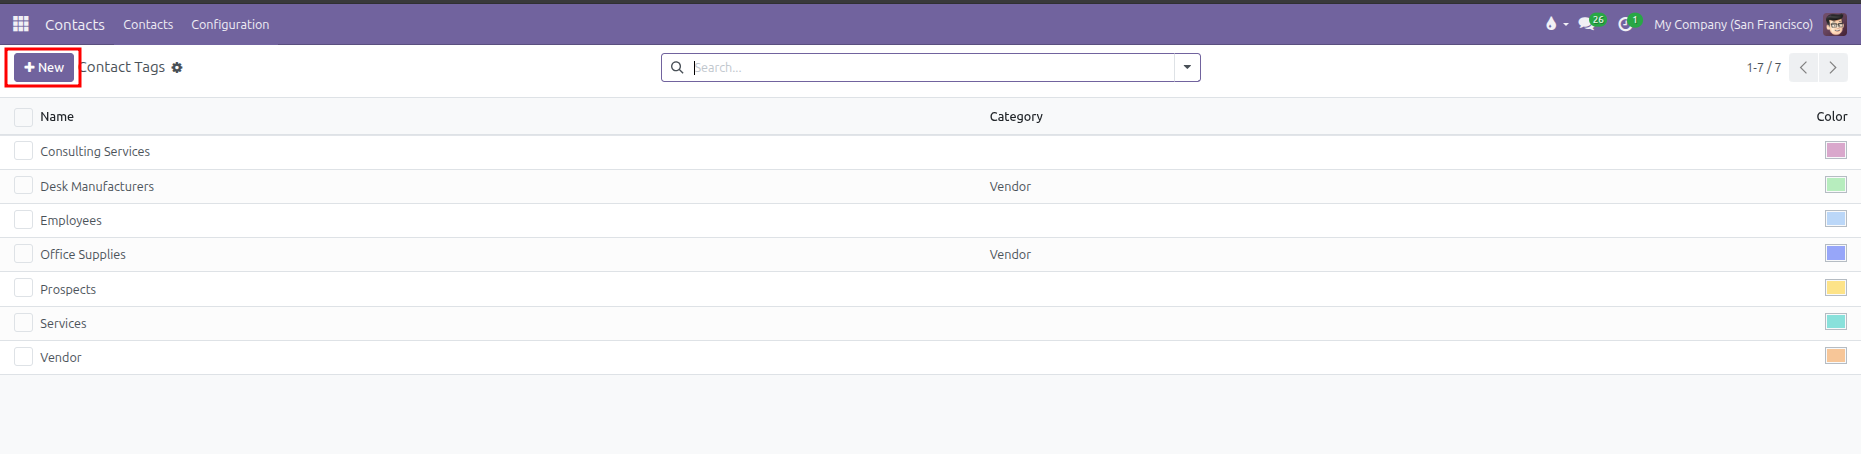
CURQ displays the table of existing tags with their parent category and color indicator:
3. Create or Edit a Contact Tag
You can add a new tag directly in the table or open the full form view:
Click New at the top left of the list, or click into an empty row at the bottom of the table.
Fill in the tag fields:
Field |
Description |
Practical Effect |
|---|---|---|
Tag Name |
Name of the label (for example, |
Displays on the contact record and search dropdowns. |
Category |
Optional parent tag (for example, choose |
Creates a nested label like |
Color |
Color swatch selected from the color picker palette. |
Sets the badge background color on contact cards and forms. |
Click into the inline text box (with placeholder
e.g. "Roadshow") and select a color swatch from the 12 available palette options on the right:
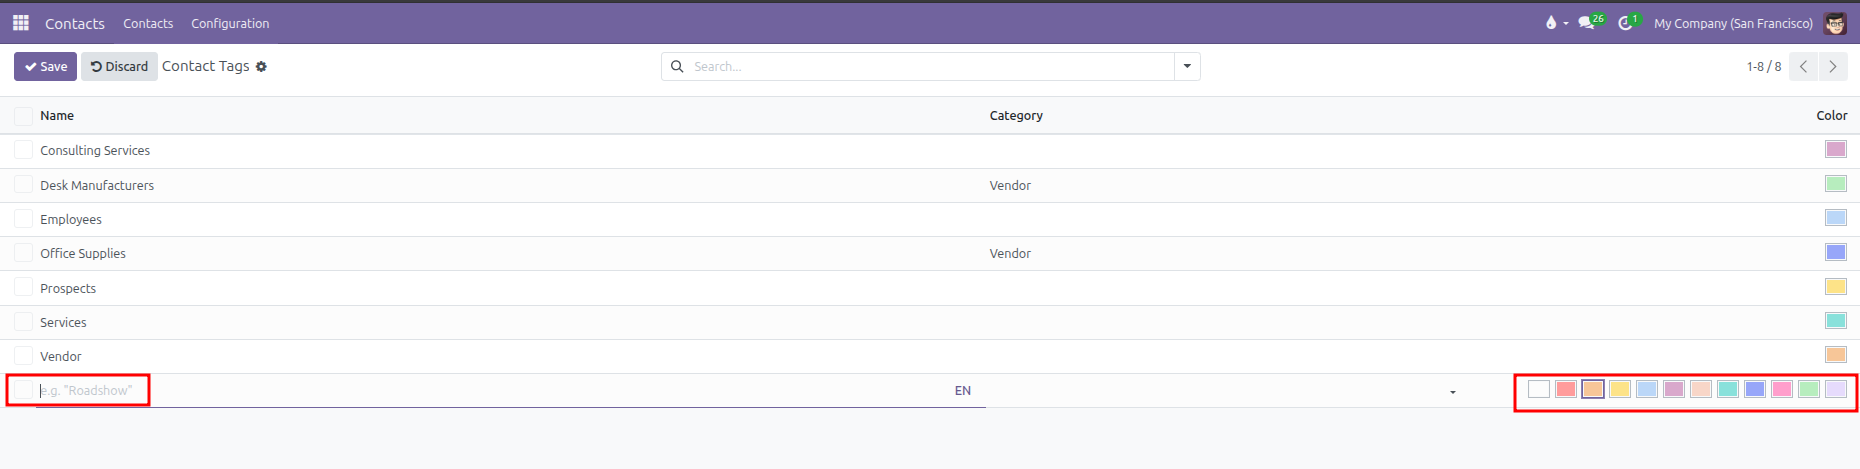
Click outside the line or click Save at the top left to store your new tag.
(To deactivate a tag without deleting it, open the tag form and turn off the Active toggle switch).
4. Assign Tags to a Contact
To apply tags to a person or business:
Open the Contacts app.
Click any contact card to open the contact form.
Locate the Tags field on the right side of the form under Language.
Click into the field and select one or more tags from the dropdown list.
Click Save (cloud icon) or navigate away to keep the changes.
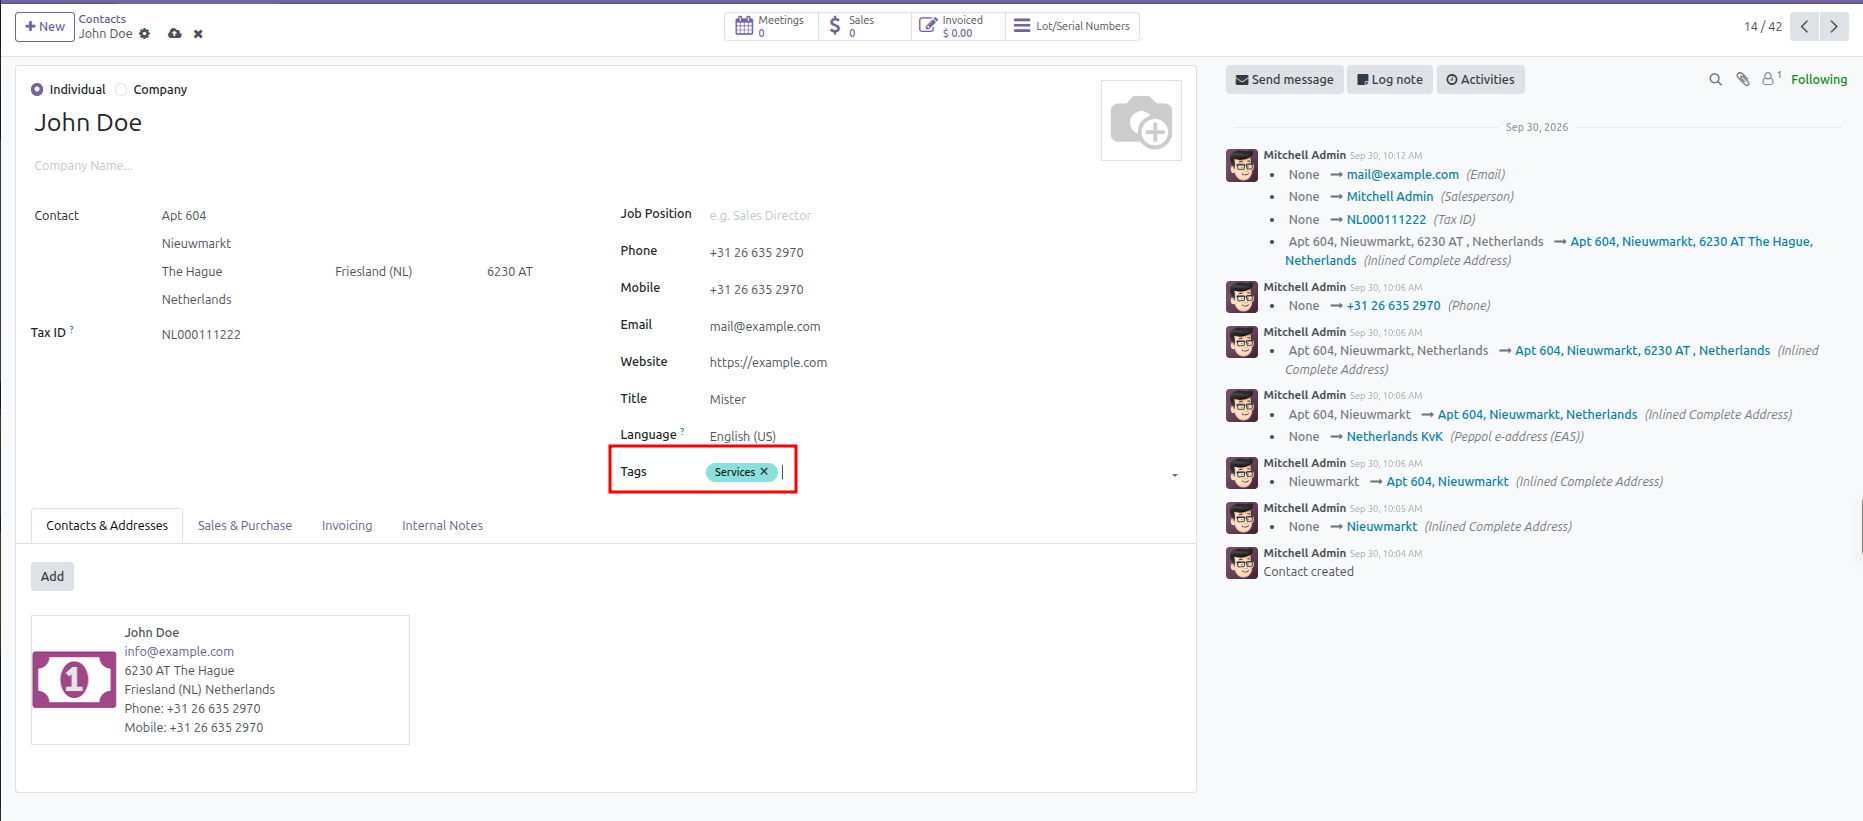
(You can also create a new tag on the fly by typing a new name into the Tags field and clicking Create).
5. Search and Group Contacts by Tag
After assigning tags, you can organize your directory using them:
In the Contacts main directory, click the search bar.
Type a tag name (such as
VendororServices).Click the matching tag suggestion in the dropdown list.
CURQ narrows the view to show only contacts with that tag.