Creating and Managing Opportunities
Create new sales opportunities, assign contacts, estimate deal values, set win probabilities, and prioritize deals in CURQ 18.
1. Overview of Opportunities in CURQ
In CURQ 18, an opportunity reflects a qualified sales prospect or potential contract. Opportunities move across visual pipeline stages until they are won or lost.
Every opportunity tracks:
The contact or organization.
The expected revenue and estimated closing date.
The automated or manually assigned win probability.
The assigned salesperson and designated sales team.
The priority level to help sales teams focus on high-impact deals.
Connected meetings, quotations, sales orders, and communication history.
2. Quick Creation from the Pipeline Kanban
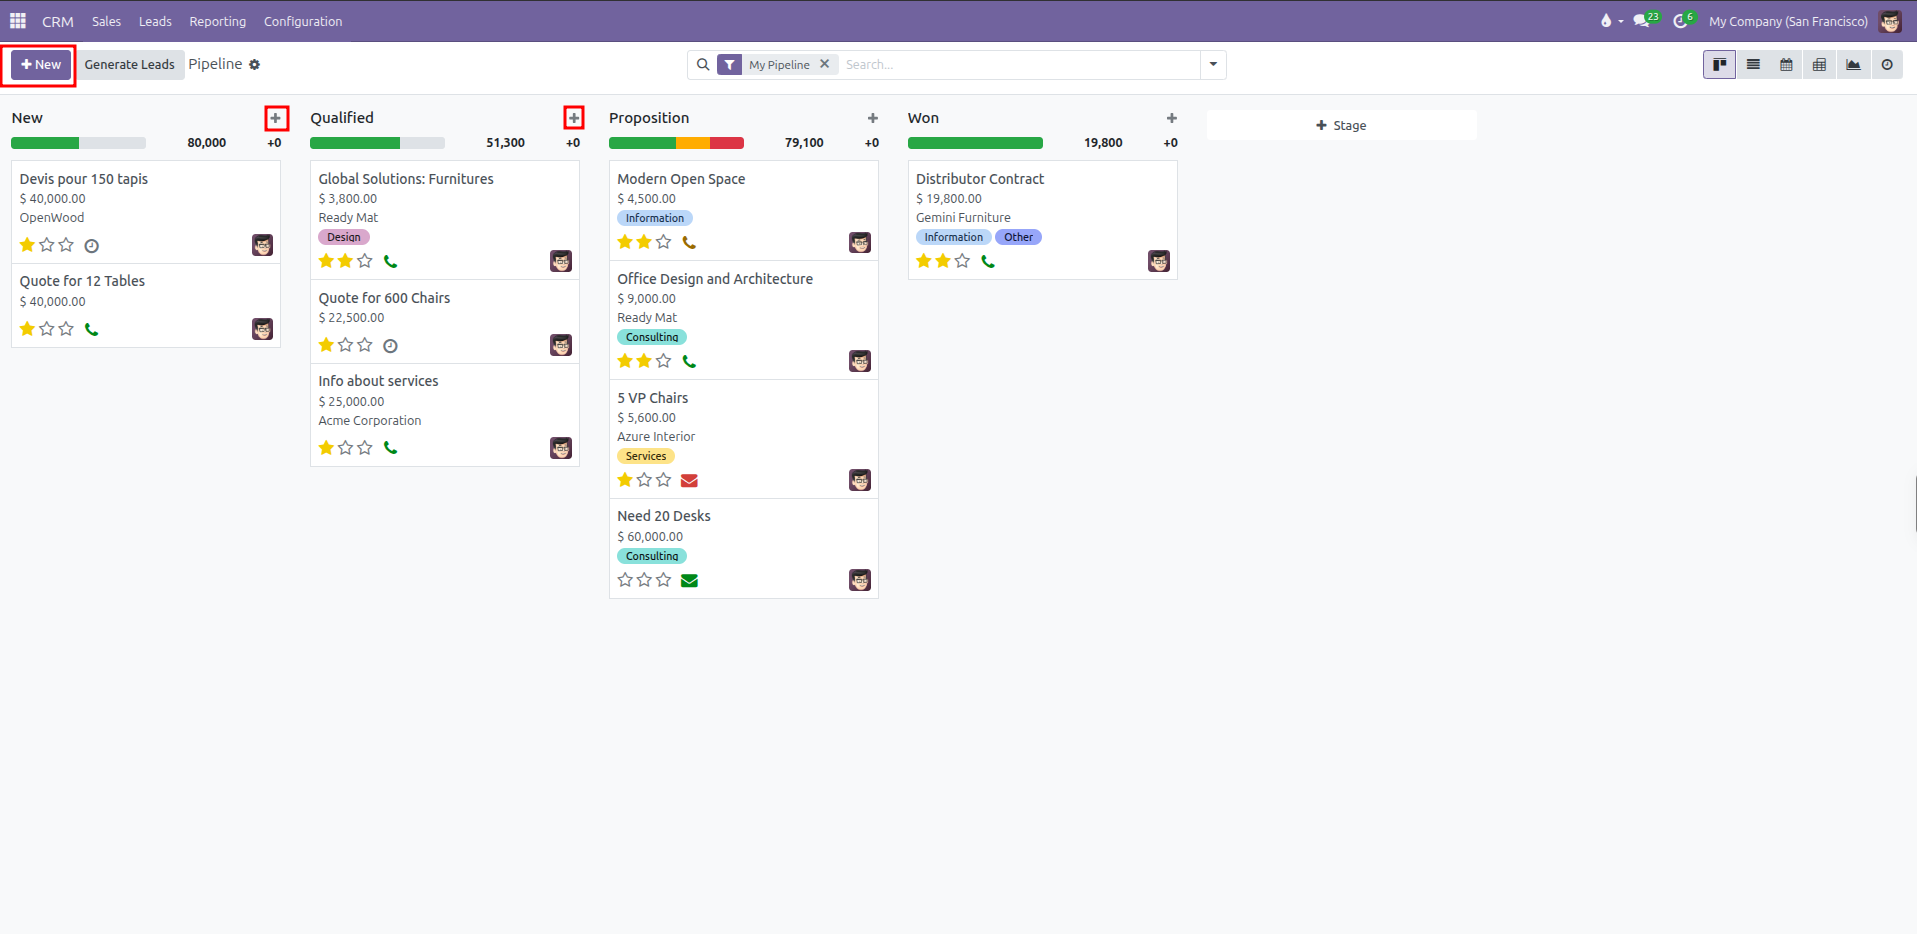
You can create an opportunity directly from the Kanban pipeline view using either of two buttons:
Top Control Panel
+ NewButton:Located in the top left control bar.
Clicking + New opens the quick creation card inside the first column (New stage).
Column Header
+Button:Located on the right side of each individual stage column header (New, Qualified, Proposition, Won).
Clicking the + icon opens the quick creation card directly inside that specific stage. This allows you to log a deal directly into Qualified or Proposition without creating it in New first.
Fields on the Quick Creation Card:
The quick creation card displays the following fields:
Contact: Select an existing contact from the database, or type a new name to create a contact card immediately.
Opportunity: Enter a clear, descriptive title (such as
Product PricingorCloud Migration Contract).Email: Contact email address, automatically populated when an existing contact is picked.
Phone: Contact phone number.
Expected Revenue: Enter the estimated monetary value of the deal.
Priority: Click the star icons to set urgency (1 star = Low, 2 stars = Medium, 3 stars = High).
Recurring Revenue: If recurring revenues are enabled, specify the recurring amount and time period (such as Monthly or Annually).
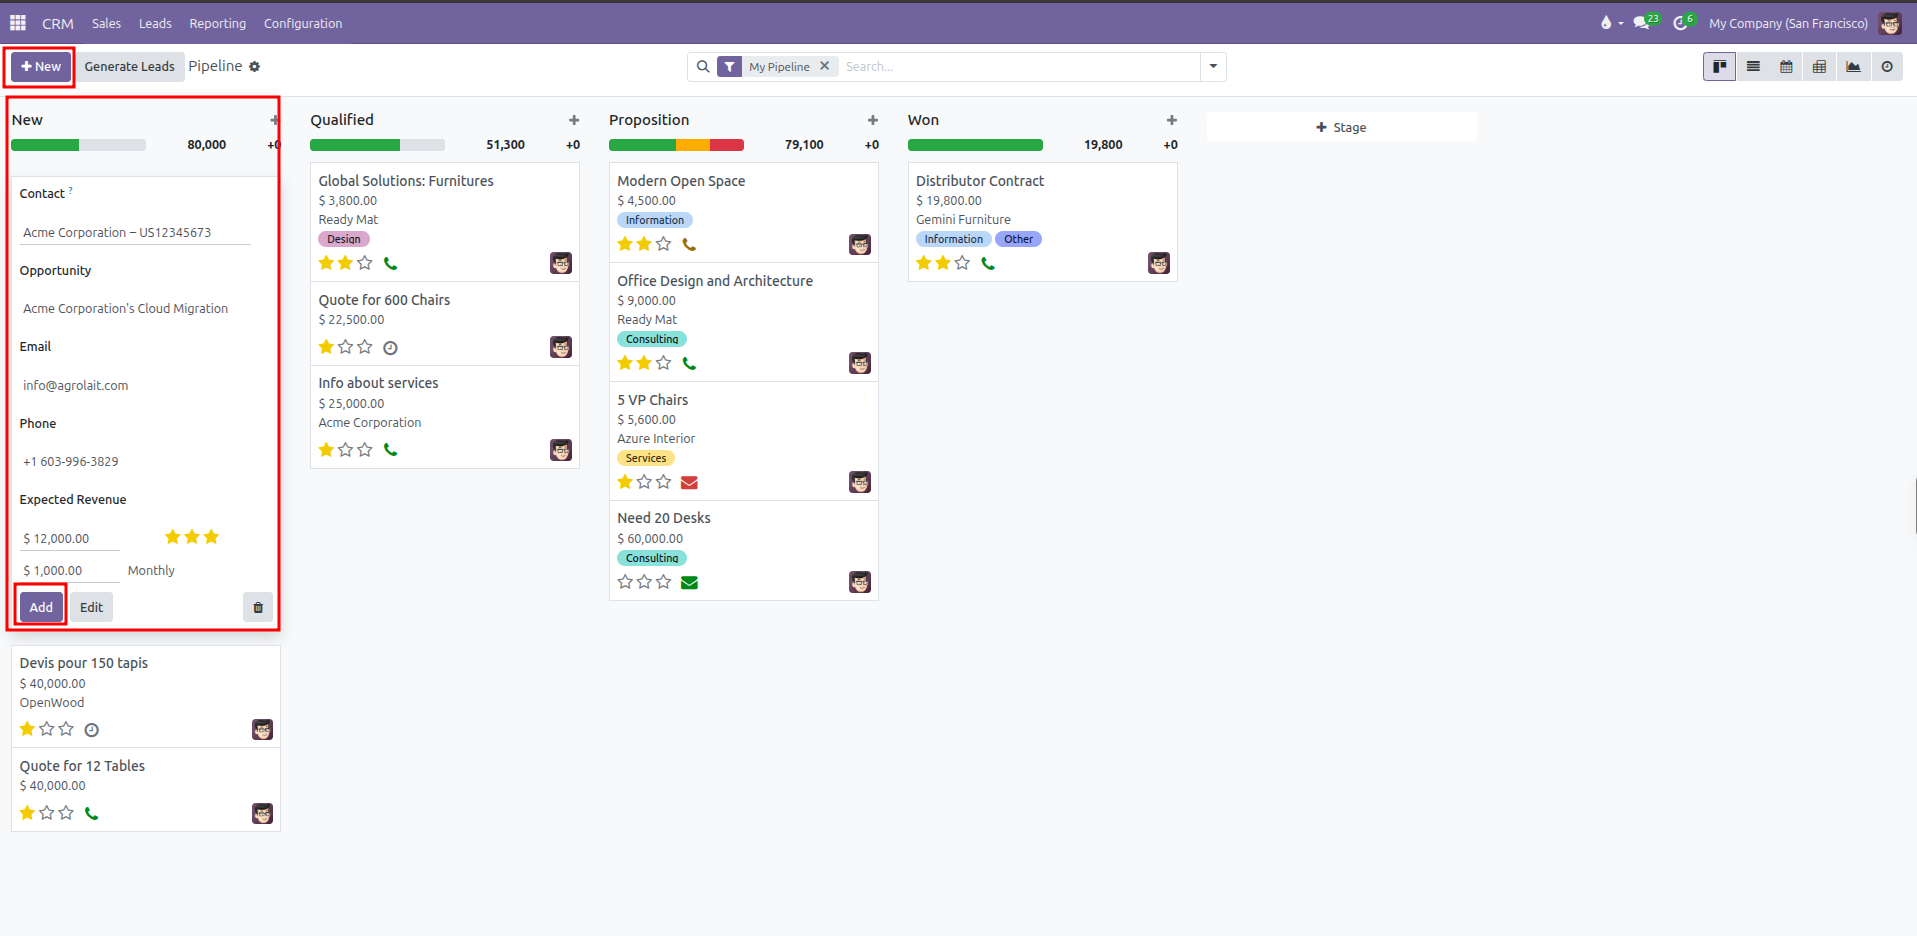
Click Add to place the opportunity card into the column immediately, or click Edit to open the full form view.
3. Detailed Opportunity Form View
Clicking any opportunity card opens the full form view. Here you configure comprehensive commercial details across several sections:
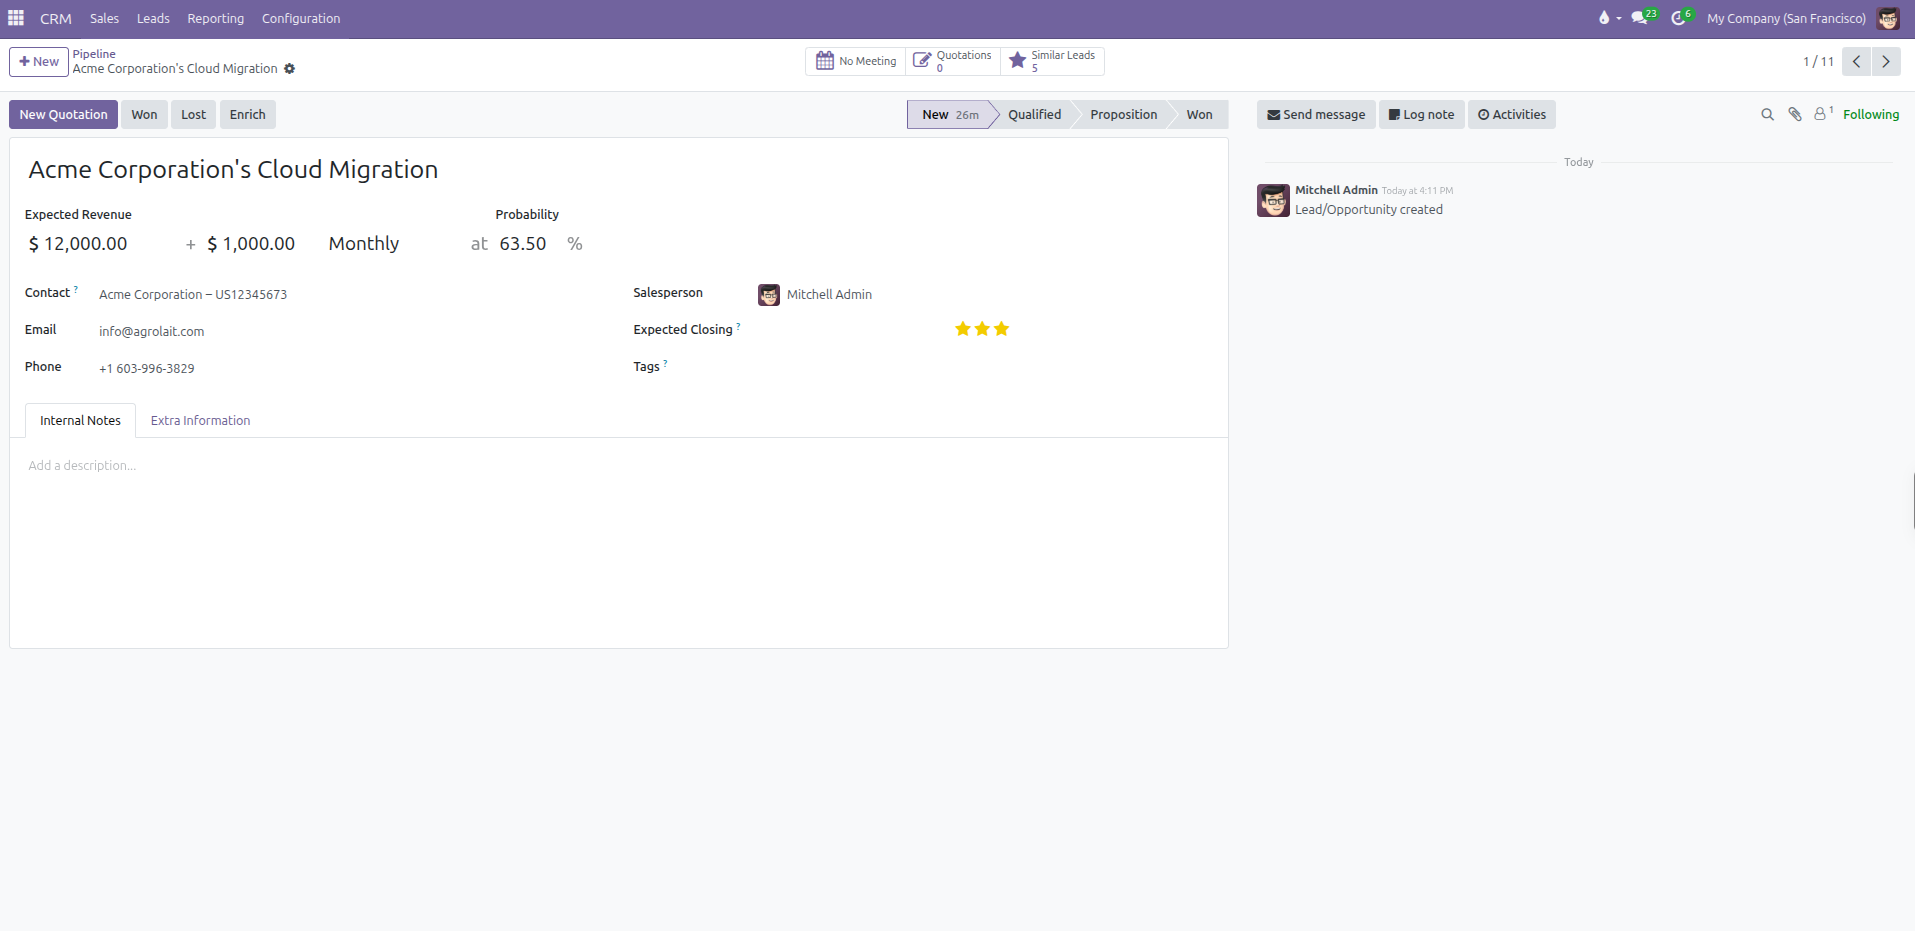
Top Header and Metrics:
Opportunity Title: The primary deal title shown at the top of the sheet.
Expected Revenue: The estimated monetary value of the deal, including optional recurring revenue and period (such as Monthly).
Probability: The percentage likelihood of winning the deal.
Automated Probability Reset: When a custom percentage is typed, a small gear icon appears next to the field showing the system calculation. Clicking the gear restores the automated probability calculation.
Main Columns:
Left Column:
Contact: The contact company or individual linked to the deal.
Email: Direct email address.
Phone: Direct telephone number.
Right Column:
Salesperson: The internal user responsible for guiding the deal to closure.
Expected Closing: Target date to close the contract.
Priority: Priority star rating placed directly alongside the expected closing date.
Tags: Color-coded categorization tags (such as
Software,Services, orConsulting).
Tab Sections:
Internal Notes: A rich text area for internal discovery notes, technical constraints, or customer requirements.
Extra Information: Holds extended contact details, marketing attribution, and operational tracking metrics.
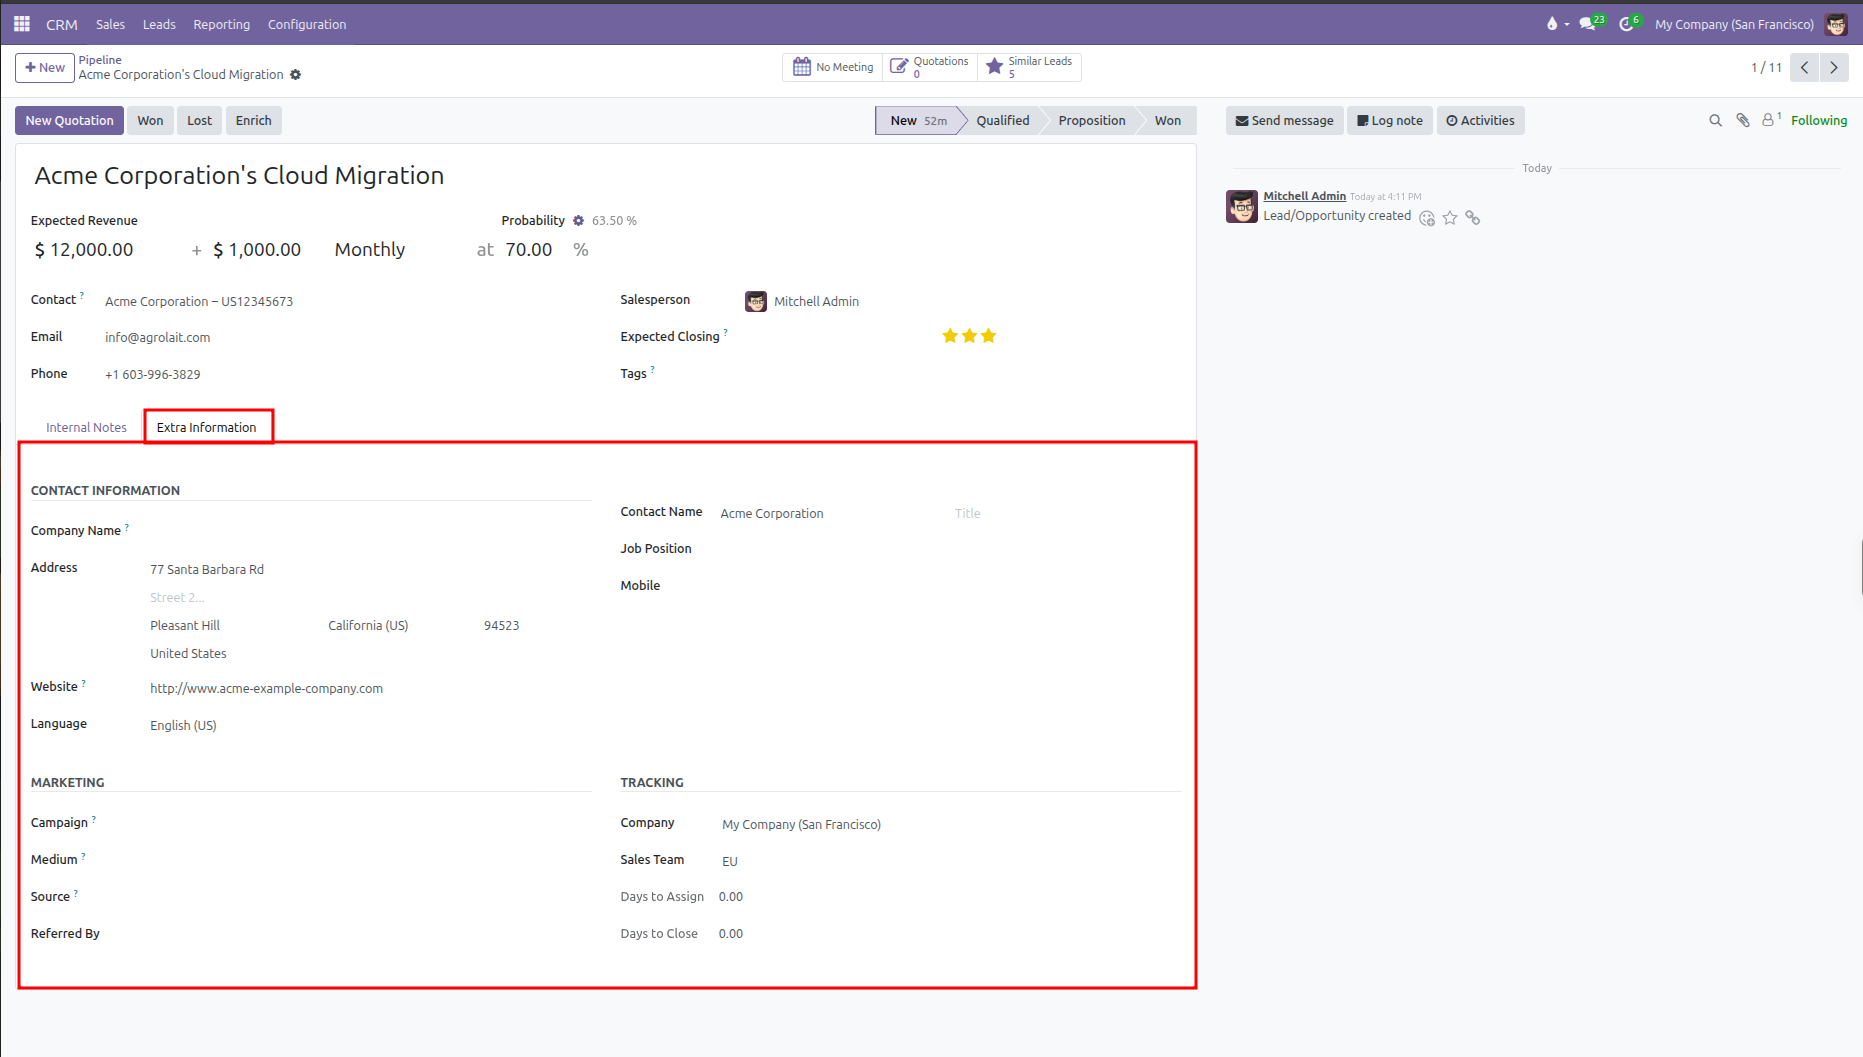
Contact Information
Field |
Description |
|---|---|
Company Name |
Legal name of the customer company or organization. |
Address |
Complete street address, city, state, postal code, and country. |
Website |
Customer web address or portal link. |
Language |
Preferred communication language for quotations and messages. |
Contact Name |
Full name of the primary contact person. |
Title |
Salutation or honorific title (such as Mr., Ms., Dr.). |
Job Position |
Role or professional title within the client company. |
Mobile |
Mobile telephone number for direct calls or text messages. |
Marketing
Field |
Description |
|---|---|
Campaign |
Specific promotional campaign that generated this deal. |
Medium |
Delivery channel used to reach the prospect (such as Banner, Email, or Direct). |
Source |
Origin platform or touchpoint (such as Search Engine, Referral, or Trade Show). |
Referred By |
Name of the individual or partner who introduced the prospect. |
Tracking
Field |
Description |
|---|---|
Company |
Internal operating company managing the deal. |
Sales Team |
Designated sales team handling the account (such as EU Sales or Wholesale). |
Days to Assign |
Total days elapsed between lead creation and salesperson assignment. |
Days to Close |
Total days elapsed between deal creation and final Won or Lost status. |
4. Connecting an Opportunity to a Quotation
When a prospect is ready for formal pricing, create a sales quotation directly from the opportunity record:
Open the opportunity form.
In the top button bar, click New Quotation.
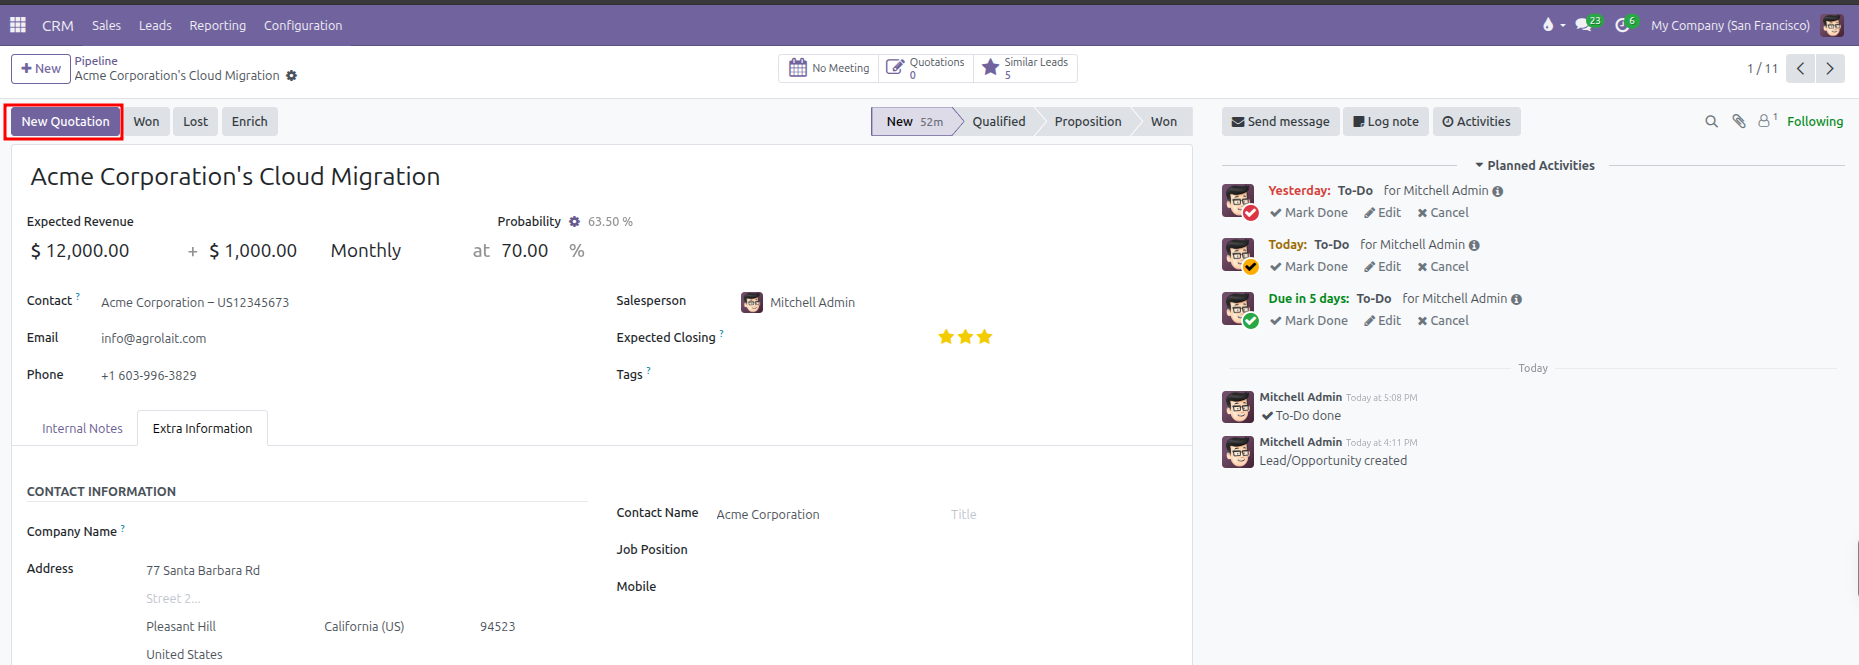
CURQ automatically creates a draft quotation with the customer, salesperson, and sales team pre-filled.
Add products, configure quantities, apply discounts, and send the quotation to the client.
Once a quotation is confirmed into a Sales Order, the revenue amount and order status link back directly to the Orders smart button at the top of the form.
To organize daily follow-ups, schedule customer calls, and manage planned meetings, see My Activities.